
Make homemade tuiles with a simple five-ingredient batter in fun spiral shapes to have with coffee or decorate your favorite desserts.
WANT TO SAVE THIS RECIPE?
Enter your email below and we’ll send it straight to your inbox. Plus you’ll get great new recipes from us every week!
❤️ Why You’ll Love This Recipe: These beautiful spiraled tuiles are an easy and fun way to decorate desserts. They have just five ingredients that are probably already on hand in your pantry.
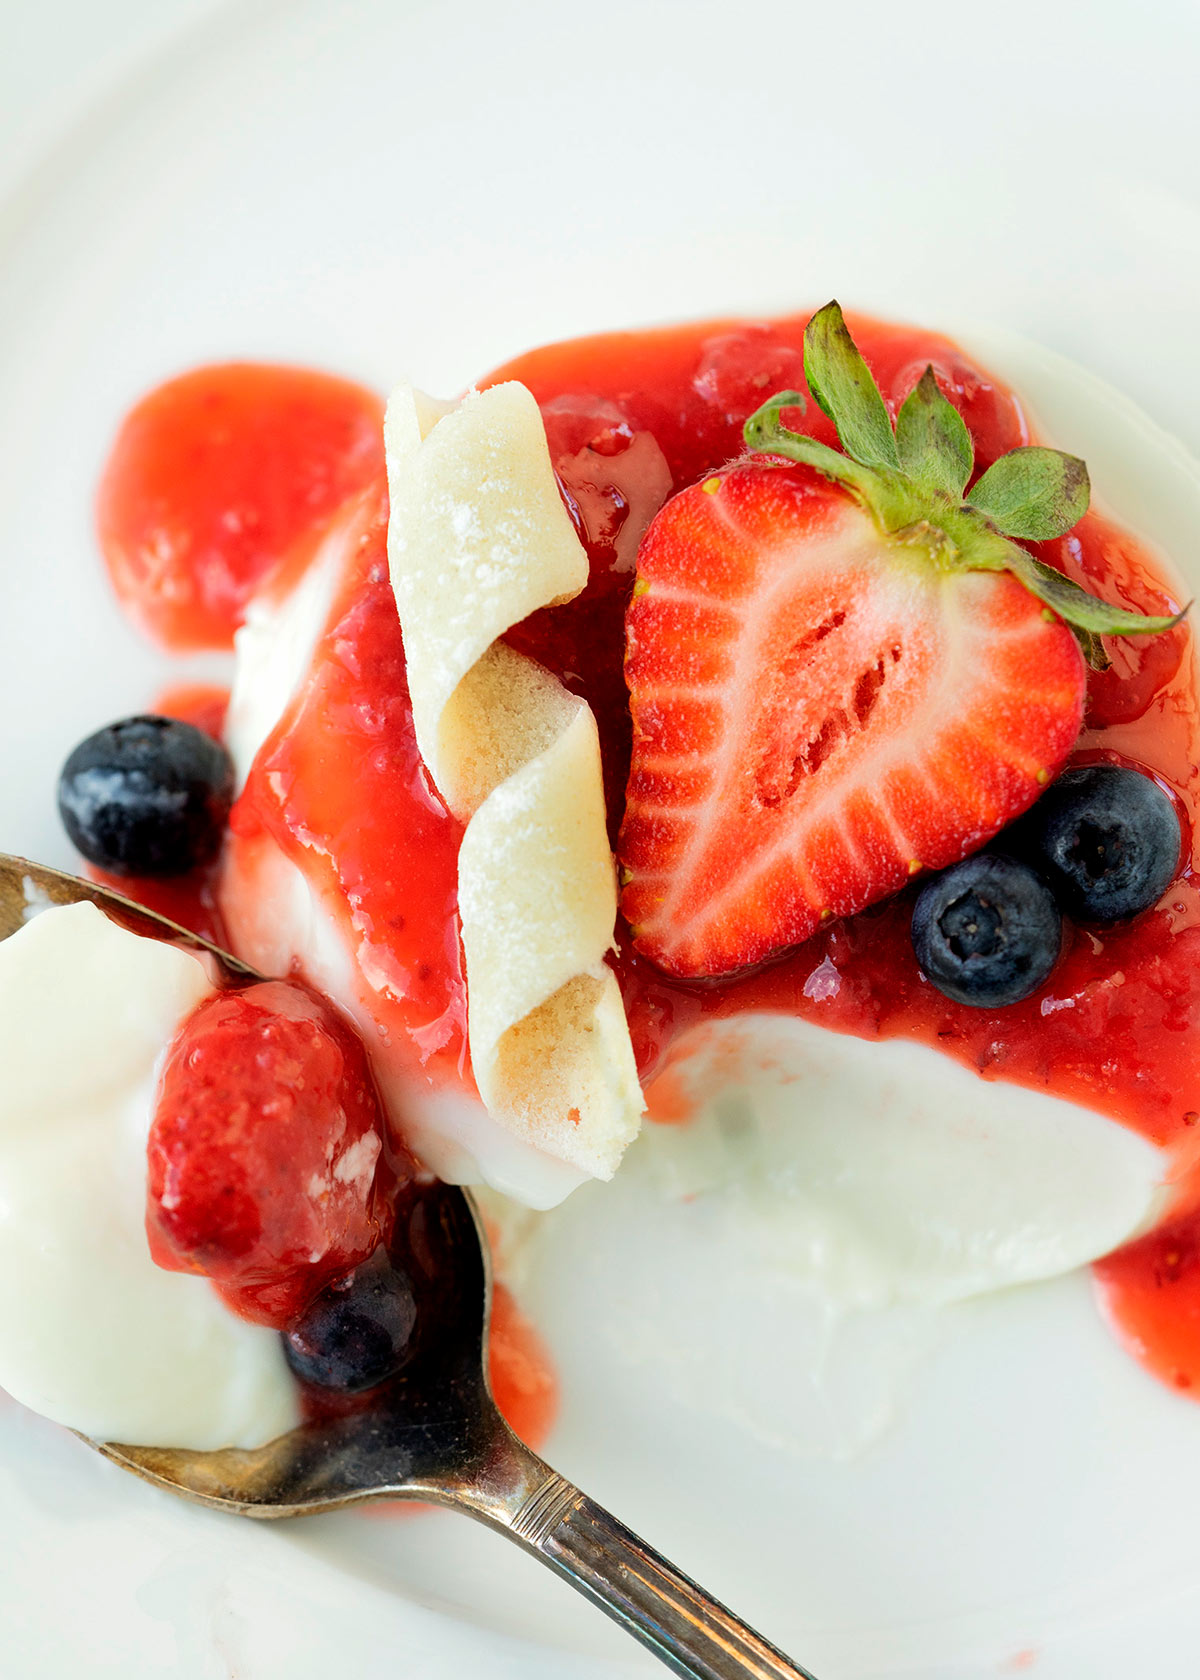
Update: I’ve updated this recipe with new tips and tricks to make and shape homemade tuiles. I love to serve them on strawberry panna cotta for an impressive dessert!
How to Make Tuiles
The batter for your tuiles is a simple combination of pantry staple ingredients.
The most important thing is to chill the batter in the fridge before making your tuiles. This thickens the batter and makes it easier to work with.
Likewise, it’s very helpful to chill the baking sheet in the fridge. However, if your fridge won’t fit the baking sheet, you can cool it with a few bags of ice on top.
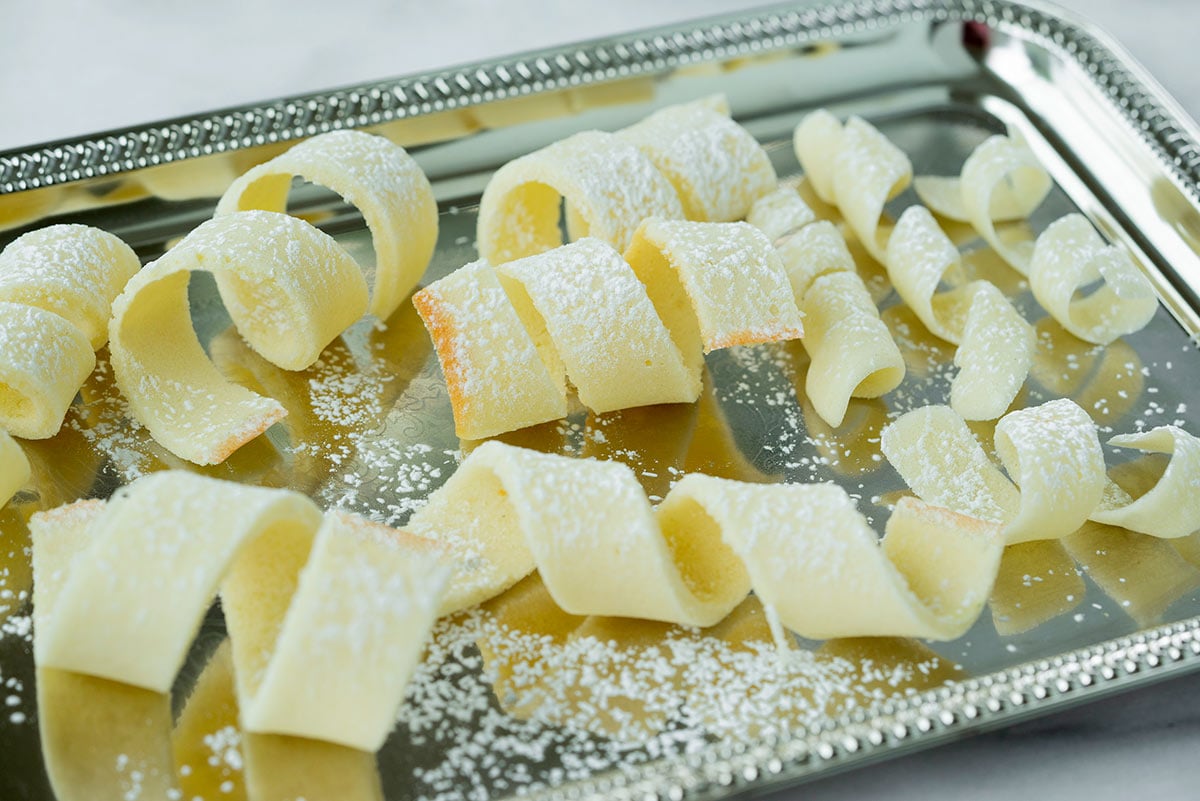
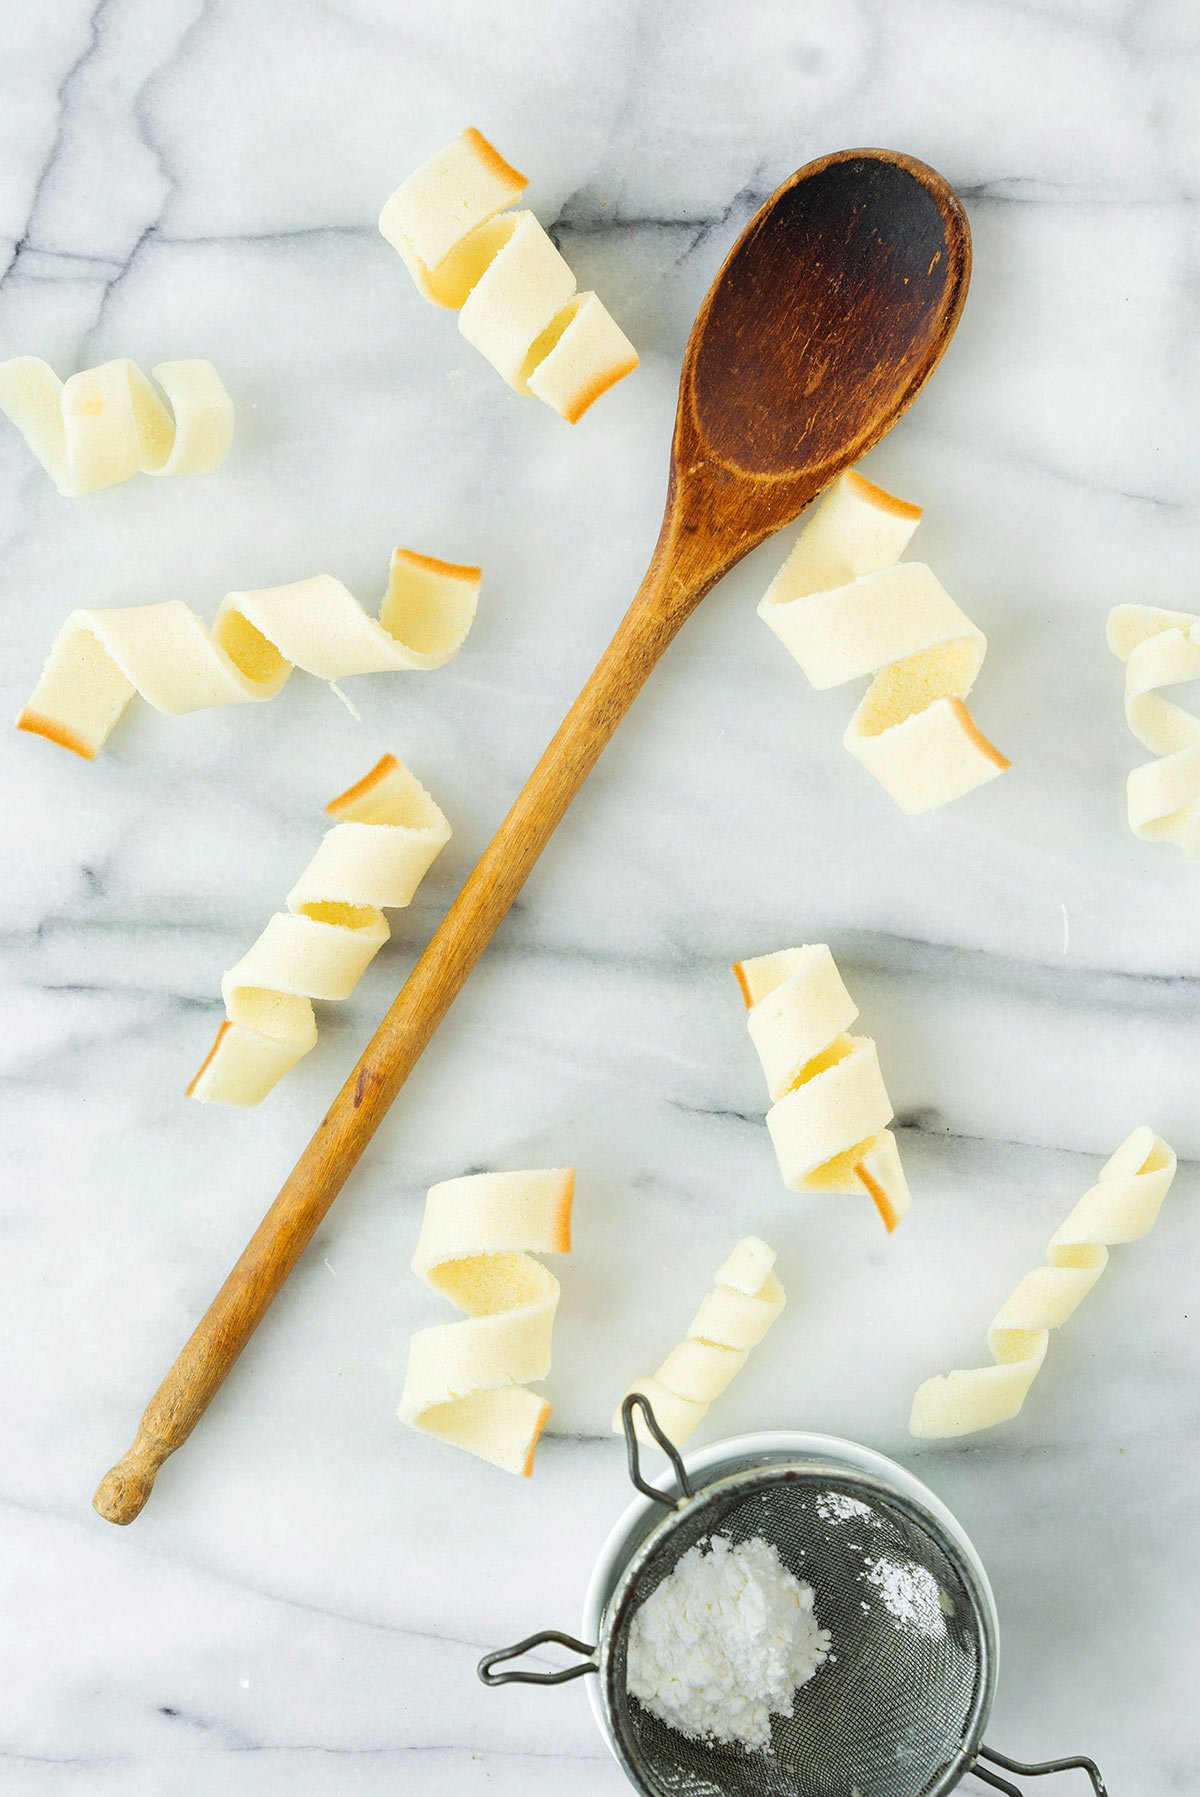
Shaping and Coiling Tuiles
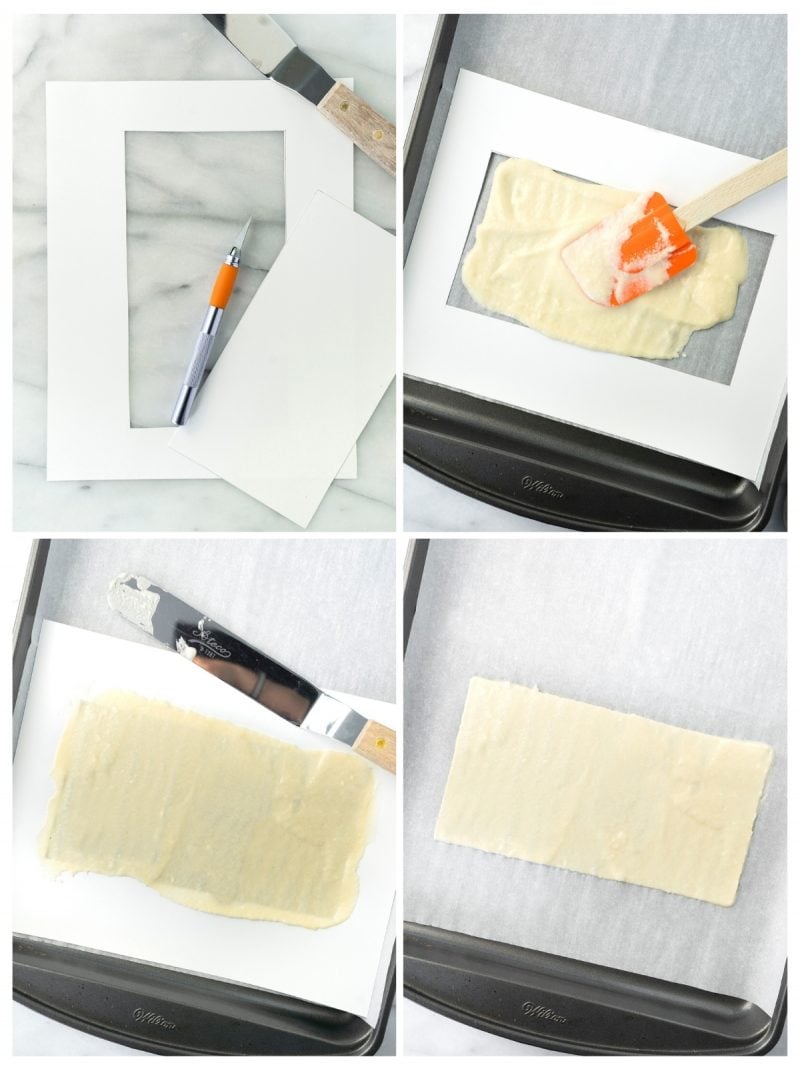
We made a handy printable stencil to help you shape your tuile cookies. However, you can free-hand spread the batter if you wish.
Tip: The secret to these cookies is to spread the batter evenly and thinly.
It’s also important not to overbake the cookies. Otherwise, they can become brittle and break easily. I’ve found that 6 minutes is the best baking time on a parchment-lined baking sheet and 7 minutes on a Silpat lined cookie sheet. Of course, every oven is slightly different. You want to bake them until there’s a slight browning around the edges.
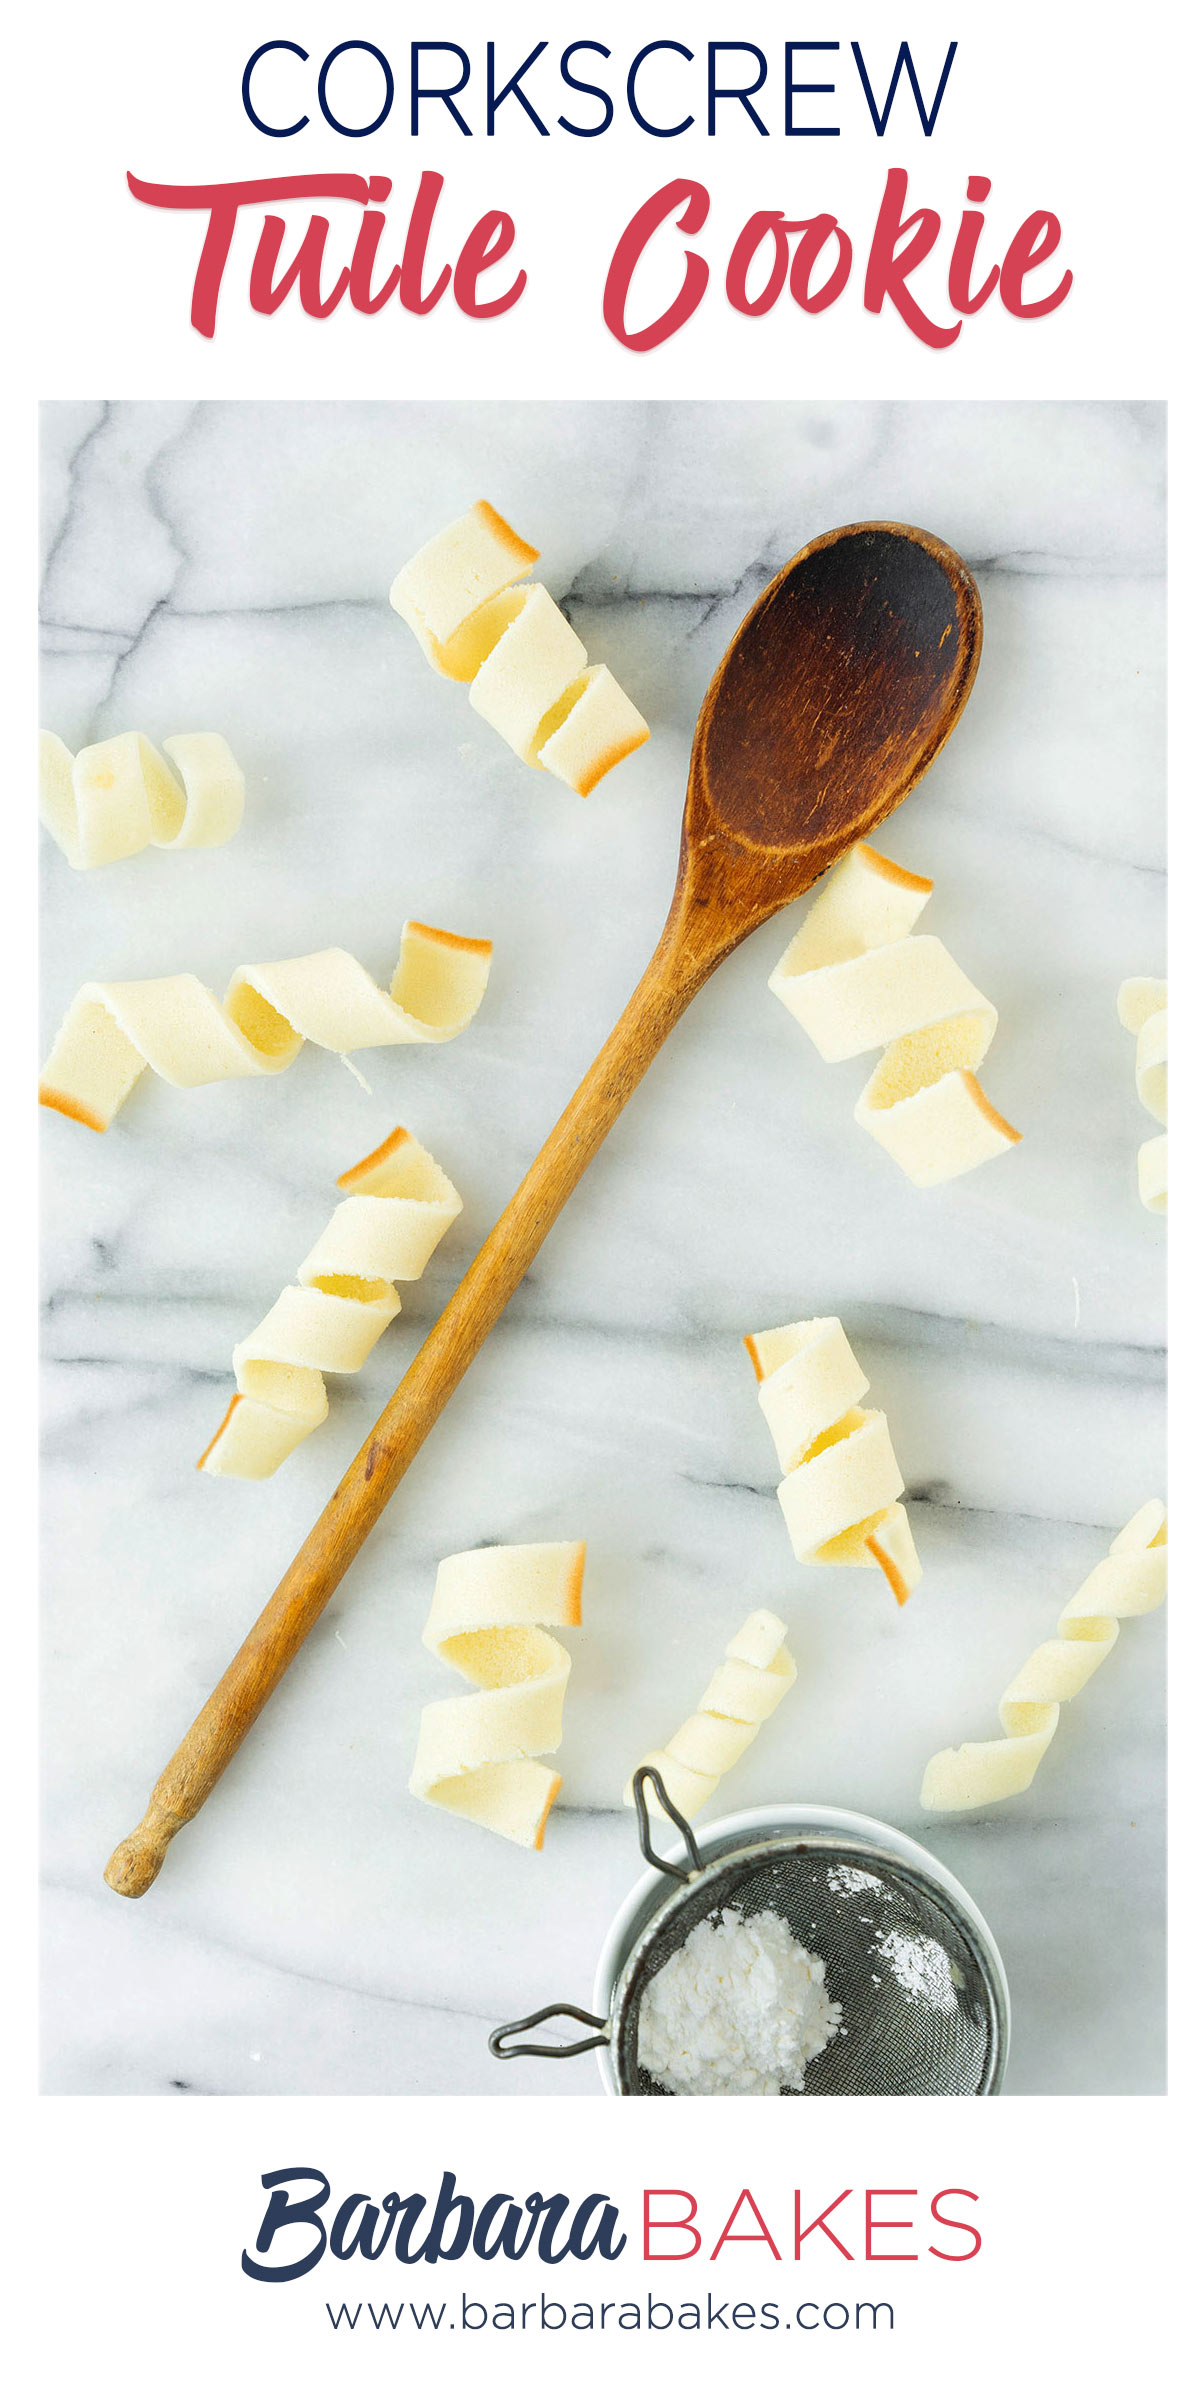
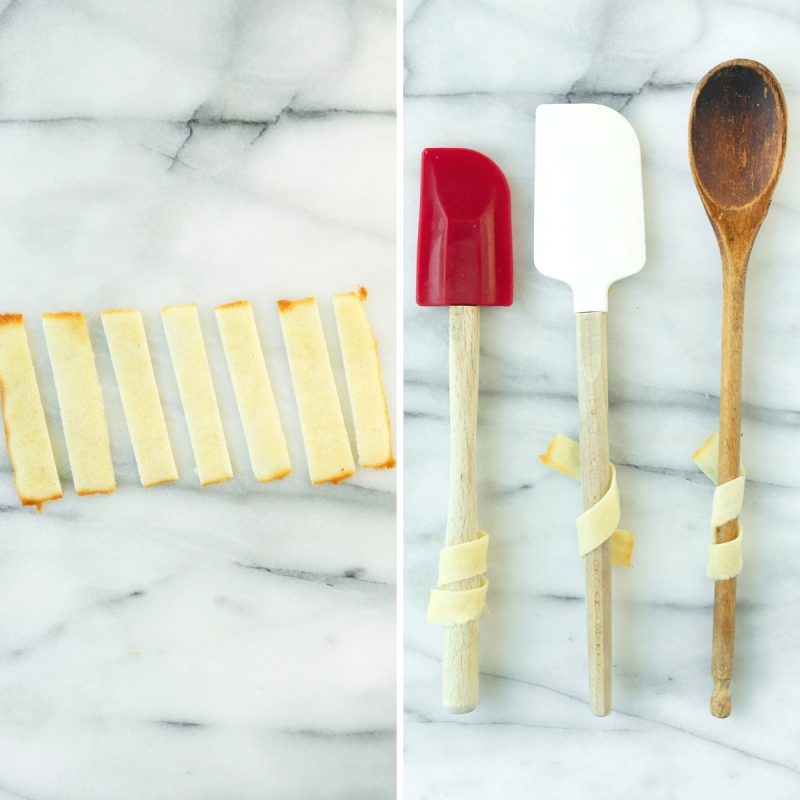
To coil the cookies after baking, use wooden spoon handles or spatulas. Only bake as many cookies as you have tools to coil them around. As they cool, the cookies harden and you won’t be able to change the shape.
Use a pizza cutter or sharp knife to cut the rectangular cookies into strips. If using a knife, cut straight downward. Don’t use a sawing motion, or you’ll have a rough-edged cookie.
When coiling, you don’t need the cookies to be super tight to the handle, as long as they stay wrapped around the handle to cool, that’s fine.
If your cookie strips are cooling too quickly, put them on a cookie sheet in a 350°F oven with the door ajar until they’re just warm and pliable.
Serving
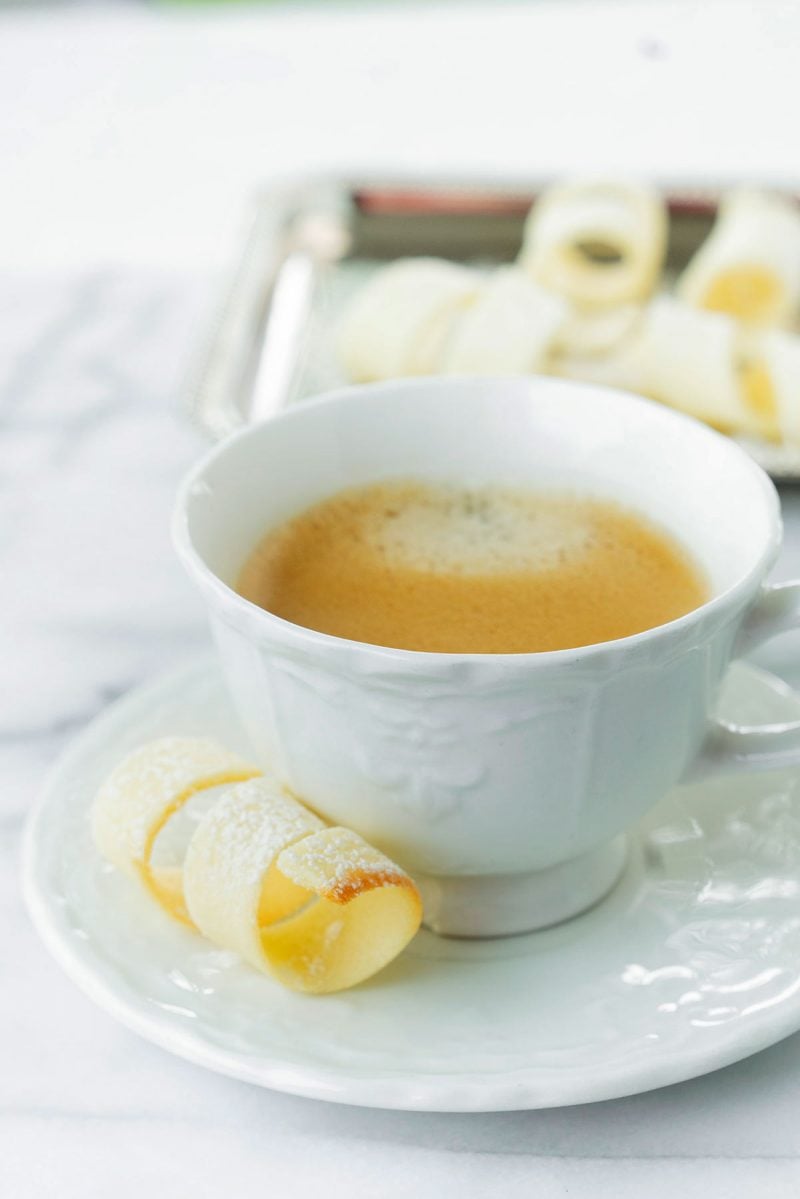
You can serve your tuiles all on their own. For a touch of sweetness, add a dusting of powdered sugar. We love them as a garnish to our strawberry panna cotta.
Here are some other dishes to dress up with your homemade tuiles:
Storage Suggestions
Store leftover cookies in an airtight container at room temperature for up to a week. For longer storage, keep in the freezer for up to three months.
More Favorite Cookie Recipes
Here are our other most popular cookie recipes to try next:
- Air Fryer Chocolate Chip Cookies are perfectly crisp on the outside and gooey in the center.
- Homemade Milanos are light, delicate and crisp with a sweet chocolate filling.
- Chocolate Peppermint Crunch Cookies are a holiday classic with peppermint candies.
WANT TO SAVE THIS RECIPE?
Enter your email below and we will send it straight to your inbox. Plus you will get great new recipes from us every week!
Tuile Cookies
Equipment
Ingredients
- ¼ cup softened butter not melted
- ½ cup confectioner’s sugar
- a dash of vanilla extract
- 2 large egg whites lightly beaten
- ½ cup sifted all purpose flour
Instructions
- Using a mixer, cream butter, sugar and vanilla on low speed until blended. Gradually add the egg whites. Add the flour in small batches and mix just until the batter is smooth. Be careful to not over-mix.
- Cover the bowl with plastic wrap and chill in the fridge for at least 30 minutes to firm up. (This batter will keep in the fridge for up to a week, take it out 30 minutes before you plan to use it).
- Preheat the oven to 350°F.
- Line a baking sheet with parchment paper, Silpat, or grease with either butter or non-stick spray and chill the baking sheet in the fridge for at least 15 minutes. This will help the batter spread more easily if using a stencil/cardboard template. Press the stencil on the baking sheet and use an offset spatula to spread batter.
- Bake for about 5-10 minutes or until the edges turn golden brown. Remove from oven.
- Cut the rectangular cookie into strips using a sharp pizza cutter or knife. (If using a knife cut straight downward, do not use a sawing motion.)
- To shape corkscrews, wrap one strip in a spiral around the handle of a wooden spoon and place it on a wire rack to cool completely before removing the wooden spoon, about 2 minutes. Repeat with remaining strips on additional handles if possible.
- These cookies have to be shaped when still warm, you might want to bake a small amount at a time or put them in the oven to warm them up again. Or: place a baking sheet toward the front of the warm oven, leaving the door half open. The warmth will keep the cookies malleable.

Gabe's Girl
How lovely. Your creation is beautiful! Just really beautiful.
Meg
Beautiful!
Lynn
Wow wow wow. You really went outside the box. I think your tuiles are superb. I am really impressed and a wee bit jealous that I wouldn’t have ever thought of what you did. Well done, indeed.
Carrian
YUM!!! That pannacotta looks so delicious! Your tuiles look pretty darn perfect!! Good job!
Dragon
So pretty! Great job on this month’s challenge.
Maria
Stunning dessert! Your tuiles are perfect!
The Blonde Duck
Those are incredible! WOW!
Renee
I love your dessert. It looks awsome and I bet it tasted even better!
Rebecca
What an amazing color! Your red, red, red tuiles really beat the midwinter blues!
Lauren
Ooo, your tuiles are beautiful! I love the design =D.
HoneyB
Barbara! They look great! I pulled out so I won’t be participating. I may come back when everything else has slowed down.
Reeni♥
Their beautiful!! I love your design!!
Megan
Yours look fantastic! Mine bombed. I wish I would have read your post last night before I began. I so needed your inspiration. You make me want to start over. I guess very thin is the key to these.
Rosa's Yummy Yums
A great combo and pretty tuiles! I love the decorations…
Cheers,
Rosa
Netts Nook
This looks great I can’t wait to try thanks for sharing.
vibi
I got here and saw the polka dots, which I just loooooooved! Then I scrolled down and caught my breath… what a pretty, oh! so pretty rosette design! WOW!
Very French, very classy! Amazing!
Cathy
This entire dessert looks unbelieveably delicious — you did a fabulous job on your Tuiles! You Daring Bakers just blow me away every month with the desserts that you whip up!
April
It looks fantastic!
teafactory
woweee, absolutely stunning!!
Lorraine @NotQuiteNigella
What a gorgeously chic dessert! Love the pairing with the pannacotta and feathering detail too 🙂