
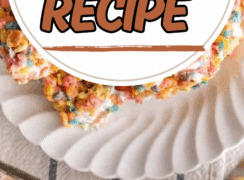

This Fruity Pebbles Treats Recipe brings back childhood memories with every colorful, chewy bite that’s impossible to resist. With just a few simple ingredients, you’ll have a batch of these delightfully sweet bars that disappear faster than you can make them!

WANT TO SAVE THIS RECIPE?
Enter your email below and we’ll send it straight to your inbox. Plus you’ll get great new recipes from us every week!
🍭 Children absolutely go wild for these vibrant, crunchy treats that taste like their favorite breakfast cereal in dessert form!
My 2 Best Tips For Making This Fruity Pebbles Treats Recipe
Marshmallow Quality: Fresh mini marshmallows are crucial for the best results – stale ones won’t melt properly and can make the mixture lumpy. Mini marshmallows melt more evenly than regular-sized ones, creating a smoother binding mixture. The reserved cup of whole marshmallows adds delightful pockets of chewiness throughout.
Pan Preparation: Thoroughly butter your pan to prevent sticking – don’t skip this step or you’ll have a mess when trying to remove the treats. You can also line the pan with parchment paper for easier removal and cleaner cuts. Make sure to butter over the parchment as well for double protection. A well-prepared pan makes all the difference in presentation.

I always toast my fruity pebbles in a dry skillet for 2-3 minutes before mixing to intensify flavor and ensure maximum crunch. This removes any staleness and helps the cereal maintain better texture when combined with the warm marshmallow mixture.
I’ll let the treat mixture cool for about half an hour before cutting to ensure clean edges and proper setting. When you cut it too early, you’ll create messy pieces that fall apart. However, you can refrigerate for 15 minutes to speed up the process if needed.
You can enjoy these treats straight from the pan as a sweet snack or dessert! I love serving them with a cold glass of milk or crumbling them over vanilla ice cream for an extra indulgent treat.
🩷 Melissa
WANT TO SAVE THIS RECIPE?
Enter your email below and we will send it straight to your inbox. Plus you will get great new recipes from us every week!

Fruity Pebbles Treats Recipe
Ingredients
- 8 tablespoons butter ½ cup or 1 stick
- 16 ounces mini marshmallows divided
- 1 teaspoon vanilla extract
- 7 cups Fruit Pebbles crispy cereal
Instructions
- Prepare a 13×9-inch baking pan by greasing it well with butter.
- Optional: Toast cereal in a dry skillet over medium heat, stirring frequently, for about 5 minutes until lightly toasted and crunchy.
- In a large pan on the stove, melt the butter over medium heat.
- Reduce the heat to medium-low; add all of the marshmallows EXCEPT for 1 cup.
- Stir constantly, until the marshmallows are melted.
- Remove from the heat, and stir in the vanilla.
- Add the cereal and the remaining one cup of mini marshmallows, and stir to combine well, making sure there are no dry pockets of cereal.
- Add the cereal to the prepared pan, and use a spatula to spread it out to an even layer, taking care not to press or smash it down. If a spatula isn’t cutting it, get your hands lightly damp, and gently press out the cereal. A buttered bottom of a measuring cup also works well.
- Let the rice crispy treats cool for 30 minutes before cutting and serving.
Notes
Nutrition
How To Make Fruity Pebbles Treats
Step 1: Grease a 13×9-inch pan well with butter and set it aside. In a large saucepan, melt the butter over medium heat.
Step 2: Set aside 1 cup of marshmallows. Add the rest to the butter and reduce the heat to low. Stir constantly until they are all melted.
Step 3: Remove from heat and stir in remaining marshmallows and the Fruity Pebbles. Stir until the cereal is coated and there are no dry pockets.
Step 4: Transfer the mixture to the prepared pan and spread out with the spatula, a buttered measuring cup bottom, or wet hands, taking care to not mash it in so it stays fluffy. Let cool 30 minutes then serve.

Recipe FAQs
Yes, you can substitute regular marshmallows, but you’ll need to cut them into smaller pieces first and they may take longer to melt evenly.
Lightly butter your hands or spatula, or try using a piece of parchment paper to press the mixture into the pan without it sticking to your tools.
Yes! These treats actually improve after sitting for a day as the flavors combine, making them perfect for meal prep or party planning.
More Delicious Desserts Recipes to Consider


Did you try this recipe? Leave a ⭐️ rating below and share it on Instagram.

Leave a Reply