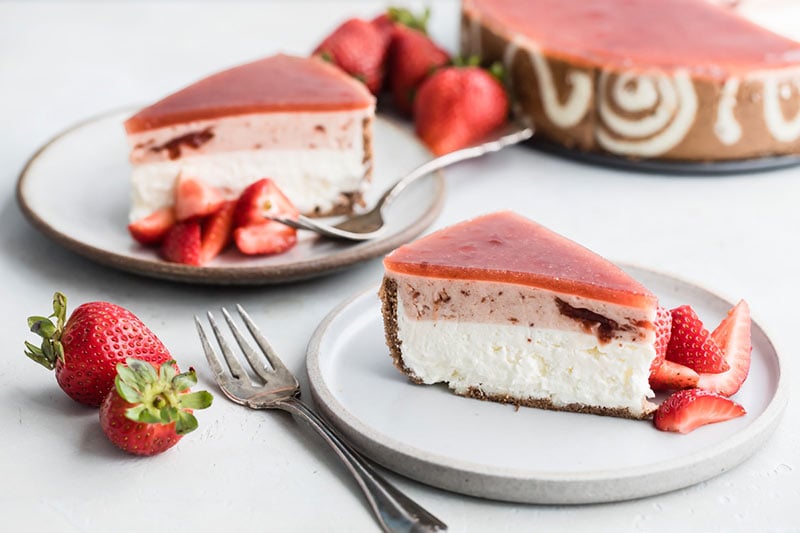
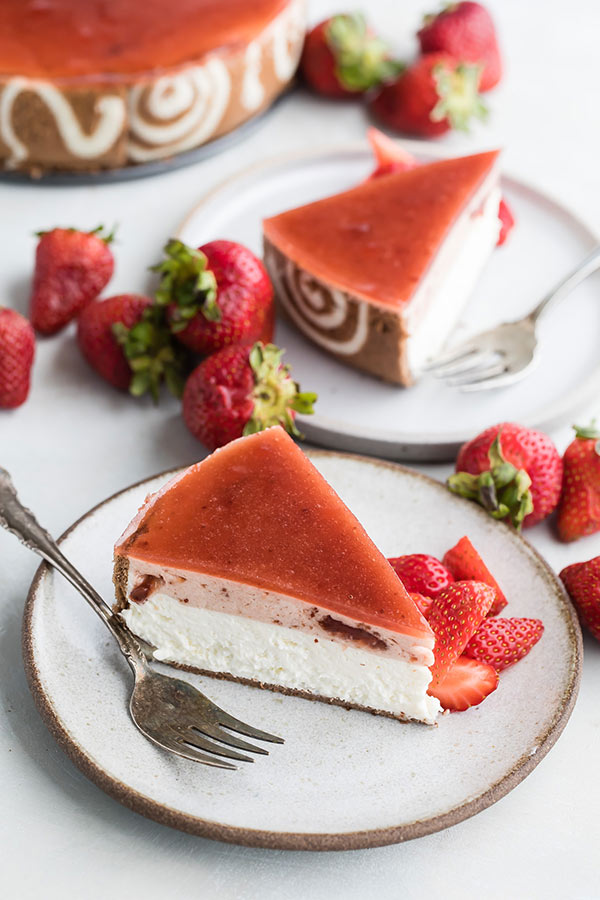
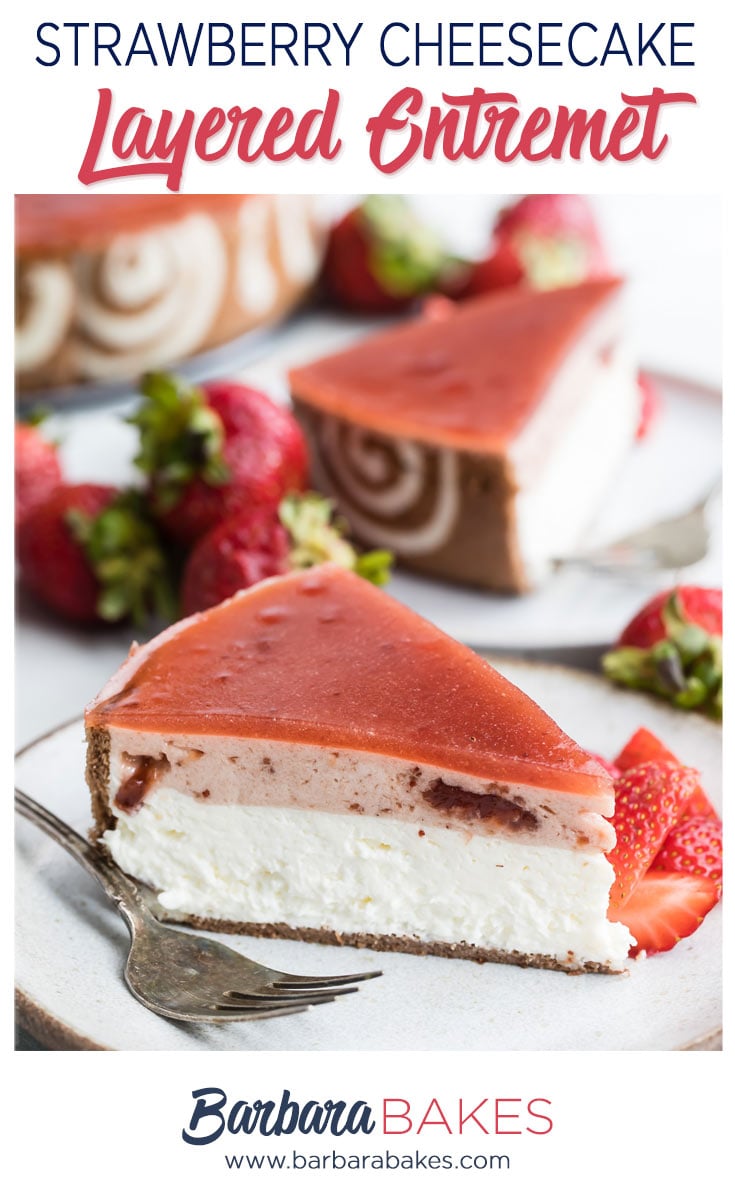
This gorgeous Strawberry Cheesecake Entremet is a multi-layered mousse cake that is perfect for a holiday or party. It has a thin layer of cake on the bottom and sides, a layer of creamy lemon cheesecake, a layer of strawberry mousse and finished with a clear strawberry jelled layer on top.
What is an Entremet
An entremet is a French term for a fancy dessert with many different layers of cake and pastry creams, created in a mold and served cold. Essentially a trifle that is layered and molded instead of tumbled together in a glass bowl.
The first time I made an entremet was in 2011 as part of a Daring Bakers challenge.
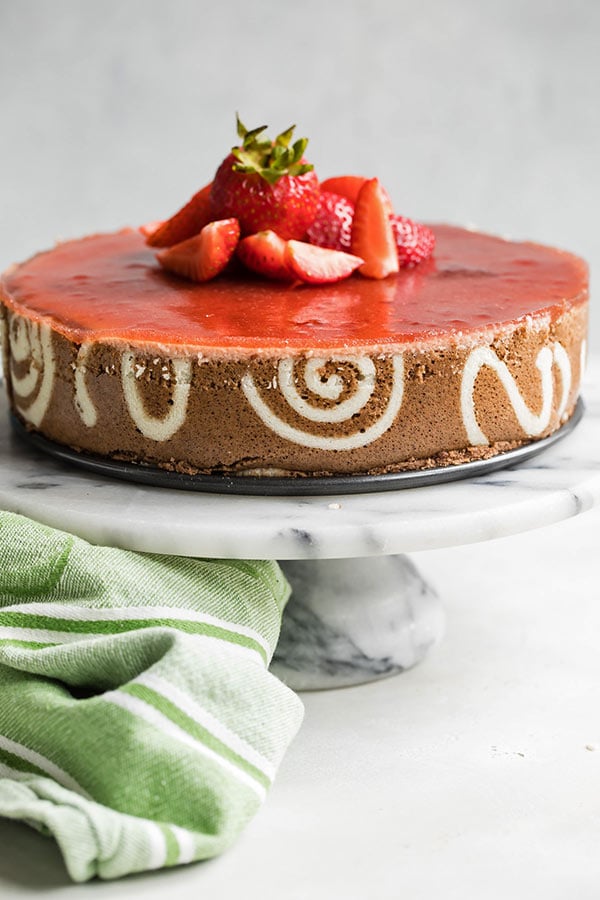
I was intimidated by the challenge to make an entremet at first. It all sounded so foreign and fancy, but taken step by step it really isn’t hard at all.
It’s a little time consuming to make, but all the steps are fairly easy, so don’t let all the steps deter you from making it.
The Joconde and Joconde Imprime (Sponge Cake Design)
A joconde (sponge cake) batter is used because it bakes into a moist, flexible cake. Similar to the cake you’d use to make an ice cream cake roll.
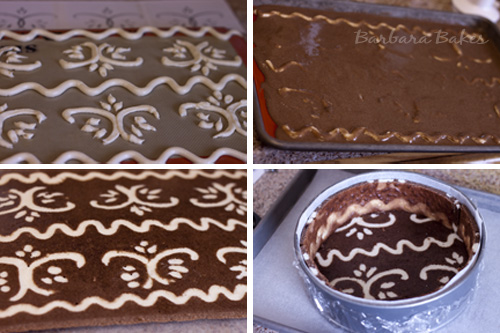
A joconde imprime is the fancy name for the decorative design baked into the sponge cake providing an elegant finish.
You can make any design you like for the base and sides of the cake. The design on the bottom will be hidden but it helps give the cake a little structure.
The cake for the sides will be cut into strips, so be sure and pipe your design for that in rows.
The recipe is in grams, so you’ll need a digital scale to make it. More and more, I’m finding a scale is an essential kitchen tool.
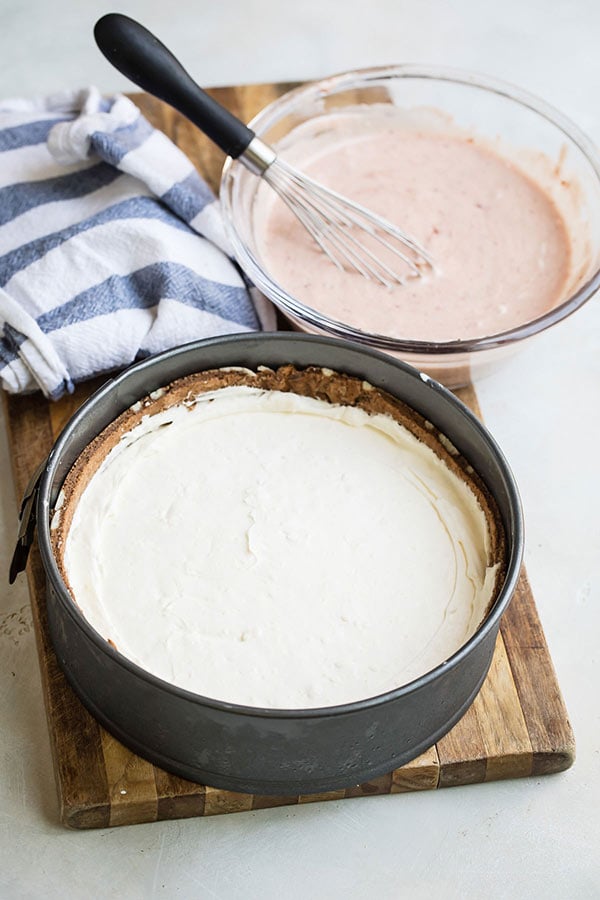
I topped my chocolate sponge cake with a light no-bake lemon cheesecake, which was then topped with a strawberry mousse layer, and finished with a strawberry gelee (a jelled strawberry layer.)
It’s important that the cake layer fits tightly on the cake base and is high enough on the sides to keep the fillings inside of it making it easy to remove from the springform pan and serve.
It would make a gorgeous Valentine’s Day dessert. Pipe heart shapes with the white batter and then cover it with the chocolate cake batter.
How to Make Entremet – Step by Step Instructions
White Joconde-Décor Paste
Chocolate Joconde (Sponge Cake)
Lemon Cheesecake Filling
Strawberry Mousse
Strawberry Gelee
It’s a light, refreshing elegant dessert that will wow your guests. I hope you’ll give it a try.
Strawberry Cheesecake Entremet
Equipment
Ingredients
White Joconde-Décor Paste
- 7 tablespoons/100g unsalted butter softened
- 100 g Confectioners’ icing sugar
- 100 g egg whites about four
- 110 g cake flour
Chocolate Joconde (Sponge Cake)
- 85 g almond flour/meal
- 75 g confectioners’ icing sugar
- 15 g cake flour
- 10 g Dutch cocoa powder
- 3 large eggs / 150g
- 3 large egg whites / 90g
- 10 g white granulated sugar or superfine caster sugar
- 2 tablespoons / 30g unsalted butter melted
Lemon Cheesecake Filling
- 3 tablespoons fresh lemon juice
- 1 envelope 2 ¾ teaspoons unflavored gelatin
- 16 oz. 2 packages cream cheese, softened to room temperature
- ½ cup sugar
- pinch salt
- ⅔ cup whipping cream
Strawberry Mousse
- 3 tablespoons cold water
- 200 grams strawberry puree
- 40 grams sugar
- 1 envelope 2 ¾ teaspoons unflavored gelatin
- 150 grams whipping cream soft peaks
Strawberry Gelee
- 3 tablespoons cold water
- 300 grams strawberry puree
- 80 grams sugar
- 1 envelope 2 ¾ teaspoons unflavored gelatin
Instructions
White Joconde-Decor Paste
- Cream butter and sugar until light and fluffy (use a stand mixer with blade, handheld mixer, or by hand). Gradually add egg whites. Beat until well blended. Fold in flour.
- Place two Silpats on two baking sheets. Pipe design onto mats. (If you do not have a piping bag. Fill a ziplock bag and snip off corner for a homemade version of one.) Slide the baking sheets with paste into the freezer. Freeze hard – approx 15 minutes.
- While the design is in the freezer, prepare chocolate Joconde batter (recipe below.) Remove from the freezer. Quickly pour the Joconde batter over the designs. Spread evenly to completely cover the pattern of the Décor paste.
- Bake at 475ºF until the joconde (sponge cake) bounces back when lightly pressed, approx. 5–15 minutes. It will bake quickly, so watch closely. Cool until it’s cool enough to handle. Do not leave too long, or you will have difficulty removing it from Silpat.
- Flip cooled cakes on to parchment paper. Carefully peel off Silpats. The cakes should be right side up, and pattern showing.
- (This short video will help explain the process of layering the entremet.) Preparing the mold for entremets: Start with a large piece of parchment paper laid on a very flat baking sheet. Then a large piece of cling wrap over the parchment paper. Place a spring form pan ring, with the base removed, over the cling wrap and pull the cling wrap tightly up on the outside of the mold. Line the inside of the ring with a curled piece of parchment paper overlapping top edge by ½ inch. CUT the parchment paper to the TOP OF THE MOLD. It will be easier to smooth the top of the cake.
- Preparing the Jaconde for Molding: Trim the cake of any dark crispy edges. You should have a nice rectangle shape. Decide how thick you want your "Joconde wrapper". Traditionally, it is ½ the height of your mold. This is done so more layers of the plated dessert can be shown. However, you can make it the full height. Once your height is measured, then you can cut the cake into equal strips, of height and length. Use a very sharp paring knife and ruler (I found it was easier to use the full height).
- Make sure your strips are cut cleanly and ends are cut perfectly straight. Press the cake strips inside of the mold, decorative side facing out. Once wrapped inside the mold, overlap your ends slightly. You want your Joconde to fit very tightly pressed up to the sides of the mold.
- Then gently push and press the ends to meet together to make a seamless cake. The cake is very flexible so you can push it into place. You can use more than one piece to "wrap" your mold, if one cut piece is not long enough. The mold is done, and ready to fill.
Chocolate Joconde Sponge
- In a clean mixing bowl whip the egg whites and white granulated sugar to firm, glossy peeks. Reserve in a separate clean bowl to use later.
- Sift almond flour, confectioner’s sugar, cake flour and cocoa powder (this can be done into your dirty egg white bowl). On medium speed, add the eggs a little at a time. Mix well after each addition. Mix until smooth and light. (If using a stand mixer use blade attachment. If hand held a whisk attachment is fine, or by hand.)
- Fold in one third reserved whipped egg whites to almond mixture to lighten the batter. Fold in remaining whipped egg whites. Do not over mix. Fold in melted butter. Note: Makes enough sponge for the side and bottom of an 8" round mold.
Lemon Cheesecake Filling
- Put the lemon juice in a small bowl and sprinkle the gelatin over the top. Let it stand until the gelatin softens, about 5 minutes. Microwave the mixture until it is bubbling around the edges and the gelatin dissolves, about 30 seconds or less. Set aside.
- In a large bowl with a handheld mixer or in the bowl of a stand mixer, beat the cream cheese, sugar, and salt until smooth and creamy, about 2 minutes. Slowly add the cream and beat until the mixture is light and fluffy, about 2 minutes. Add the gelatin mixture. Beat until the mixture is smooth and airy, about 3 minutes.
- Pour the filling into the prepared jaconde and smooth the top. Refrigerate the cheesecake until set, about 1 hour.
Strawberry Mousse
- Put the water in a small bowl and sprinkle the gelatin over the top. Let it stand until the gelatin softens, about 5 minutes. Microwave the mixture until it is bubbling around the edges and the gelatin dissolves, about 30 seconds or less. Add the gelatin to the strawberry puree.
- Fold the whipped cream in to the puree. Pour the mousse on top of the cheesecake layer and let it set in the refrigerator.
Strawberry Gelee
- Put the water in a small bowl and sprinkle the gelatin over the top. Let it stand until the gelatin softens, about 5 minutes. Microwave the mixture until it is bubbling around the edges and the gelatin dissolves, about 30 seconds or less. Add the gelatin to the strawberry puree. Chill the gelee until it starts to thickened.
- Pour the gelee on top of the strawberry mousse and let it set several hours in the refrigerator before serving.
Notes
Pin It:


Alisoni
What exactly is strawberry puree–frozen? fresh? just strawberries?
NitDit
I tried your recipe and almost got it right. The flavor were excellent. I need to work on getting the jelly top layer texture right.
I used vegetable gelatin and had to use a little more to get it to set. I also used hand mixer for whipping. Overall it turned out good and was a very fulfilling experience.
Thankyou for this great recipe. Please post more of these entremet recipes if you can.
Barbara Schieving
Glad you had fun making it. I’d love to see pictures if you want to post them to Instagram and tag me.
Tara
Hi, I’m interested in making this recipe and was wondering, would it be good with a chocolate glaze poured over it or is that a bad idea? Also it looks delicious! I will be making it no matter what!!
Barbara Schieving
Hi Tara – I wouldn’t pour glaze over it because it would hide the pretty layers. But if you want to serve it with chocolate drizzled on the serving plates, I think that would be a delicious addition.
Lou
This is such a wasteful recipe! This recipe essentially made enough cheesecake filling and joconde paste for two large cakes but only had enough sponge for one! I improvised and made little mugs filled with the filling but still had leftover ingredients! How annoying!
Barbara Schieving
Hi Lou – sorry you had difficulty, perhaps my pan was taller than yours. Although, leftover dessert is never a problem at my house.
Jeannes3sons
This is a very impressive looking cake! I will definitely be trying this one!
alla kopp
Very European cake:)) I doubt there is a woman living in America who will attempt to make this cake^))) American women like to mix cake mix with some water and eggs, bake it and spread store bought artificial flavor color and everything else frosting on top of it :)))) At least most of them. But me on the other hand is European and I will spend the necessary 15 hours making this beauty!!!:)) Thank you for the recipe !:)))
rima
Can’t wait to try this; one question, you pour the batter over the frozen designs on the BACK of the baking sheet, or do you put the silpat inside of the baking sheet?
Barbara Schieving
Hi Rima – you put the silpat inside the baking sheet before pouring the batter over the frozen design. Enjoy!
gourmandelise
Yum… Your cake looks amazing and gorgeous!!!
You are very talented!!
Natalie || The Devil Wears Parsley
Barbara, this looks so absolutely gorgeous! It was great meeting you at BTP1!!!!
Khan
Hello Barbara,
How thick should the whole joconde spread should be?
Thanks!
Barbara Schieving
About half an inch thick or less when baked.
AA
Please translate this recipe for us measurements!
Barbara Schieving
Here’s a link to the hostess’s post with the US measurements http://astheroshe-accro.blogspot.com/2011/01/daring-bakers-january-2011-spumoni.html
pardis
Hello Barbara
Really Surprises and beautiful
I love cooking ,Specially Cakes and desserts
I do not know much English But I’m trying to translate your commands and recipe.
After cooking, I would send her picture.
Excellent Excellent Excellent Excellent and Really Surprises and beautiful
I was very happy to meet you dear artist
Thank you