
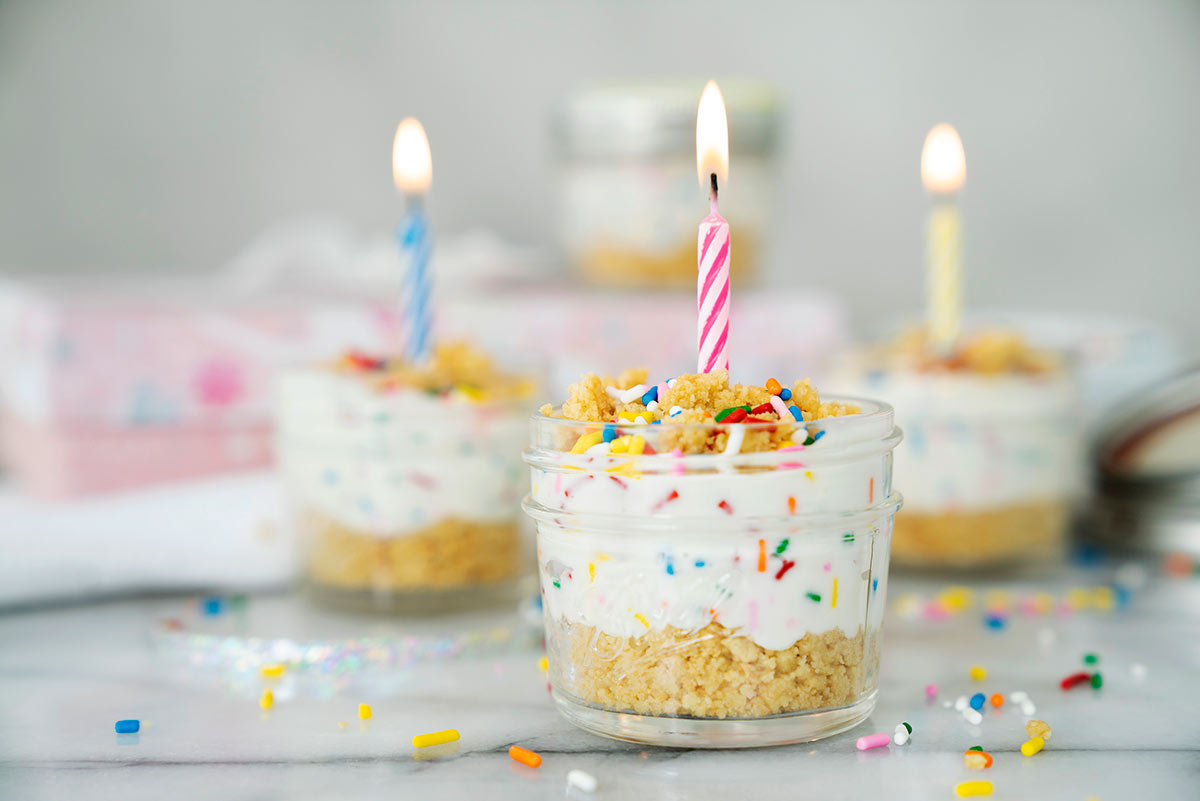
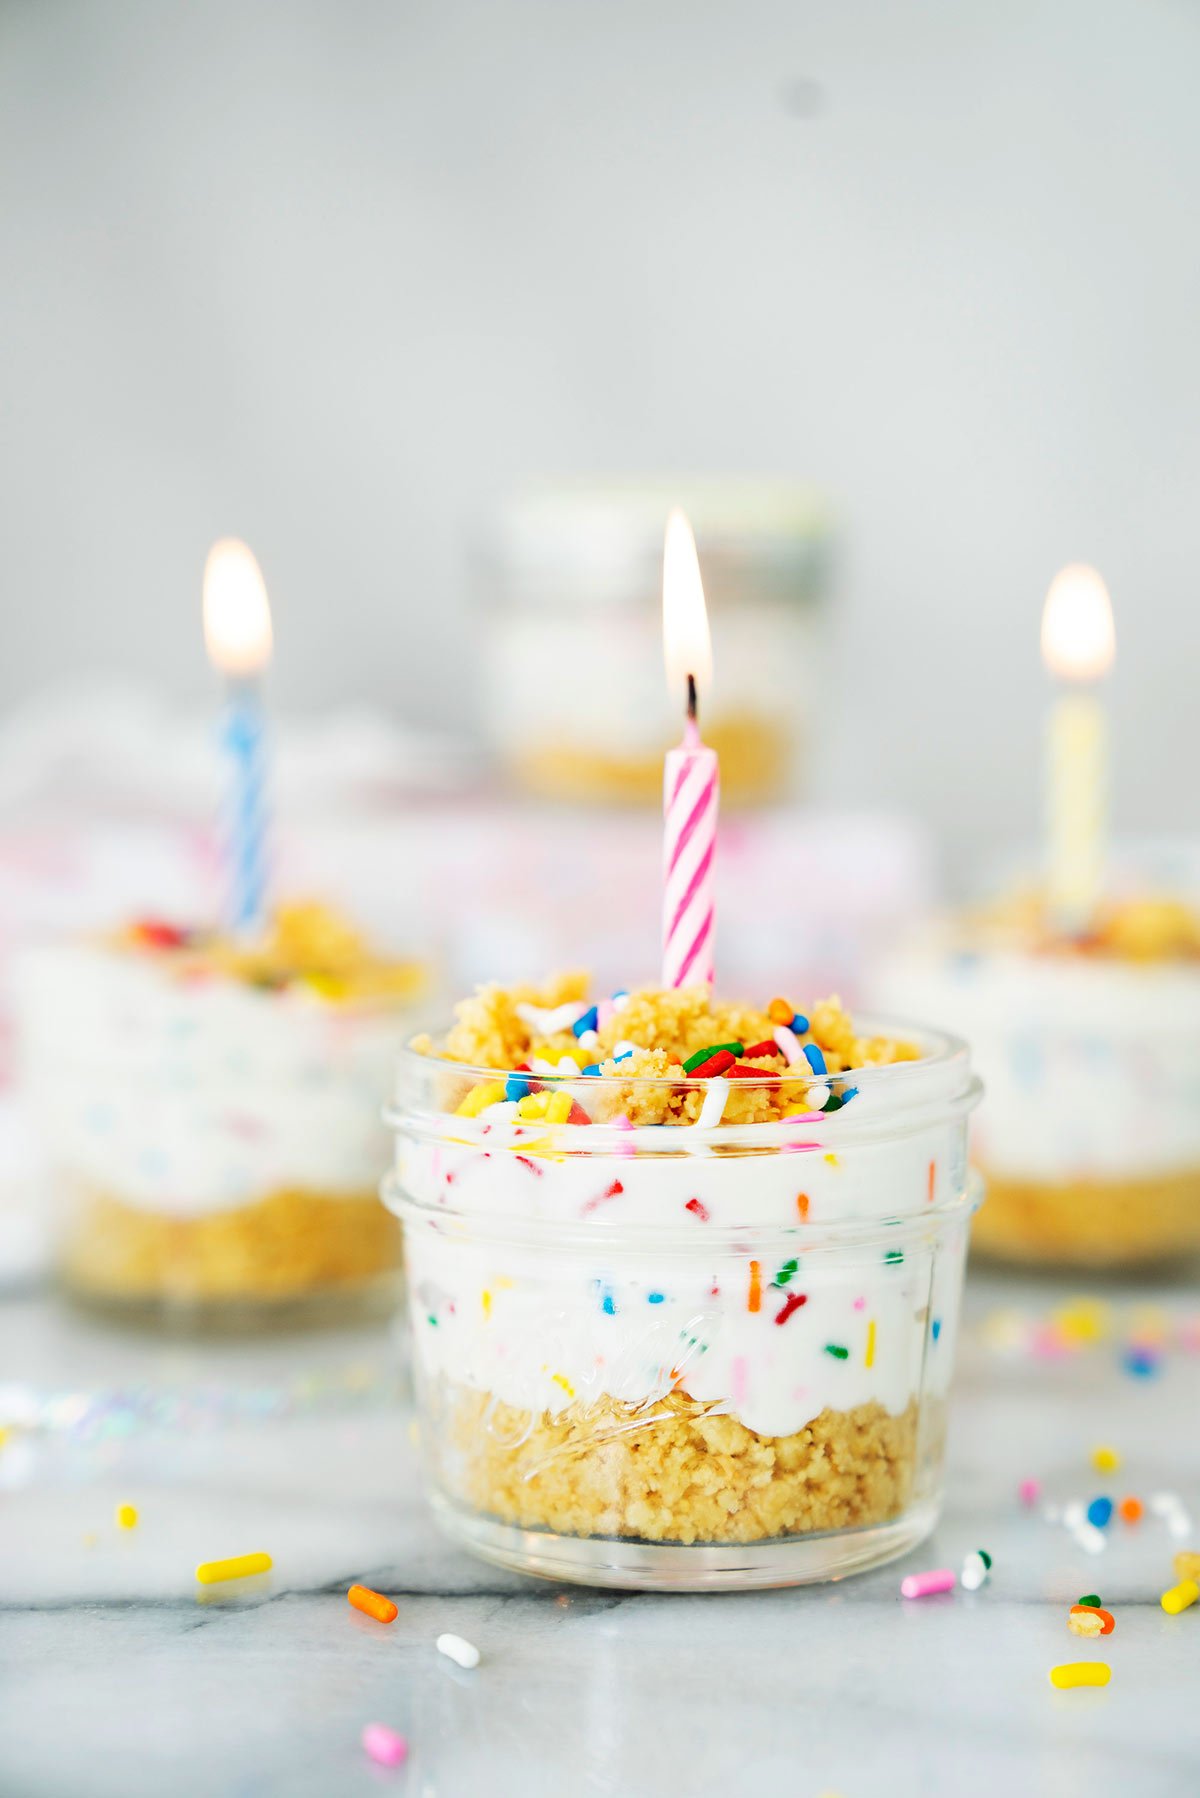
Mix up your birthday celebration with festive no-bake Birthday Cheesecake in a Jar. These are creamy and tangy, with a cream cheese filling and Golden Oreo cookie crust.
WANT TO SAVE THIS RECIPE?
Enter your email below and we’ll send it straight to your inbox. Plus you’ll get great new recipes from us every week!
We celebrate a lot of birthdays at my house. So naturally, I’m always looking for new fun desserts to celebrate the occasion. Since we’ve been loving quick and easy no-bake Mason jar cheesecakes lately, I figured we needed a birthday cake cheesecake recipe.
But this recipe isn’t limited to birthdays. You can easily use different colored sprinkles to celebrate different holidays. For the fourth of July, try red, white, and blue sprinkles. For St. Patrick’s Day, use green!
You get the idea–however you color your Mason jar cheesecakes, you can be sure that this is an easy, no-bake cheesecake recipe that’s fit for any celebration.
Pin It For Later:
How To Make No-Bake Birthday Cheesecake in A Jar
I love how this is such an easy birthday recipe. It’s no-bake, with just two simple steps, plus assembly.
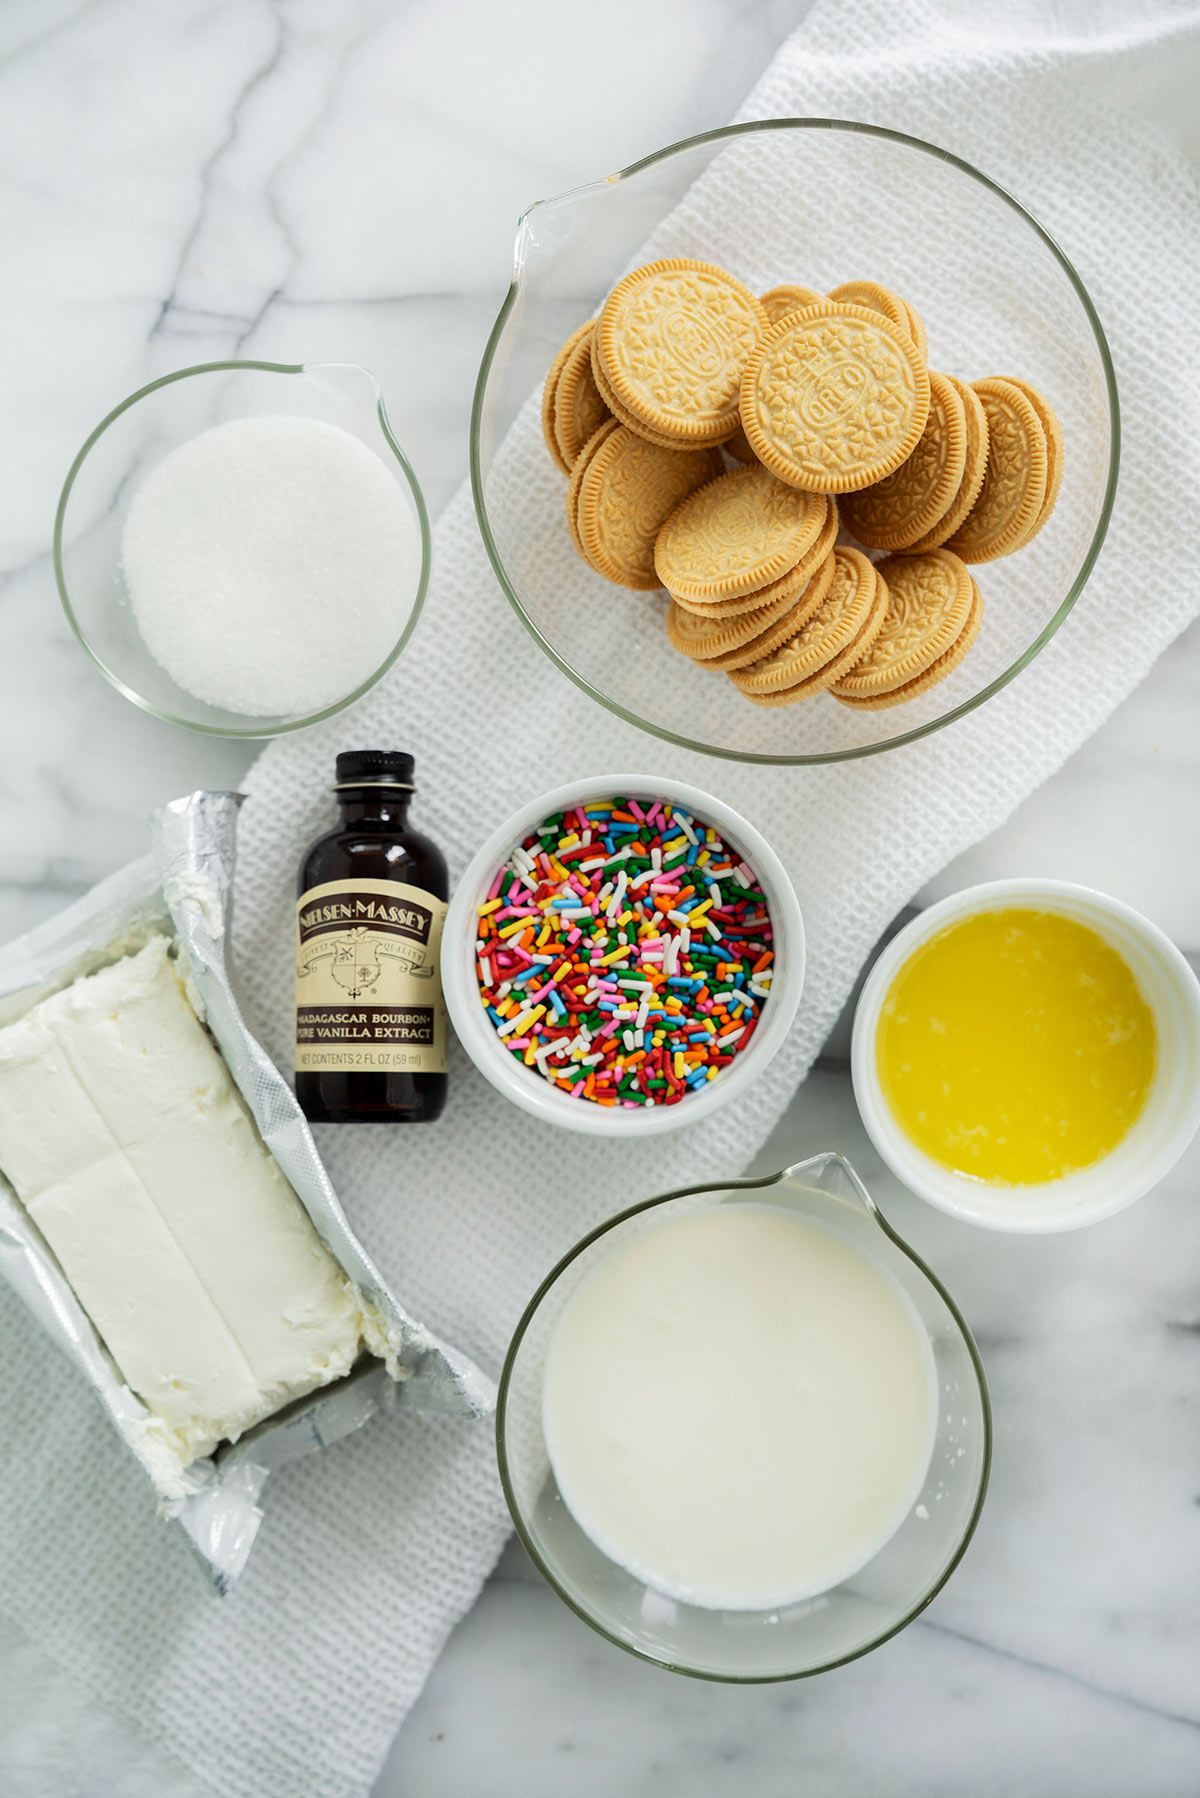
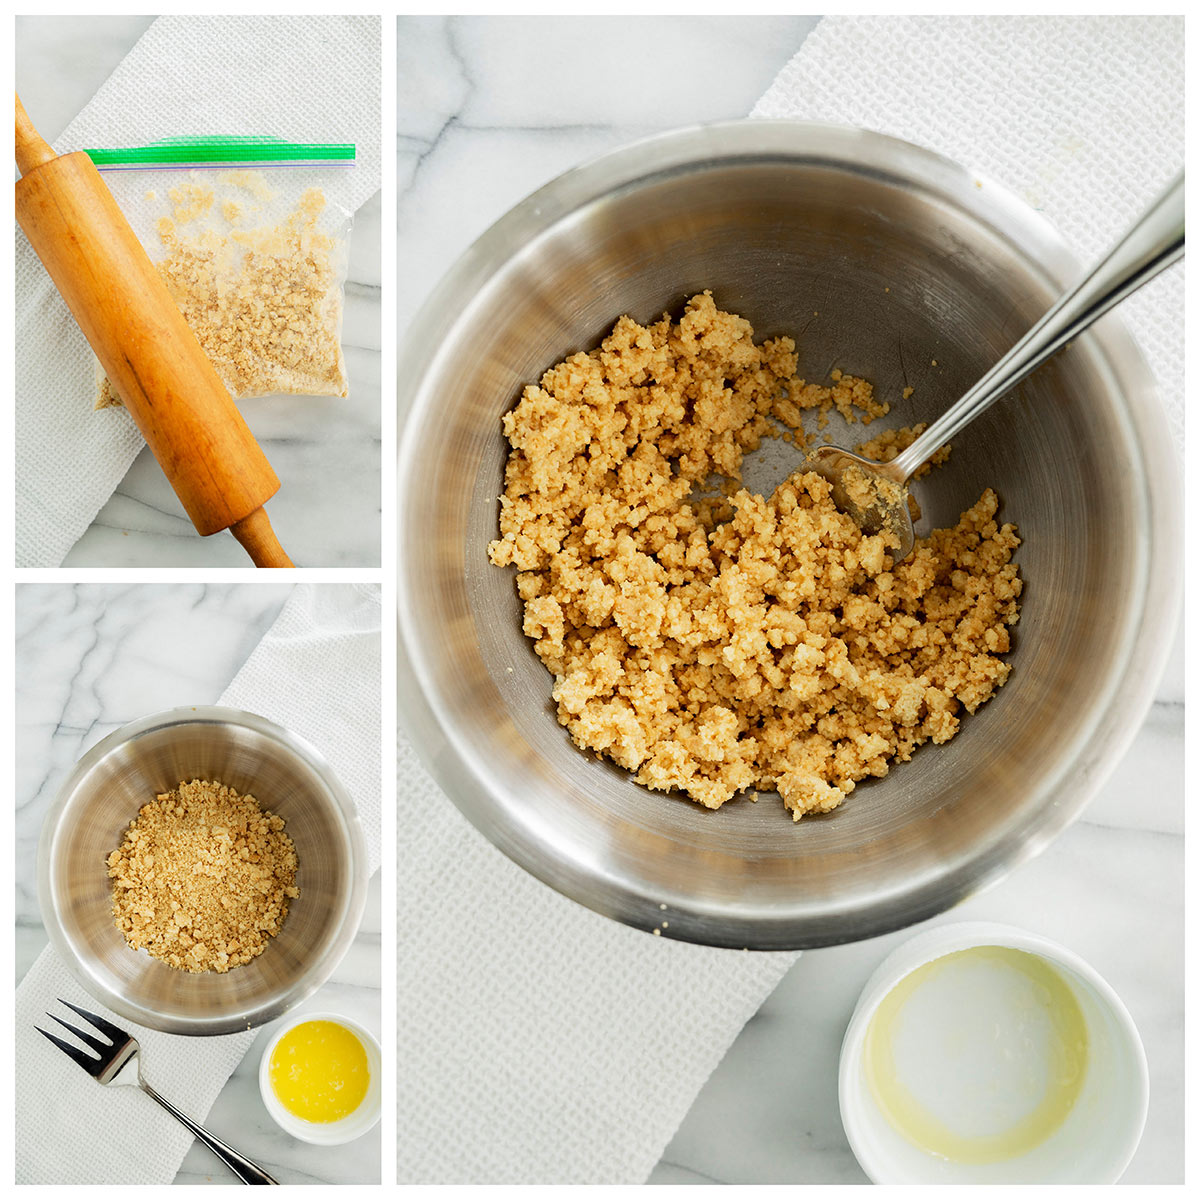
First, make a quick and easy Oreo cookie crust. This no-bake crust is just 2 ingredients: Golden Oreos and butter. There’s no need for sugar, as the cookies and cream filling are perfectly sweet.
To make the crust, put the cookies in a Ziploc bag and seal it tight. Use a rolling pin to crush the Oreo cookies as finely as possible. Some clumps will form with the cream filling. You can break them up by shaking up the bag and breaking them apart with your fingers.
Or, if you have a mini food processor, just pulse the cookies a few times.
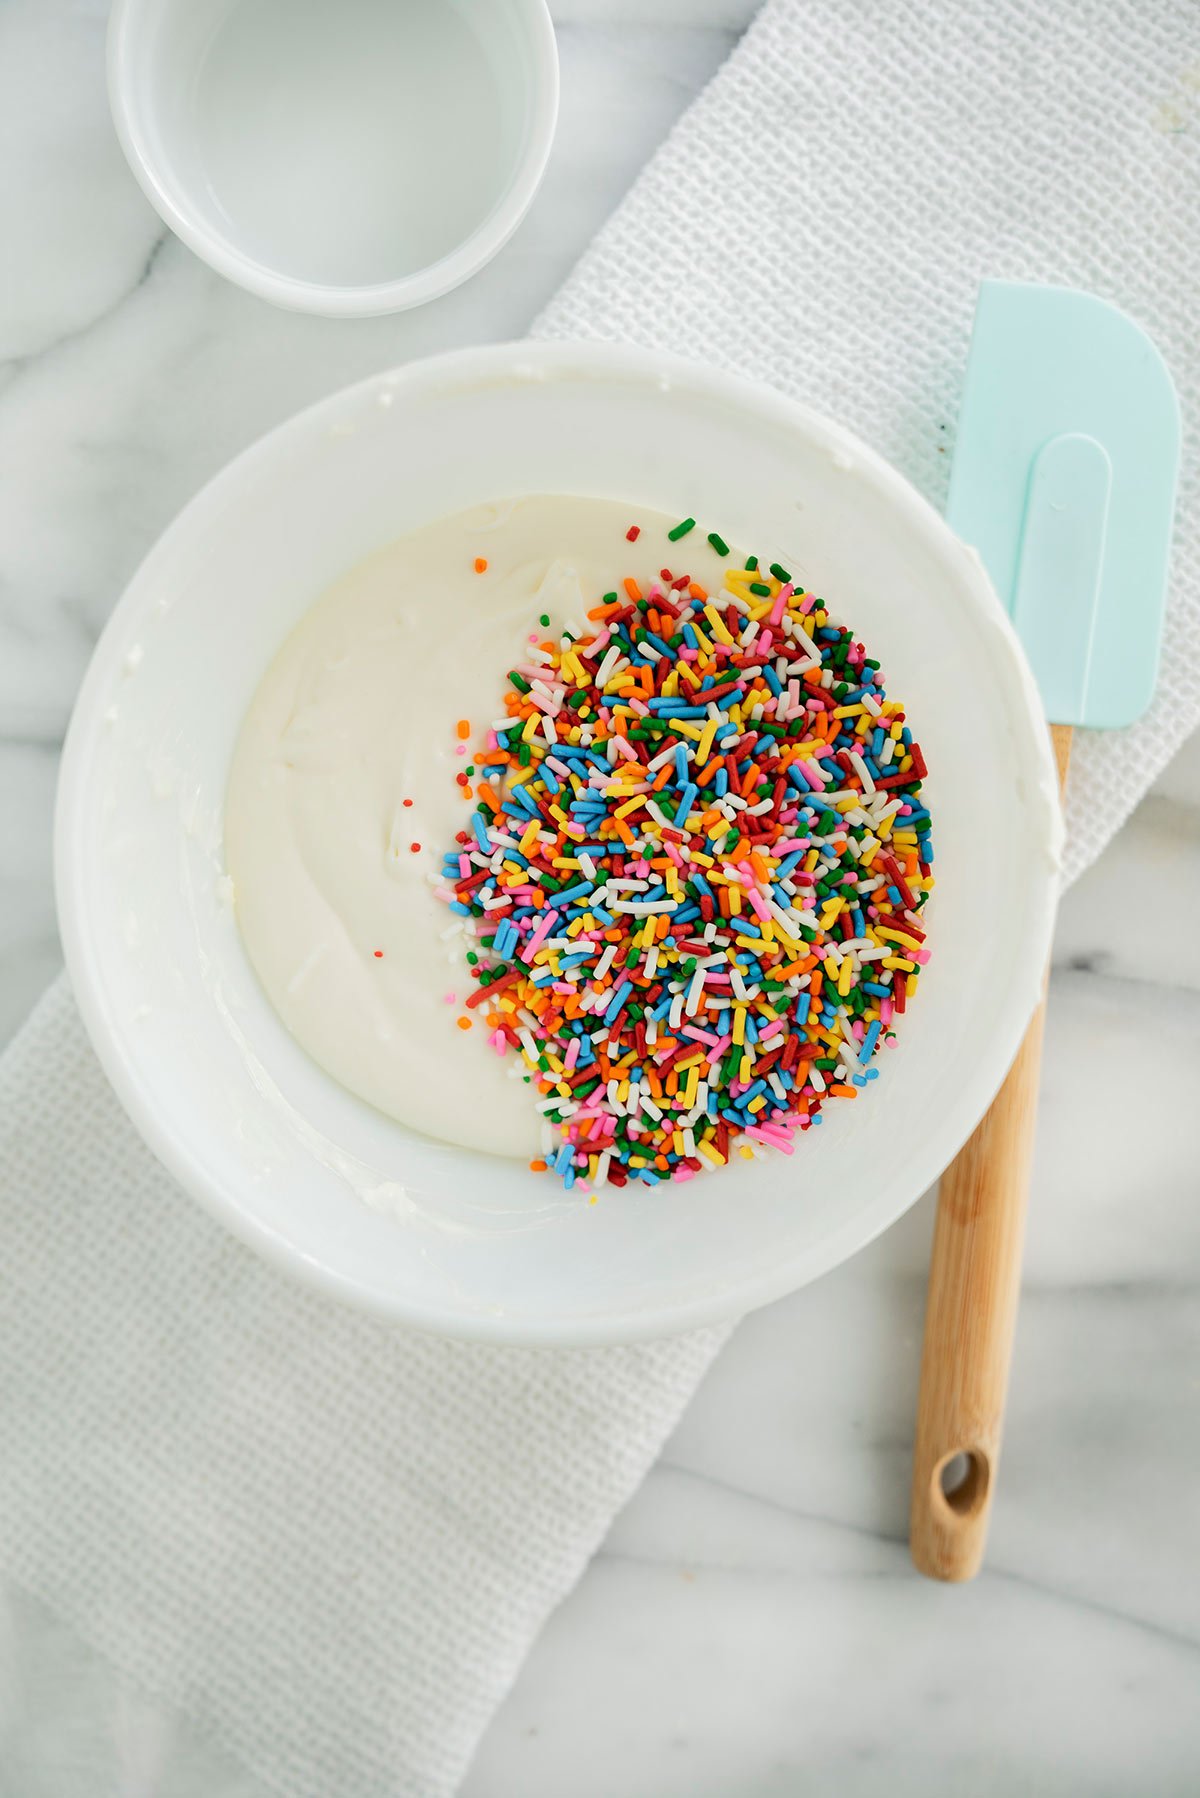
Next, make the Birthday Cheesecake filling. Simply whipping together a few staple ingredients: softened cream cheese, sugar, heavy cream, and vanilla.
After mixing the filling ingredients together, let the filling firm up in the fridge for 45 minutes. This firms up the filling, which helps in the next step, folding in rainbow sprinkles.
Once the birthday cheesecake filling is chilled, fold in the sprinkles. Quickly but gently fold them in until just combined. Try not to overmix the cheesecake filling, as the more you mix, the more the sprinkles will bleed and cause streaks.
As soon as the sprinkles are incorporated, it’s time to assemble the cheesecake jars.
What Size Mason Jar is Best?
I made these using 6 4-ounce Mason Jars. To feed more, you can also prepare smaller cheesecakes in smaller jars or glass cups, or the recipe is easily doubled or tripled.
Assembling Birthday Cheesecake in A Jar
It’s quick and easy to assemble these fun birthday cake cheesecakes in Mason jars. To streamline things and ensure your filling stays cold, have all of your jars and ingredients set up and ready to go.
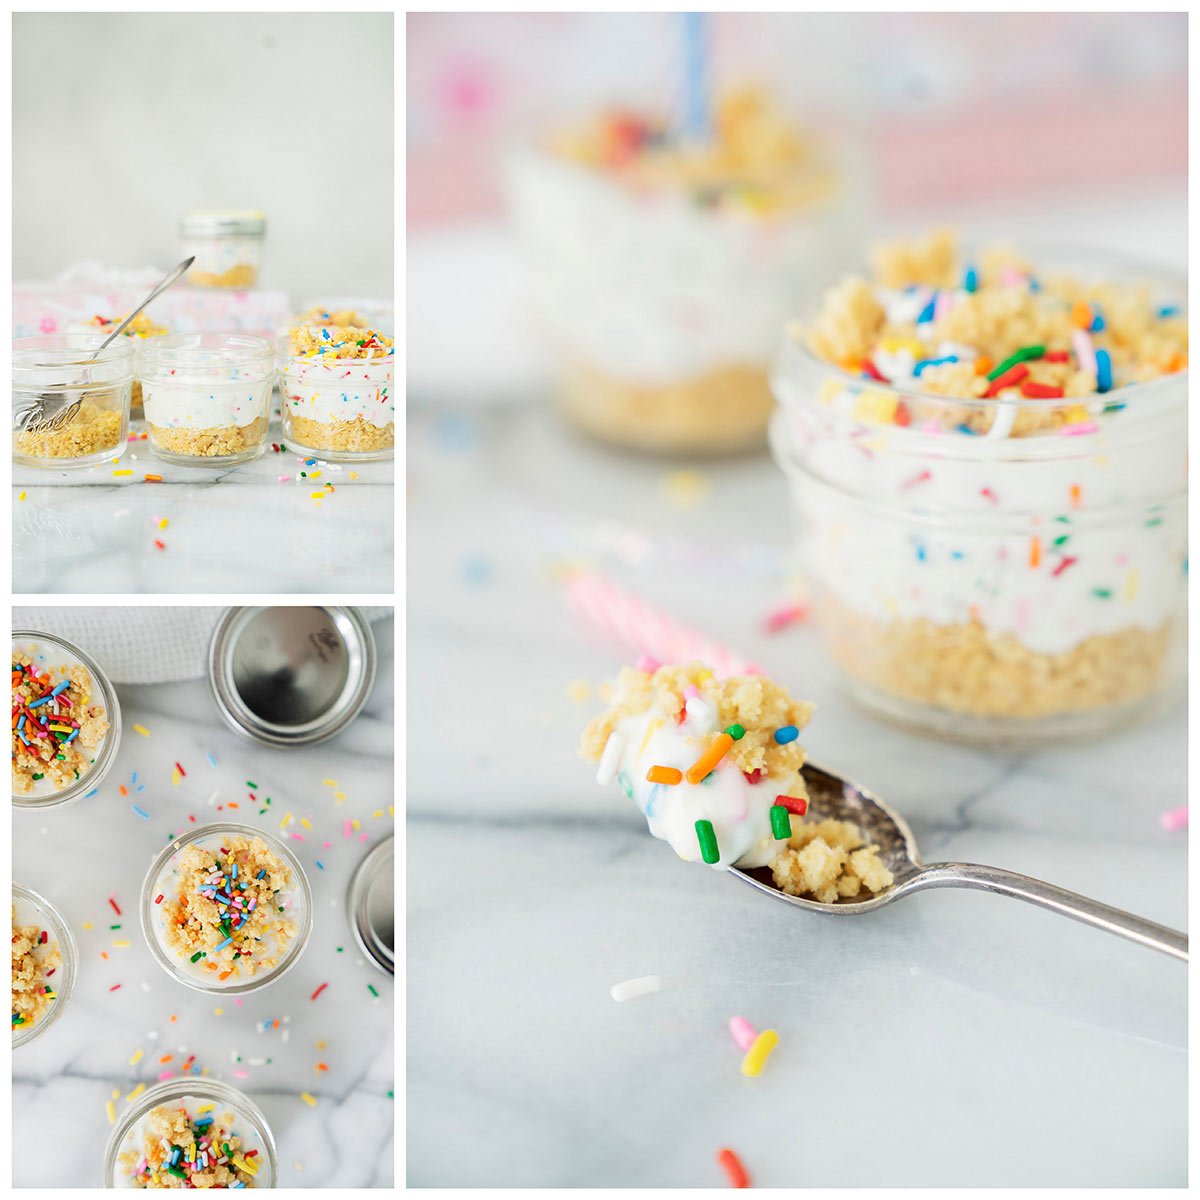
Start with your cookie crust on the bottom of each mason jar. Pack it in by pressing with the back of a spoon or I love using my tamper tool.
Next, add birthday cheesecake filling using a pastry bag or a Ziplock sandwich bag with one corner cut off. A smaller tip is better, as it gives you more control of where the filling goes. You can also use a scoop or simply spoon in the cheesecake filling and pat it flat.
Tap the jars on the table to help settle the cheesecake.
Finally, add a sprinkle of Oreo crumbles and sprinkles on top for garnish. Leave a ¼ inch space between the top of your filling to the top of the jar. This allows you to screw on the lid without any cheesecake oozing out the sides.
Then seal them up and store the birthday cheesecakes in a jar in the fridge until it’s time to enjoy.

Can I Make Birthday Cheesecakes Ahead of Time?
The longer the assembled cheesecakes sit, the more likely it is that the sprinkles bleed. For best results, assemble the cheesecakes the day you’re serving.
However, you can make the Oreo crust ahead of time and store in an airtight container or Ziploc bag on the counter for up to 3 days. And store the birthday cake cheesecake filling in an airtight container in the fridge for up to 3 days.
Then, assemble the jars the day you’re serving.
How To Serve Mini Mason Jar Cheesecakes
These are best eaten cold. The cheesecake filling will be light, fluffy, and stiff if it’s kept chilled. If you want to display them for a party, you can arrange the filled jars on a rimmed serving tray filled with ice.
These are a perfect dessert to make for a party. They’re easy to eat with just a spoon, no plate, or even table necessary!
More Cheesecake In A Jar Recipes
Once your guests have polished off your Birthday Cheesecake In A jar, try these other cute and easy no-bake cheesecake recipes:
- Strawberry Cheesecake In A Jar is a simple, classic no-bake summer dessert to use your favorite berries.
- Peanut Butter Cheesecake in A Jar features chocolate, creamy peanut butter, and Reese’s Peanut Butter Cups in one mason-jar sized treat.
- Red, White, and Blue Cheesecake in A Jar is the most patriotic no-bake dessert around, made with fresh berry compote and an Oreo-almond crust.
WANT TO SAVE THIS RECIPE?
Enter your email below and we will send it straight to your inbox. Plus you will get great new recipes from us every week!

Birthday Cake Cheesecake in a Jar
Equipment
Ingredients
Birthday Cake Cheesecake Filling
- 1 8-ounce package cream cheese, softened
- ½ cup heavy cream chilled
- ¼ cup sugar
- 2 teaspoon vanilla extract
- ½ cup rainbow sprinkles plus extra for garnish
Golden Oreo Crust
- 8 Golden Oreo cookies crushed into fine crumbles (plus more for garnish)
- 2 Tbsp unsalted butter melted
Instructions
GOLDEN OREO COOKIE CRUST:
- If you haven’t done so already crush up the Oreo (I used a plastic baggy and rolling pin but a food processor will work as well.) And place in a bowl.
- Pour the melted butter over the cookie crumbs. Mix well to combine, the texture will be like crumbly sand.
BIRTHDAY CAKE CHEESECAKE FILLING:
- In a mixing bowl, beat the cream cheese, heavy cream, sugar, and vanilla until smooth and creamy. Refrigerate 45 minutes.
- After chilling, gently fold in the sprinkles. Do not overmix or the sprinkles will begin to bleed and you will get color streaks in the filling.
ASSEMBLY:
- Line up your jars (or cups). Have all your ingredients ready to go.
- These jars were layered as follows: Oreo cookie crust crumbles, cheesecake filling, Oreo cookie crust crumbles, and additional sprinkles.
- Start by adding the cookie crust crumbles to the bottom of each jar. Press the crumb mixture down with the back of a spoon to form a crust.
- Next, add your cheesecake filling. Fill a Ziploc sandwich bag with the birthday cake cheesecake filling and cut the corner off. Then squeeze in the filling on top of the cookie crust. If the filling is uneven, gently tap the jar on counter a few times to level it out.
- Sprinkle the top with remaining cookie crust crumbles and sprinkles.
- Twist on the lids. Refrigerate until ready to serve.
Nutrition
Pin it.

Carol
Fun, fun, FUN! I can see me celebrating any day with one of these….happy UN-BIRTHDAY to me!!!! : )