
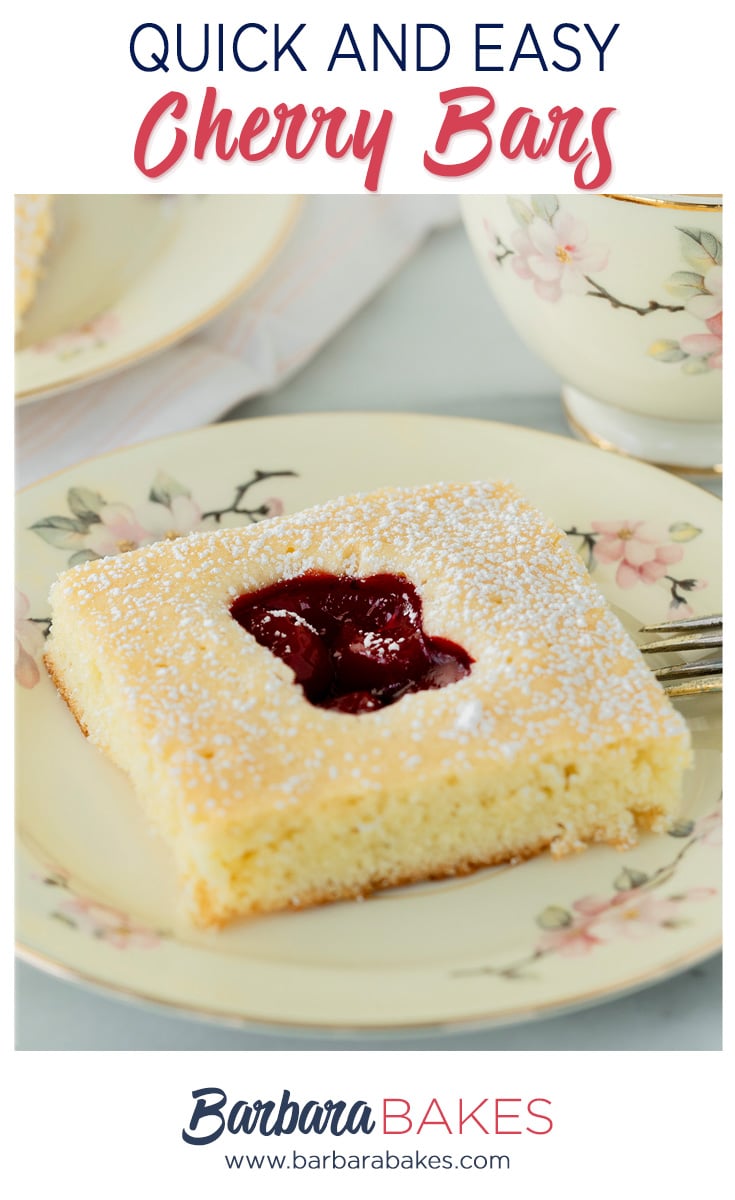
Make delicious Cherry Pie Bars with canned pie filling in under an hour! These easy fruit squares deliver all the flavor of homemade pie without rolling dough. Perfect for potlucks and dessert trays!

WANT TO SAVE THIS RECIPE?
Enter your email below and we’ll send it straight to your inbox. Plus you’ll get great new recipes from us every week!
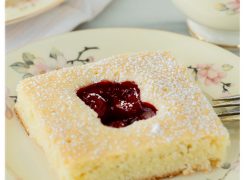
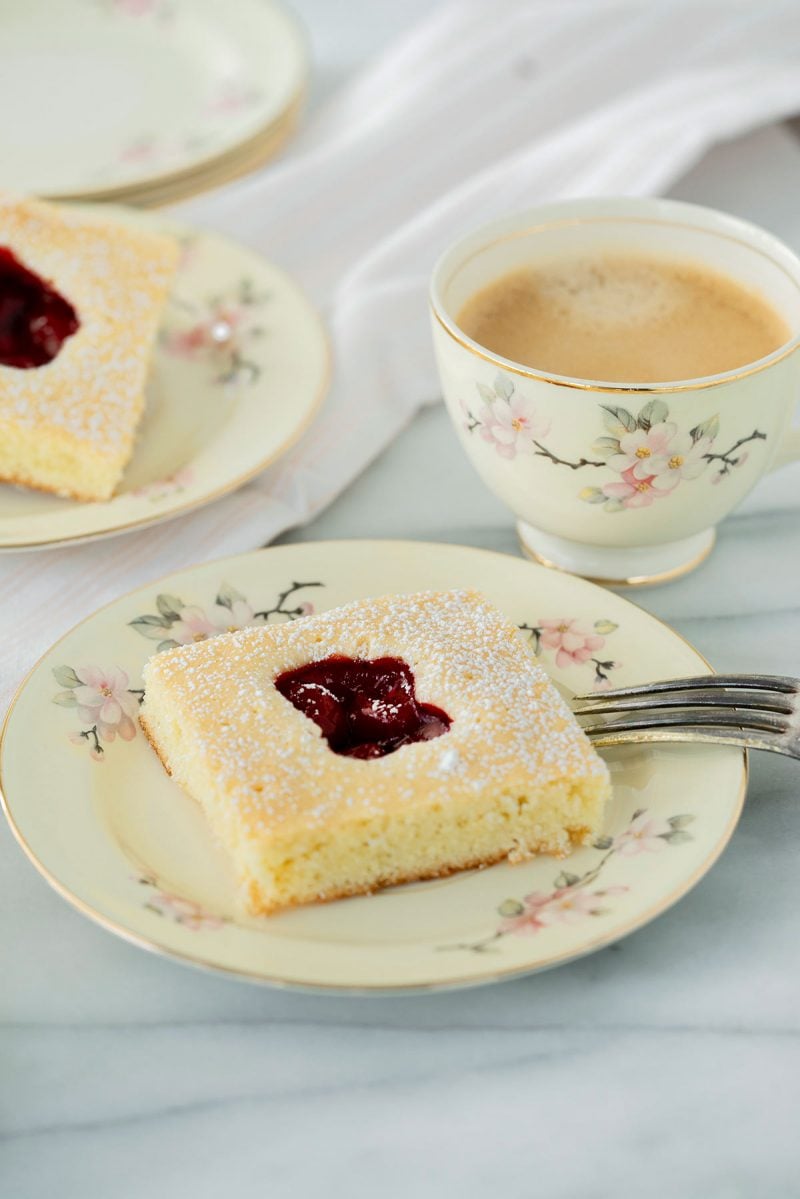
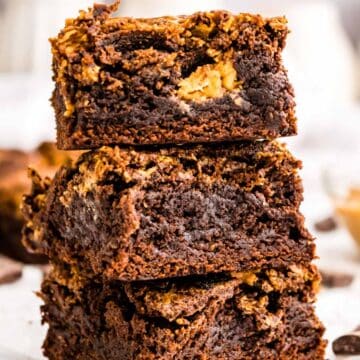
This is a fantastic dessert recipe. It’s a not-too-sweet bar cookie that is incredibly easy to make. The cookie batter puffs up around the pie filling during baking for a beautiful almost stained-glass look.
Why You’ll Love This Cherry Pie Bars Recipe
Sheet Pan Easy: Bake an entire batch at once in a single pan, making these fruit squares ideal for feeding a crowd without the fuss of individual portions.
Minimal Ingredients: Just seven simple ingredients create these impressive cherry bars—no specialty items or complicated techniques required.
Make-Ahead Friendly: These bars taste even better the next day, making them perfect for busy schedules and advance party prep.
Versatile Dessert: Serve them for breakfast, brunch, dessert, or pack them in lunchboxes—these fruit squares work for any occasion.
Crowd-Pleaser Guaranteed: The classic combination of buttery vanilla dough and sweet cherry filling appeals to kids and adults alike.
Recipe Ingredients
- Butter
- Granulated sugar
- Eggs
- Vanilla extract
- All-purpose flour
- Salt
- Cherry pie filling (I used Lucky Leaf Premium Cherry)
See the recipe card below for full information on ingredients and quantities.
WANT TO SAVE THIS RECIPE?
Enter your email below and we will send it straight to your inbox. Plus you will get great new recipes from us every week!
Homemade Cherry Pie Bars Recipe
Equipment
- Stainless Steel Measuring Spoons
- Stainless-Steel Mixing Bowl Set, White
Ingredients
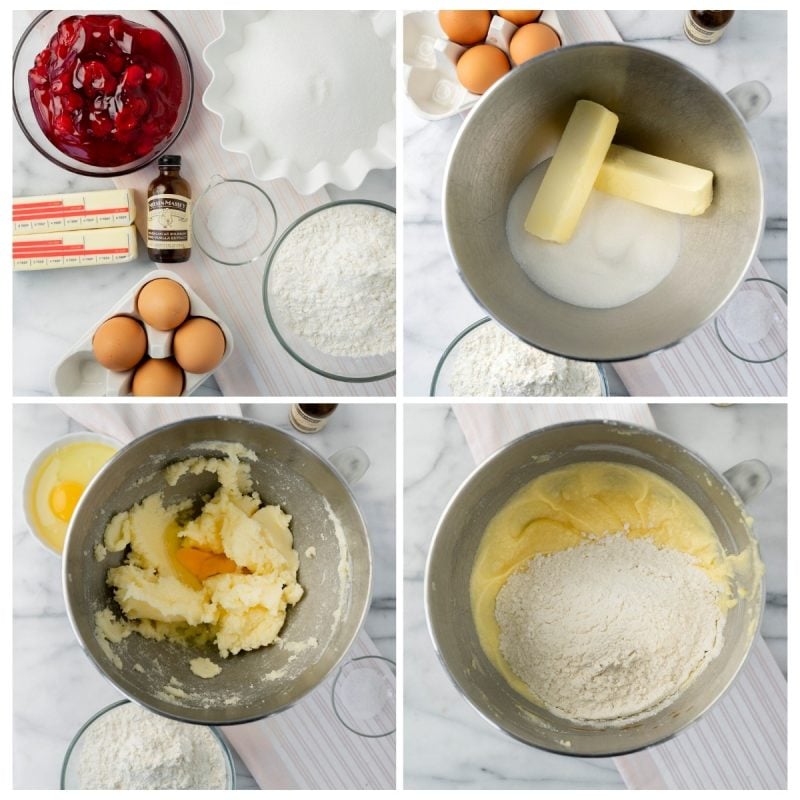
- 8 ounces butter room temperature
- 1 ½ cups granulated sugar
- 4 large eggs
- 2 teaspoons vanilla extract
- 2 cups all-purpose flour
- 1 teaspoon salt
- 1 can cherry pie filling (I used Lucky Leaf Premium Cherry.)
Instructions
- Preheat the oven to 350º F. Butter a 17"x12"x1" sheet cake pan.
- In an electric mixer, cream the butter and sugar until light and fluffy. Add the eggs one at a time and mix just until blended. Add the vanilla.8 ounces butter, 1 ½ cups granulated sugar, 4 large eggs, 2 teaspoons vanilla extract
- In a separate bowl, whisk the flour and salt together. Stir the dry ingredients into the creamed mixture just until blended. Spread the batter into the prepared pan.2 cups all-purpose flour, 1 teaspoon salt
- Mark the batter into 24 squares by pressing lightly with a sharp knife. Spoon 1 tablespoon of fruit filling into the center of each square. Do not press the filling into the batter (the batter will puff up around the filling as it bakes).1 can cherry pie filling
- Bake for 20-30 minutes or until golden brown and a toothpick inserted into the center comes out clean. Cool on a wire rack.
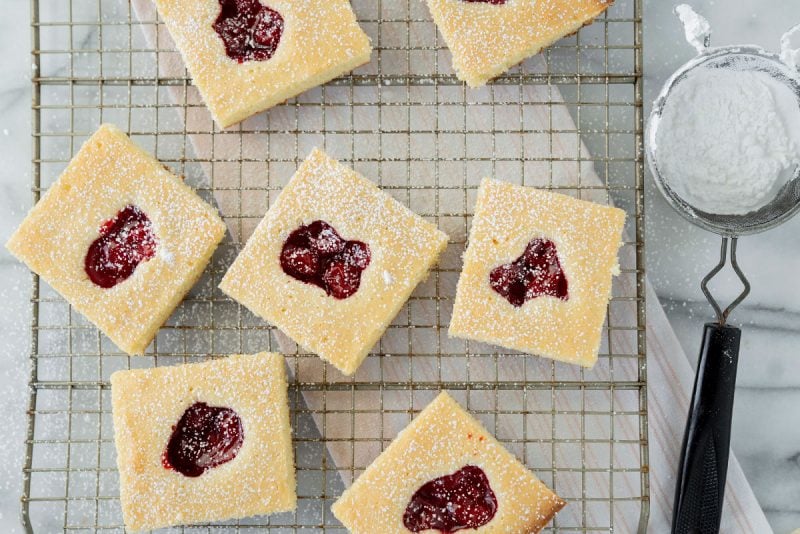
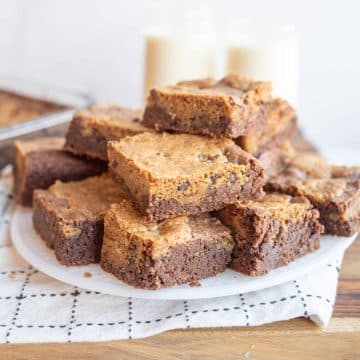
- Cut into bars and sprinkle with powdered sugar.
Notes
Nutrition
How to Make Cherry Pie Bars
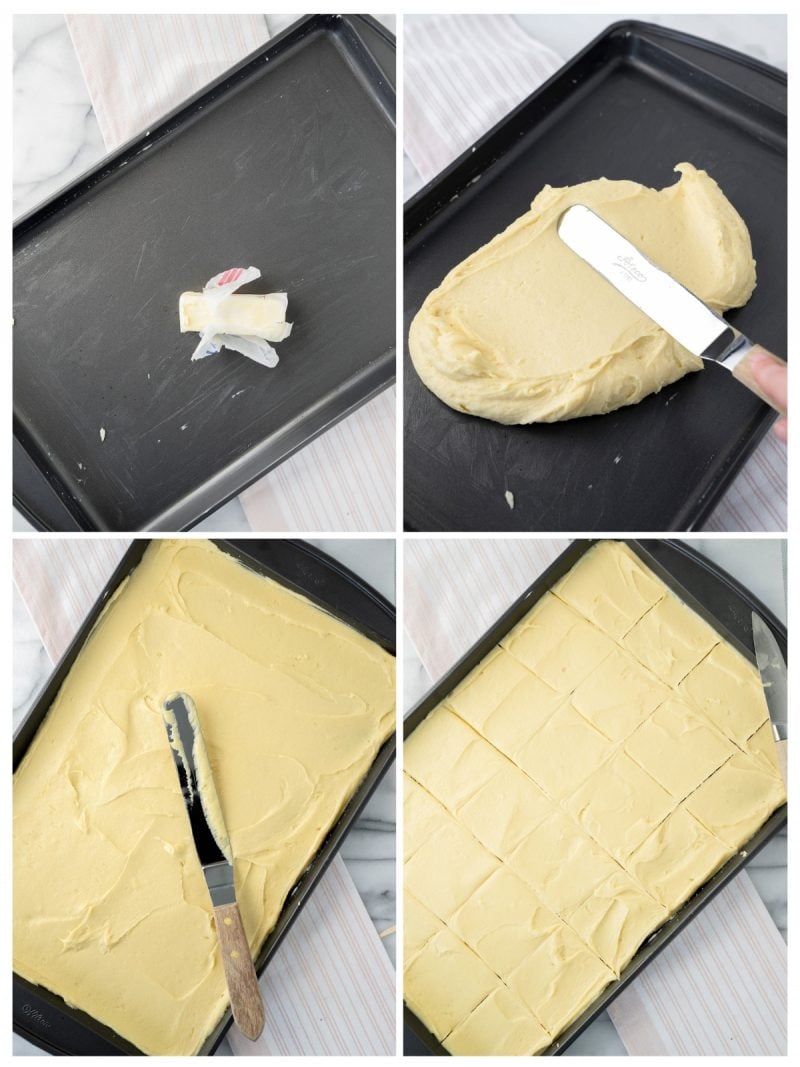
Step 1: Preheat your oven to 350°F and butter a 17″x12″x1″ sheet cake pan. In an electric mixer, cream the butter and sugar until light and fluffy, then add the eggs one at a time, mixing just until blended. Stir in the vanilla extract.
Step 2: In a separate bowl, whisk together the flour and salt. Stir the dry ingredients into the creamed mixture just until blended—don’t overmix. Spread the batter evenly into your prepared pan, making sure to reach all the corners.
Step 3: Using a sharp knife, lightly press marks into the batter to divide it into 24 squares. Spoon 1 tablespoon of cherry pie filling into the center of each marked square, being careful not to press the filling down into the batter—it will naturally settle as it bakes.
Step 4: Bake for 20-30 minutes or until the bars are golden brown and a toothpick inserted into the center comes out clean. Let the bars cool completely on a wire rack, then cut along the marked lines and dust with powdered sugar before serving.
Filling Homemade Cherry Pie Bars
To ensure that you divide the cherry filling evenly among the bars, I recommend scoring the batter in the cake pan. Use a knife to make shallow lines in the cookie dough sketching out 24 equal squares. These lines will disappear during baking.
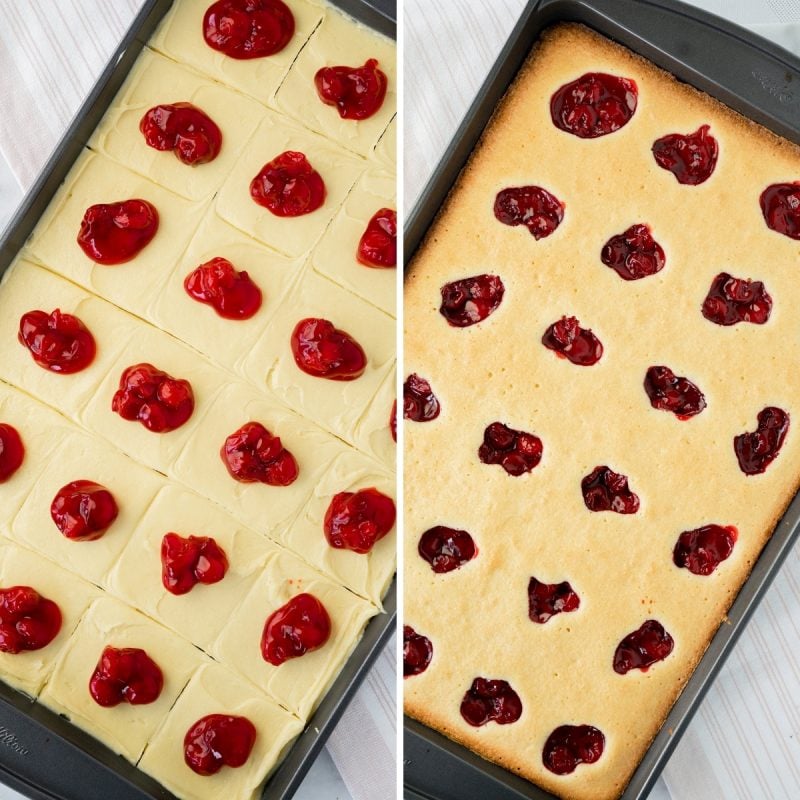
Then, spoon the cherry filling into each square. I find it helpful to make sure each square has 2-3 whole cherries as well as the filling. Then, do not push the cherries into the batter, they will sink on their own as the batter bakes.
To serve, let the bars cool to room temperature and sprinkle with powdered sugar before slicing.
Recipe FAQs
Yes, homemade cherry pie filling works beautifully in this recipe. Just make sure it’s thickened properly so it doesn’t make the bars soggy.
Yes, blueberry, apple, or strawberry pie filling all work wonderfully. Any canned pie filling can be swapped in based on your preference.
This usually happens from overmixing the batter or using too much flour. Mix just until combined and measure flour by spooning it into the measuring cup rather than scooping directly.
Expert Tips
- Room Temperature Ingredients: Let your butter and eggs sit at room temperature for 30-60 minutes before starting. This ensures even mixing and proper baking throughout the bars.
- Butter the Pan: Evenly coat your cake pan with butter, including corners and sides, by unwrapping one end of a butter stick and using it like a crayon to wipe it all around the pan.
- Use an Offset Spatula: The batter is stiffer than typical cookie dough but still spreadable. An offset spatula works best for even distribution, though a rubber spatula or large spoon works too.
- Spread to Corners: Make sure to push the batter all the way into the corners of the pan so they don’t overbrown while the center finishes baking.
Storing Cherry Bars
Store leftovers in an airtight container on the counter for up to four days. You can also freeze the bars for up to three months.
More Bar Recipes to Try
If you love easy cherry bars, give these other treats a try next:
- Key Lime Coconut Cashew Bars are zesty, bright and just sweet enough with a creamy, nutting filling.
- Fall Millionaire Magic Bars have a shortbread crust and decadence from toffee, coconut and M&Ms.
More Delicious Bars Recipes to Consider


Did you try this recipe? Leave a ⭐️ rating below and share it on Instagram.

Katherine
If I would use crushed pineapple do I use it straight out of can like I would do for cherry?
Beth
Like so many others, my mom made these in the 70s. I lost her recipe years ago. Tickled to finally find it. I never liked cherry so my mom would make mine with crushed pineapple. Can’t wait to make them again!!!
Barbara Schieving
What a fun way to change it up. Thanks for sharing Ruth – enjoy!
Peg Senholtz
Hi ! I don’t know why any of these people had a problem with the recipe ! As for the time I don’t know anyone here that doesn’t check recipes 3/4 of the way thru with a toothpick ! Maybe their ingredients weren’t fresh ?? It’s a wonderful recipe my mo made for every Ladies Home Ec meeting and for the church get together’s. New babies, birthdays and wakes all got a lovely freshly sugared plateful ! I’m taking some today to my 88 yr old cousin that just got back from the hospital ! Peach also works great !
Barbara Schieving
Thanks Peg! I’ll have to give peach a try.
Marcia
Just wondering why the recipe states to slightly beat the eggs, then later tells you to add them 1 at a time.
Barbara Schieving
Hi Marcia – I’ve updated the recipe to omit slightly beaten in the ingredients list. Just add them one at a time. Enjoy!
Lindsay
These are delicious! Thanks for sharing.
Barbara Schieving
Great – thanks Lindsay!
Jennifer
I love this recipe. We always make it with the apricot filling and use the vanilla extract though. That’s the best way. Brings back great memories.
Barbara Schieving
I’ll have to try it with apricot filling. Thanks for sharing Jennifer!
Elizabeth Schwab
This only needs to bake for 20 minutes in most ovens. And I only added 1/2 tsp. salt. Using an offset spatula helps spread
the batter evenly in the pan.
Barbara Schieving
Thanks for the feedback Elizabeth.
Kathie
Question why would filling sink and is completely covered. Did not press.
Barbara Schieving
Hi Kathie – did you cream your butter together so it gave the cake volume?
Jennifer
Just made these with my own blueberry pie filling, they were good except the time to cook is way off. I did 30 minutes and they were way over cooked!!
Ann
That’s funny, because I made my own blueberry pie filling and I just put them in for 25 minutes.
Nadine
I just tried these and followed the recipe to the “t” and the batter did not puff up at all. The pie filling just melted and spread all over the top of the batter ?. A little disappointing.
Desiree Jackson
I just made these and they did not turn out. I didn’t think the dough seemed wet enough, it was incredibly difficult to spread to fill pan. After 30 minutes, the edges were dark and a toothpick came out clean so I took it out if the oven. They didn’t really rise. I’m no chemistry expert, but don’t these need baking powder or something to help with that? I didn’t miss any ingredients. Sad because I’ve been looking for this recipe.
Angela
Seems lots of our mothers made this delicious dessert, mine included. Recently lost my well worn recipe card and delighted to find your version here. We never used almond or lemon extract but I’m looking forward to trying those variations. Just a note, I made this once with blueberry pie filling and it just wasn’t the same. Something about the tart cherries in this dense, moist butter cake makes the perfect combination. We have also decorated the top with red and green sugars for the holidays.
Barbara Schieving
Thanks for sharing Angela – I love the suggestion to dress it up with red and green sugars for the holidays.
Mary Ann
Just wanted to know if you think you could use lemon filling in place of the cherry filling. My son doesn’t like cherries and those rolls are so good. I thought maybe you could use lemon. Give me your thoughts please thank you thank you so much.
Melissa Griffiths
It should work fine though I haven’t tried it. Please let us know!
Beth C
My family has made our version of this with virtually every type of pie filling there is – blueberry is great (mix with the cherry for Independence Day), lemon is a favorite, and apple works well too!
Emily
Oh I’m so happy I found this recipe!! My mom used to make a similar recipe growing up but I couldn’t find it anywhere! I think she used to use almond extract and I have once made it with lemon extract, which was a delicious summer treat. She called it Cherry Open Window Cake. Thank you so much for bringing this recipe back for our family!!
Kathleen Peterkin
Thank you!!!! I had a similar recipe that my son loved, lost copy a couple of years ago. I am so delighted to find it again. My son is in for a treat!
Barbara Schieving
How fun – thanks for sharing Kathleen 🙂
Renee S.
My sister made these from a recipe she got from her sister-in-law. They are amazing . I was so happy to get the recipe myself from your site. I am going to make them tomorrow. I can’t wait. 🙂 I would recommend this recipe to everyone 🙂