You can make a great crusty loaf of homemade French bread right in your kitchen. I adapted Julia Child’s classic recipe for modern kitchens to make an easy bread recipe perfect for bakers of all levels.
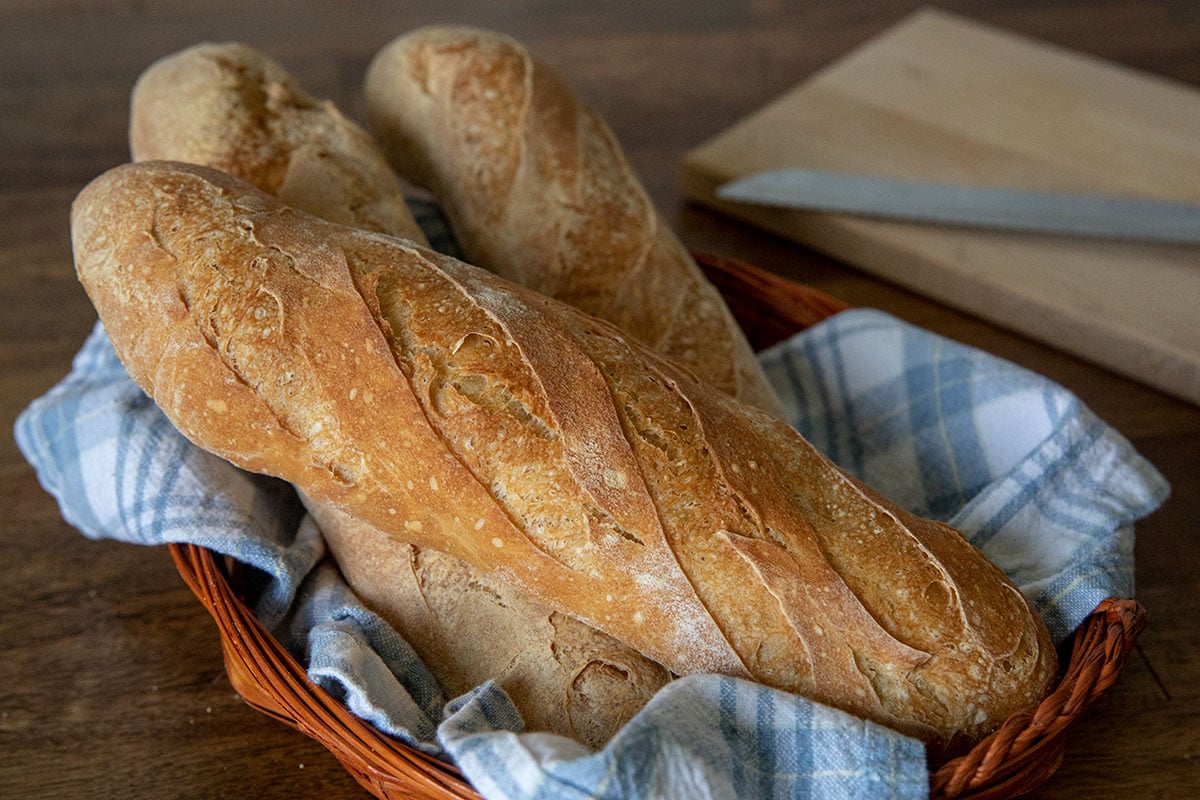
As a lifelong fan of Julia Child, I’ve been making her fabulous French recipes for years. And her Homemade French Bread is one of my all-time favorites. I’m thrilled to share my adaptation of Julia’s recipe with you!
Julia Child’s Pain Français (French Bread) recipe was published in Mastering the Art of French Cooking, Volume II in 1970. It became an instant classic, and like so many of Julia’s recipes, proved that the average home cook could make beautiful loaves of French Bread in her own kitchen.
Update: I first wrote this post to celebrate Julia’s 100th birthday. Well, that was back in 2012, so to celebrate her 108th birthday, I’ve updated it with more helpful hints and troubleshooting tips so you can make homemade loaves that would make Julia proud.
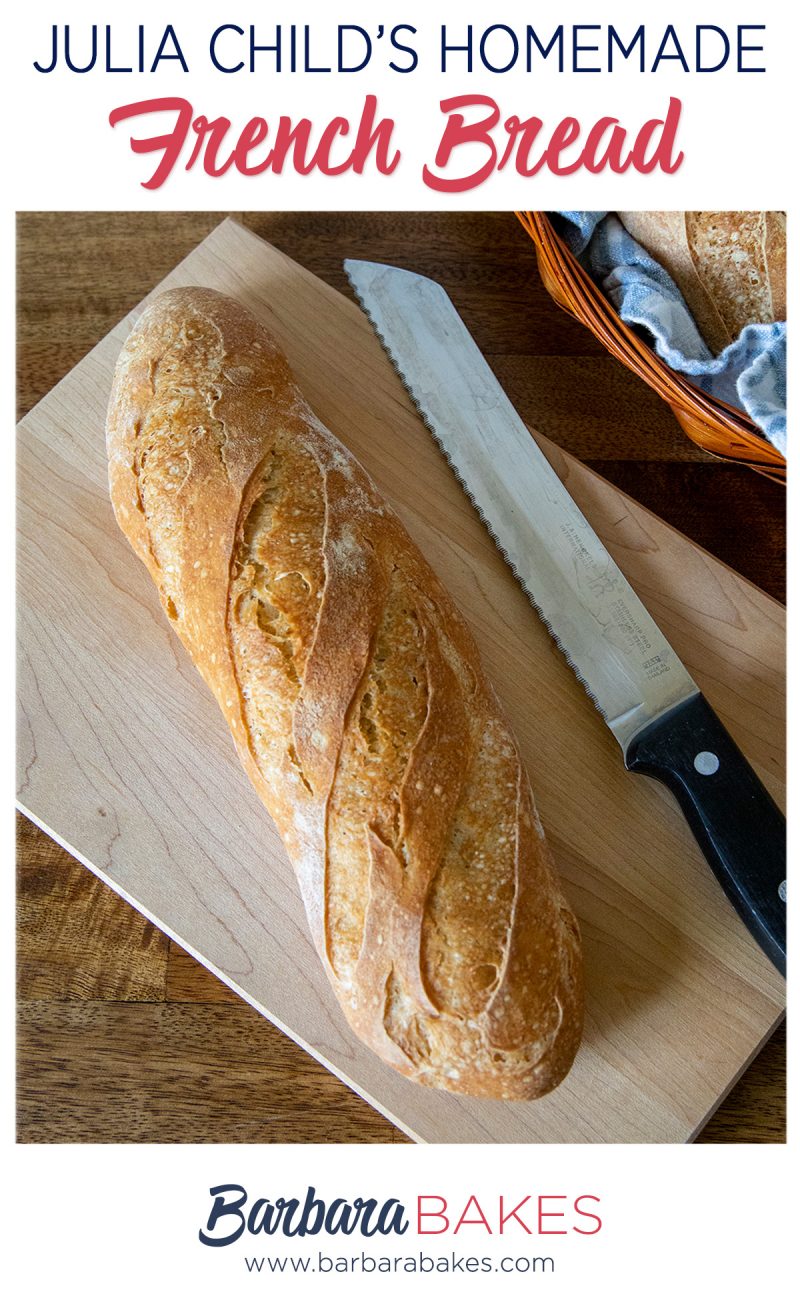
If you’re a little uncertain of making French bread at home, there’s a great video of Julia making French bread. She shows you step by step how the dough should look and how you shape the dough to make a beautiful loaf.
How To Make French Bread At Home
It’s easier than you think to fill your kitchen with the mouthwatering scent of freshly baked French Bread.
If you want to have French bread for dinner, you need to start this recipe first thing in the morning. The recipe requires two long rises to develop a flavorful dough.
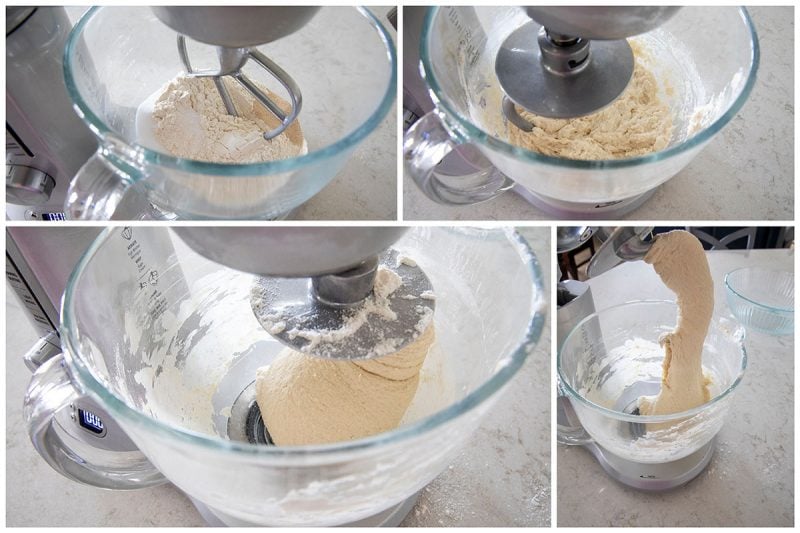
I simplified Julia’s original recipe to use a stand mixer. I rarely knead dough by hand because the mixer makes it so easy, but if you don’t have a mixer, you can mix the dough by hand.
The dough itself is a simple combination of flour, water, salt and yeast. Start by mixing the dry ingredients together for just a few seconds in the stand mixer. Then, slowly stream in the water with the mixer running.
Once a shaggy dough forms, switch to the dough hook attachment. The hook does a better job of kneading the dough than the paddle. Let the machine knead the dough for about 5 minutes on medium speed.
The dough is done kneading when it’s smooth, elastic and can be stretched easily, but it is still slightly sticky. See below for the telltale signs of a well-kneaded dough.
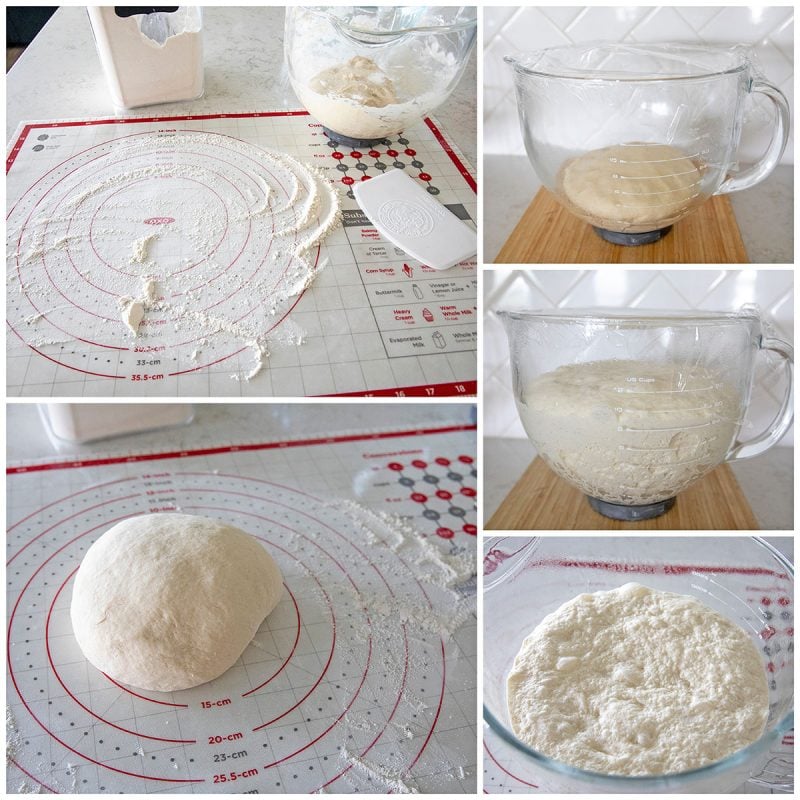
Remove the dough from the mixing bowl, grease the bowl with cooking spray, return the dough to the bowl, cover and let rise for 3 hours. The dough should increase by 3 ½ times.
Then gently remove the dough from the bowl and fold it over a couple of times to redistribute the gases. It should be light and pillowy soft.
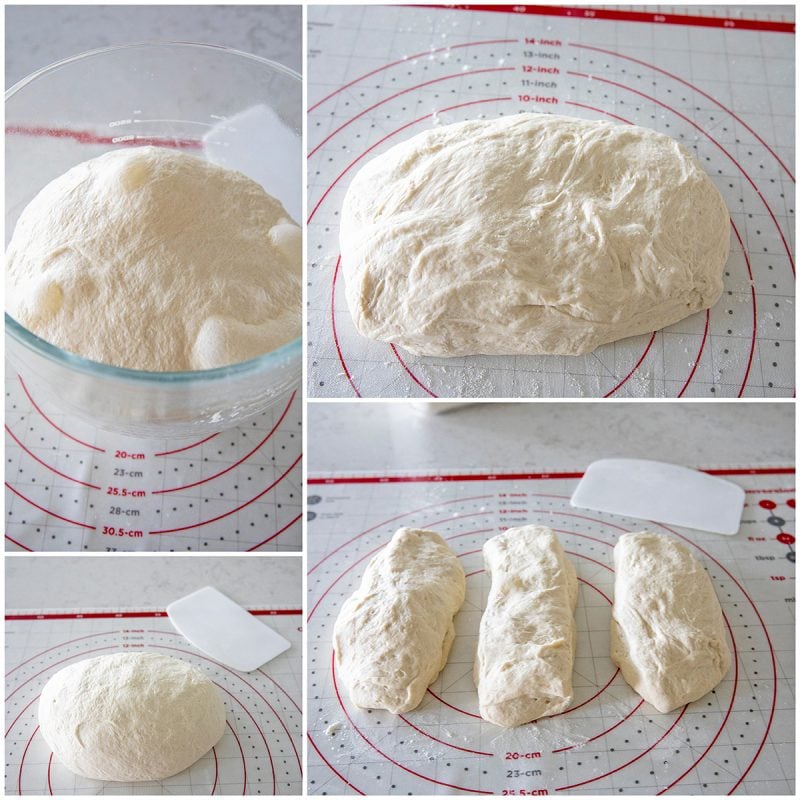
Let it rise for a second time until it grows 2 to 3 times in size, about 1½ to 2 hours.
After the second rise, the dough is ready to be shaped before its final rise, before baking it in the oven.
How to Shape and Score Homemade French Bread
Start by weighing your dough and dividing the total weight by the number of loaves you want to make. This French Bread recipe will make three small loaves. Or, if you don’t mind loaves that are the exact same size, just use a bench scraper to divide the dough into three pieces..
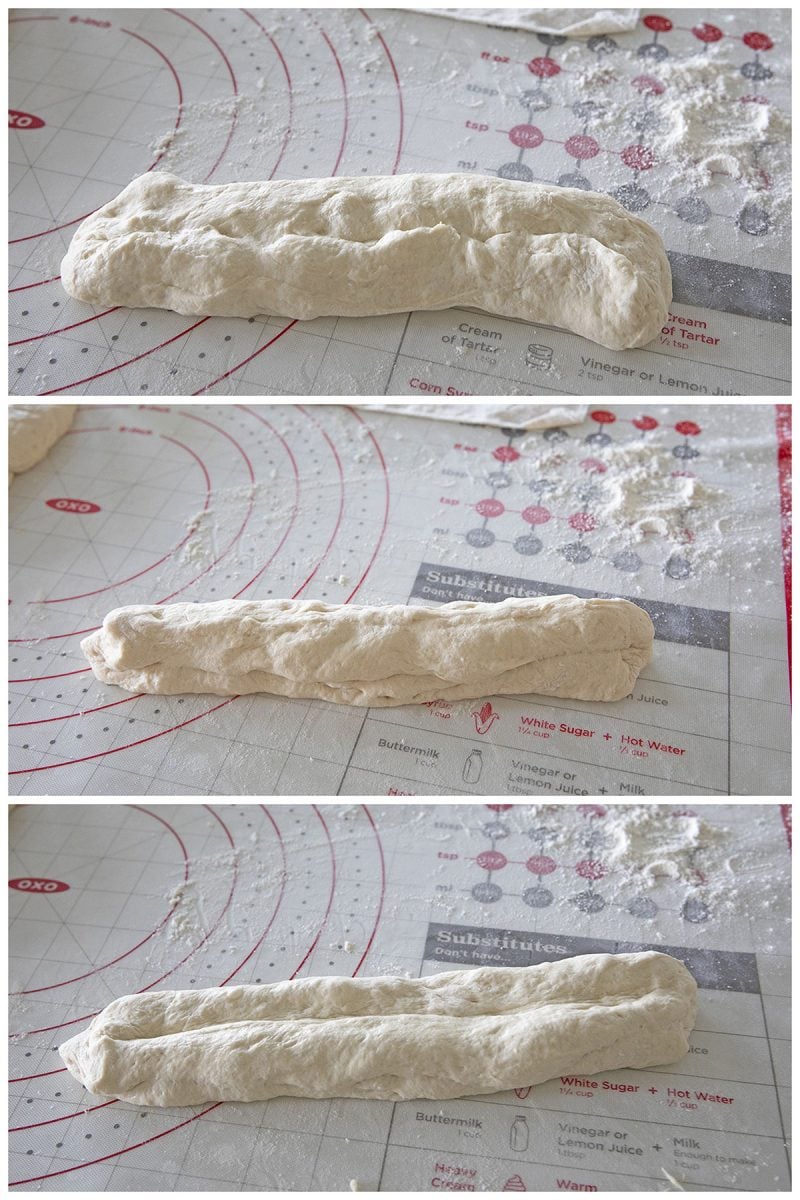
Shape the baguette by gently stretching one side of the dough on top and then fold the other side on top.
Make a well down the middle and stretch the sides together. Then use two hands to gently roll the dough back and forward to elongate the bread. (If you have questions about shaping the loaves, Julie shows you how in this video.)
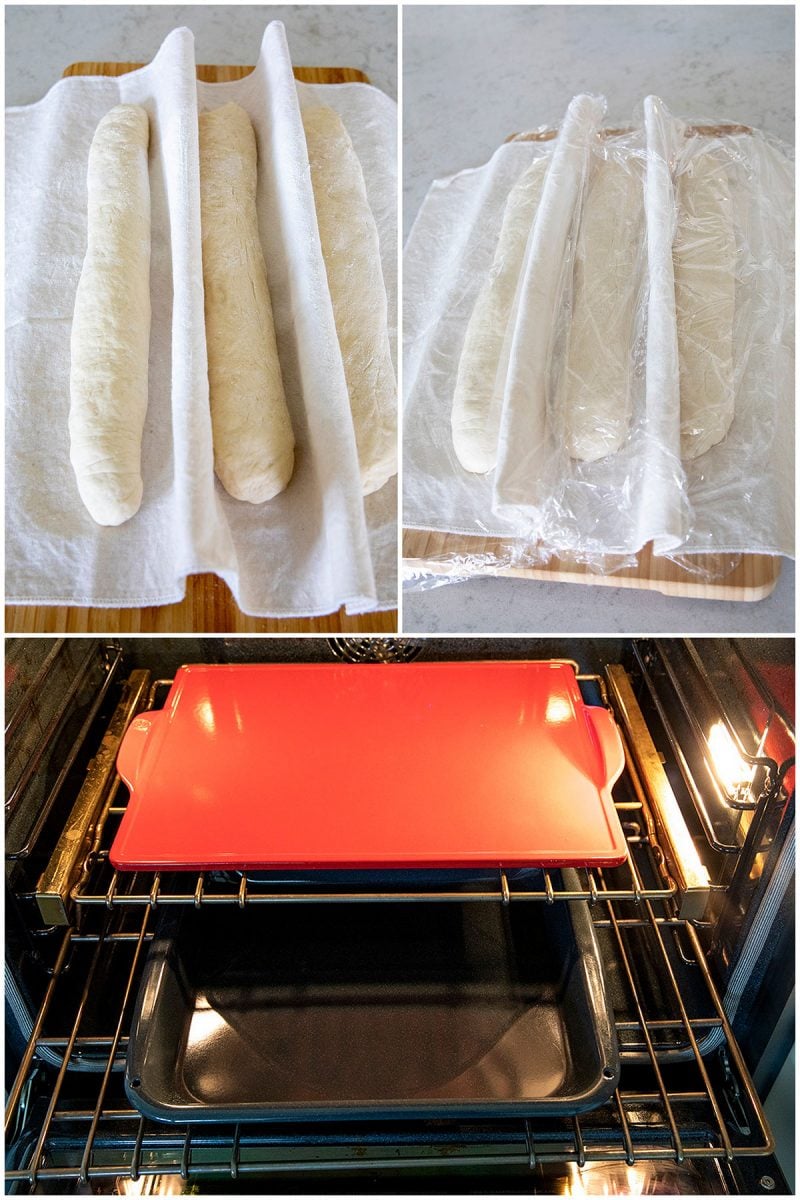
Then when your loaves are shaped, transfer them to a proofing cloth or parchment paper for the final rise.
Cover them with plastic wrap or a dish towel and let the loaves rise for the final time. They should nearly triple in volume over the course of 1½ to 2½ hours.
While your loaves are rising, heat your baking stone in a hot oven at 450°F. Place a roasting pan on a rack beneath the baking stone or rack where you’ll bake your loaves.
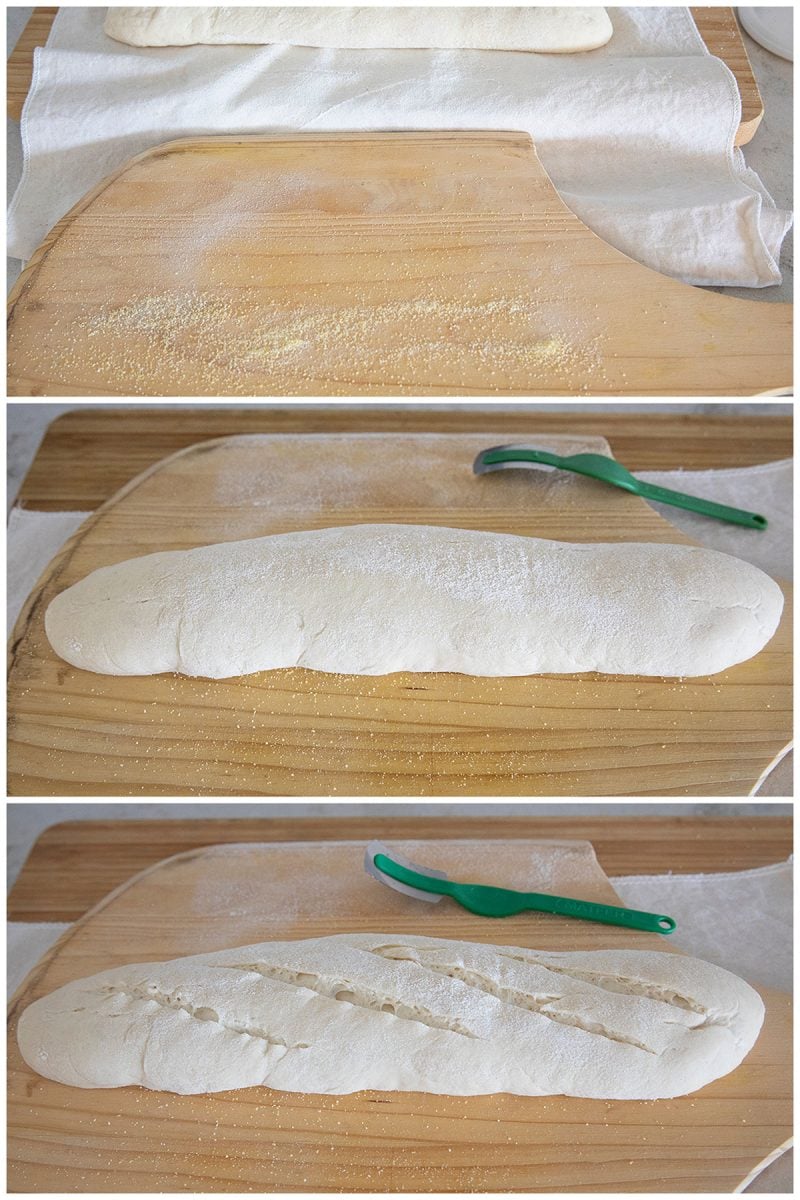
Before baking, score your loaves. You can use a lame, which is a fancy term for the blade that bread bakers use to score bread. A sharp knife or a straight razor will also work.
Quickly spritz the dough with water before transfering the shaped loaves to a baking stone with a peel. Alternative, if you’re not using a baking stone, simply slide the baking sheet with the shaped loves directly into the oven.
Transferring the dough to the pizza peel can be a delicate operation, so you can also rise your bread on parchment paper and put it on the pizza stone in the oven on the parchment paper. If you bake your bread on parchment paper, remember to remove the paper 10-15 minutes into baking.
Pour 1 cup of water into the roasting pan in the oven and quickly close the door to prevent much steam from escaping.
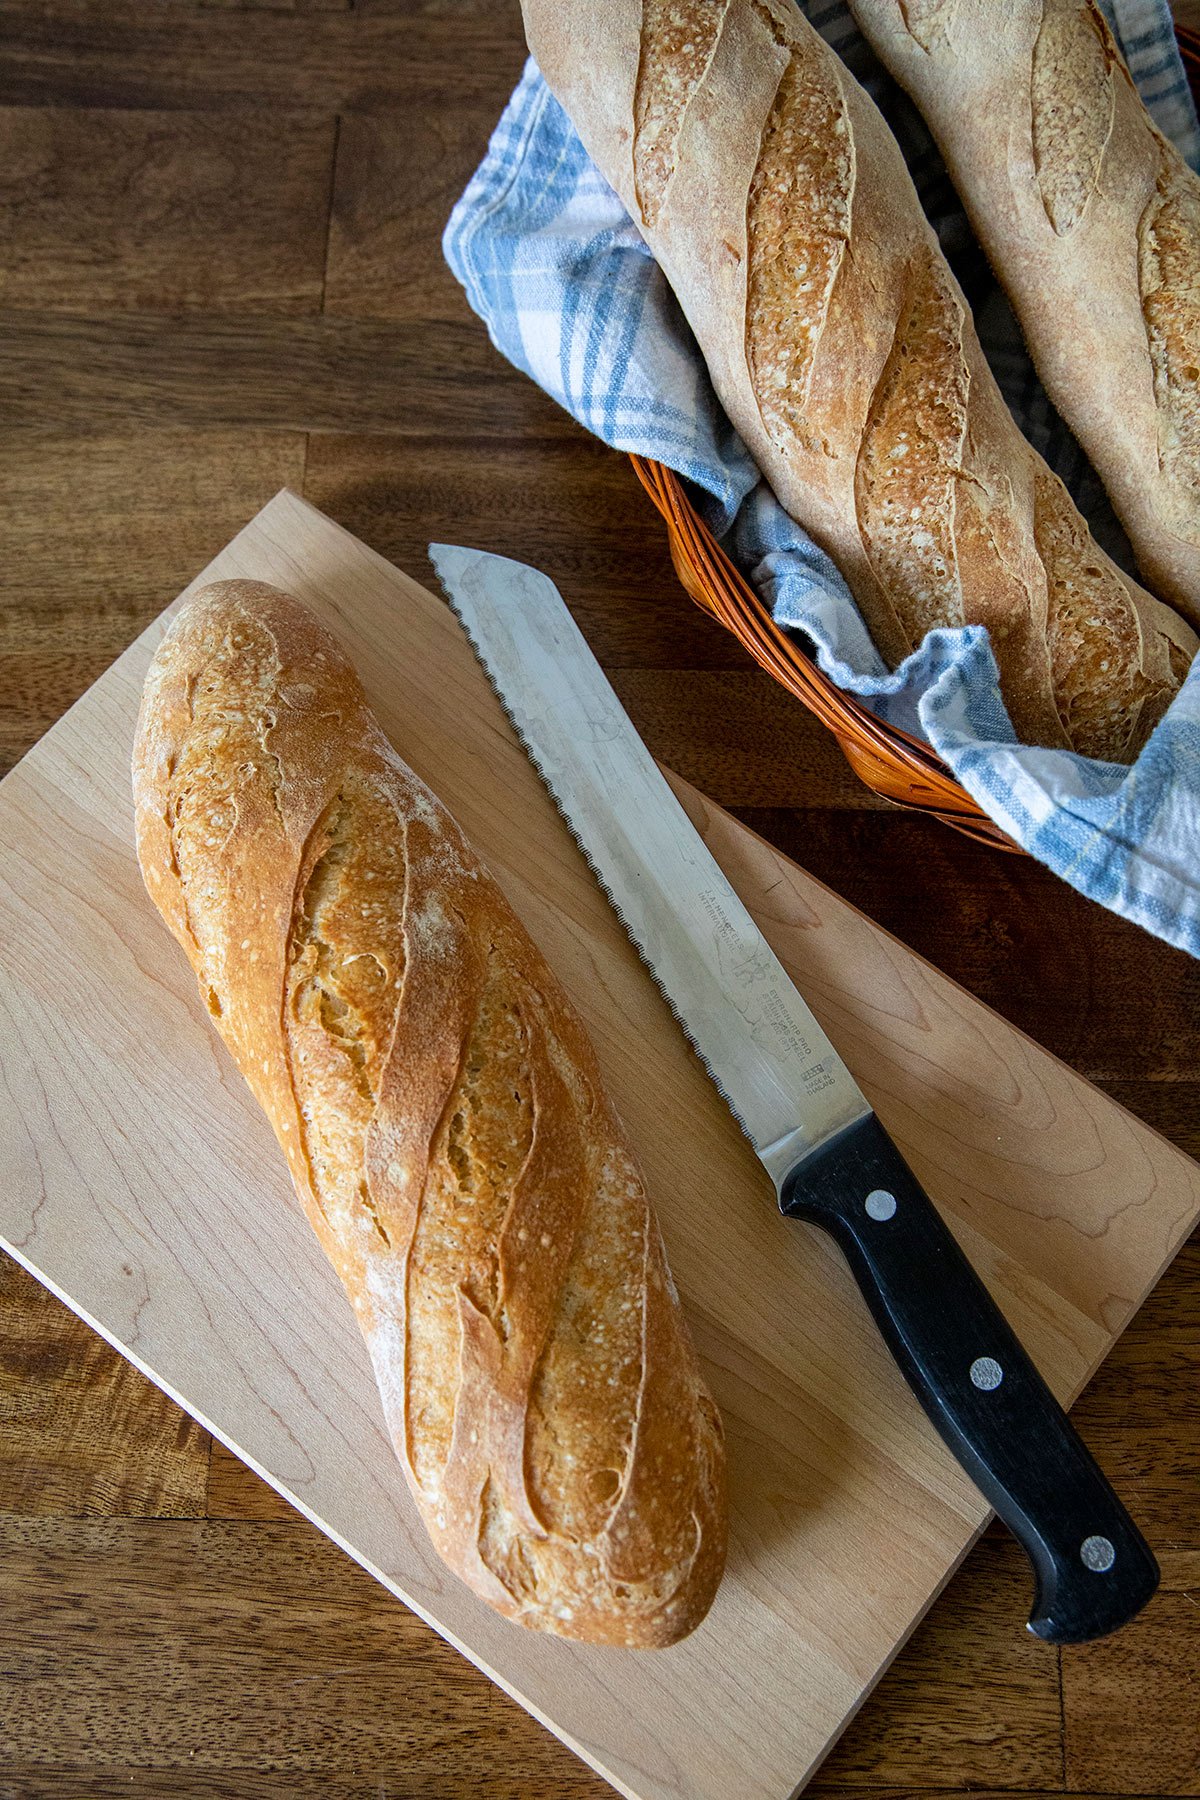
Bake for about 25 minutes, until the dough is nicely brown on top.
And here’s the hardest part: try to let the bread cool for a couple of hours before cutting it, if you can. If you cut the bread before it’s cool the inside of the bread can be a little gummy instead of light and airy.
Troubleshooting Homemade French Bread
How Do I Know When To Stop Kneading The Dough?
Whether you knead the dough in your stand mixer or by hand, there are a few tell-tale signs that your dough is done keading and ready to rise. First, the dough will be smooth and slightly sticky to the touch. It should have a lot of spring to it, which you can test by poking the dough with your index finger. The dough should pop back easily.
You can also do a windowpane test to ensure your dough is ready. Pick up the dough and grab hold of two sides. Slowly pull the dough apart. The dough should not tear easily as you pull, but rather should form a “windowpane” in the center of opaque dough that you can nearly see through, but doesn’t rip apart.
Why Isn’t My Dough Rising?
If your dough is not rising as you’d expect, the weather might be playing a role. Cold temperatures make dough rise more slowly, so try moving the dough to a warm place in your house. Often, just sticking it inside an oven that’s off is warmer than on your kitchen counter.
How Do I Develop A Nice Brown Crust On My Homemade Bread?
Using the pizza stone and a tray of water underneath helps to simulate a bakers oven and will give you a beautiful crisp crust.
The addition of moisture in the oven helps develop a golden crisp crust. If you skipped spraying the loaf before or during the oven, or you didn’t add water to a pan, you won’t get the crust you’re looking for. As the water evaporates in the oven, it crisps up the outer layer of dough.
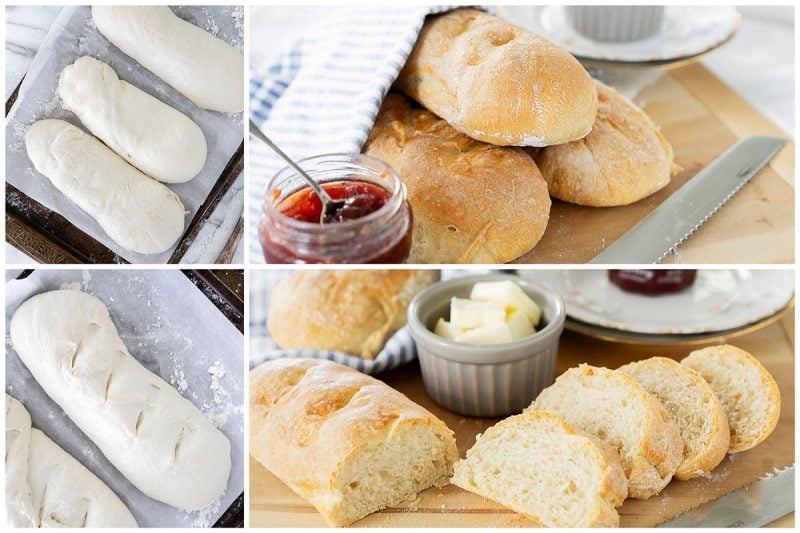
If you don’t have a pizza stone, you can still get gorgeous looking loaves, like the loaves pictures above, by baking your loaves on parchment paper on a baking sheet.
What Type of Yeast To Make French bread?
Both instant yeast and active dry yeast will work in this recipe.
As long as you are using yeast that’s not expired, there’s no need to activate the yeast, mix it with warm water, before adding it to the flour.
What Equipment Do I Need to Make Homemade French Bread?
You don’t need much special equipment to make a perfect loaf of homemade French Bread, though there are a few items I find especially useful. For example, I like to use my stand mixer to knead the dough, but you could certainly do it by hand. Of course, that’s how Julia did it.
Other readers have made this recipe in a bread machine, which is another great way to make this recipe even simpler!
Julia calls for rising the loaves on linen, but you can use parchment paper. Plus, the parchment makes the loaves easy to move onto the baking stone.
A peel is an excellent tool to transfer your loaves to the oven. If you don’t have one, it’s best to do the final rise of the shaped loaves on the baking sheet you’ll use to bake them. That way, the entire pan goes straight into the oven to bake.
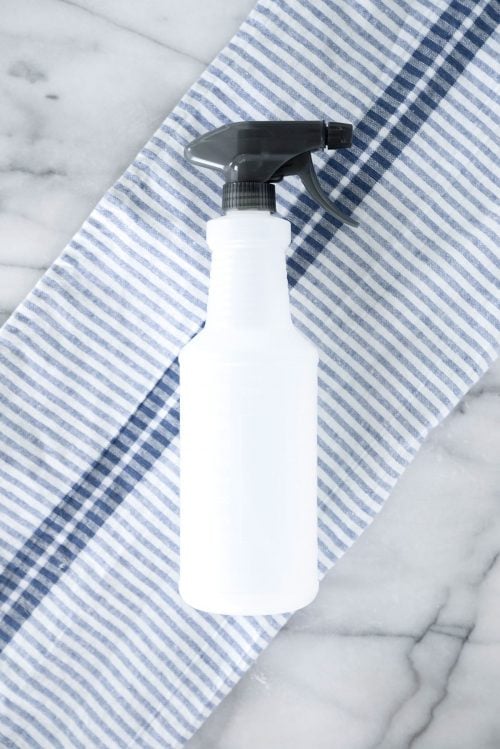
A spray bottle is also helpful to moisten the dough before it goes into the oven and while it cooks.
The number one tool I’d recommend for perfect French bread is a pizza stone. You can certainly make homemade bread without one (just use a baking sheet), but a hot stone helps ensure that the crust gets delightfully crisp and golden. It’s fantastic for other recipes too, especially pizza!
More Favorite Recipes from Julia Child
If you love Julia and her recipes as much as I do, you must try these other fantastic dishes:
- Boeuf Bourguignon is the epitome of French comfort food: tender beef in a dark, rich red wine sauce. We also adapted it for the pressure cooker for fast weeknight Boeuf Bourguignon.
- Croissants are the flaky, buttery pastry that I probably don’t need to convince you are divine. This is a wonderful project recipe to make with friends or kids.
- Chocolate Almond Cake, posted on Apron Strings, marries two of my favorite flavors, chocolate and almonds, into a moist, dense cake.
- Oven Roasted Plum & Almond Cakes from Passionate About Baking are adorable individual cakes with soft, jammy plums tucked inside.
- Julia Child’s Eggplant Pizzas, posted on Kalyn’s Kitchen, are an easy, approachable and tasty Italian-inspired dinner that happens to be low-carb.
- Jarlsberg Cheese Souffle, posted on LaFuji Mama, is a true show-stopper. Cut it open and your guests will be “ooing” and “aahing” all dinner long.
More Easy & Delicious Homemade Bread Recipes
If you caught the bug and can’t wait for your next loaf of home baked bread, join the club! Here’s what I’m baking up as soon as possible:
- Overnight English Muffins are the buttery, doughy breakfast guaranteed to have you springing out of bed in the morning!
- Braided Challah Bread from That Skinny Chick Can Bake is a classic yeasted bread that’s simple to make but beautiful to present.
- Cranberry Citrus Cream Cheese Sweet Rolls, because we can’t forget the sweet stuff.
Thanks Julia for sharing your passion for cooking, your reminders to never apologize if something you bake is less than perfect, and to be fearless in the kitchen and in life.
Julia Child’s French Bread
Equipment
Ingredients
- 2 ¼ teaspoons 1 packet instant or active dry yeast
- 3 ½ cups all-purpose flour*
- 2 ¼ teaspoons salt
- 1 ½ cups warm water 120º – 130º
- Cornmeal for pizza peel optional
Instructions
- In the mixing bowl of a stand mixer using the flat beater, combine the yeast, 2 ½ cups flour and salt. Mix on low for about 30 seconds.
- With the motor running on low, pour in the warm water. Continue mixing until a shaggy dough forms. Clean off beater and switch to the dough hook. Mix in the remaining cup of flour a little at a time, to make a soft dough, adding more or less flour as needed. Knead the dough for 5 minutes. The surface should be smooth and the dough will be soft and somewhat sticky.
- Turn the dough onto a kneading surface and let rest for 2 – 3 minutes while you wash and dry the bowl and spray it with non-stick spray.
- Return the dough to the mixing bowl and let it rise, covered, at room temperature (about 75º) until 3 ½ times its original volume. This will probably take about 3 hours.
- Gently deflate the dough and return it to the bowl. Let the dough rise at room temperature until not quite tripled in volume, about 1 ½ – 2 hours.
- Meanwhile, prepare the rising surface: rub flour into canvas or linen towel placed on a baking sheet. (You can use parchment paper.)
- Divide the dough into 3 pieces. Fold each piece of dough in two, cover loosely, and let the pieces relax for 5 minutes.
- Shape the loaves and place them on the prepared towel or parchment. Cover the loaves loosely and let them rise at room temperature until almost triple in volume, about 1 ½ – 2 ½ hours.
- Preheat oven to 450º. Set up a "simulated baker’s oven" by placing a baking stone on the center rack, with a metal broiler pan on the rack beneath, at least 4 inches away from the baking stone to prevent the stone from cracking.
- Transfer the risen loaves onto a peel sprinkled with cornmeal.
- Slash the loaves.
- Spray the loaves with water. Slide the loaves into the oven onto the preheated stone and add a cup of hot water to the broiler tray.
- Bake for about 25 minutes until golden brown. (If you used parchment paper you will want to remove it after about 10-15 minutes to crisp up the bottom crust. Spray the loaves with water three times at 3-minute intervals.
- Cool for 2 – 3 hours before cutting.
Notes
Note: *more flour will be required for dusting and shaping the dough, and you may need more or less flour when mixing the dough as described in step 2.
Nutrition
Pin It:




David
Hi,
The amount of salt in the baguette recipe seems excessive, 12.8 gr, which is 2.85% of flour weight. Standard recipes call for 2.0% of flour weight. Is this an error?
Thanks,
David
Sophie
Not sure if I am reading to quickly but where in the instructions does it say how to use the yeast?
Melissa Griffiths
It’s in step 1 of the recipe! Hope that helps!
Vera
The truth will be revealed in a couple hours, but the second and third rise, my dough never did rise. The first rise it almost doubled in size. Don’t know what I did wrong, but hoping it still taste good when it comes out of the oven in about 20 minutes.
gina
Can I do the mixing in a bread maker then take it out and let it rise and knead it the appropriate number of times?
Melissa Griffiths
I think that would work great!
Steph
I am not the type of person who heavily modifies a recipe and then comments. I will say this recipe is amazing as is! However I ordered French T55 flour from amazon and used an emile henry mini baguette baking dish so it made 5 smaller baguettes. This made for a life changing version of this splendid recipe!
Rehoboth
Nice post
David Bassham
Just want to Thank You for spending the time on this website/blog. I haven’t made this yet, but I intend to. Have to wait for a weekend.
Lynsey
I’ve made this twice now and both times the loaves have barely risen once shaped and don’t brown at all in the oven but taste great – I can’t figure out what’s going wrong!!!
Melissa Griffiths
How fresh is your yeast? Do you know if your oven is accurate? Any other changes? Happy to help!
Mike
this is my go to recipe for baguette if I decide to put the dough in the frige overnight after knealing do you think I should cut back on the amount of yeast and the next day should I follow the directions the same way for 2nd rise and shaping…..thank you
Melissa Griffiths
I wouldn’t cut it down but a cold ferment overnight generally lends to a really nice baguette texture. I would just follow the rest of the instructions the next day and give it a little time to warm up.
Mike
thank you love this recipe
Ginger
I don’t understand this flour to water ratio. It was more like a batter than a dough. I added a bit at a time, and probably almost doubled the flour, and obviously more yeast. I ended up with 4 loaves. Will taste it tomorrow, but it smells and looks yummy.
Barbara Schieving
Hi Ginger – for French bread you do want a higher hydration level. Here’s a good explanation https://www.kingarthurbaking.com/blog/2021/08/16/with-bread-is-wetter-better-high-hydration-dough but I’m sure your loaves will be delicious, but perhaps not as open a crumb as a typical French bread.
Luca
What can you use if you don’t have a pizza stone?
Melissa Griffiths
You can use a rimless baking sheet or a rimmed on turned upside down!
Happycamper12000
Biggest downside to this recipe is that it’s not possible to do if you have literally ANYTHING ELSE going on. Let it raise 3 times, so this than and the other. If this bread is bad I may just freakout. It’s in the oven now and just read spray with water every 3 mins and just about freaked out. I have literally worked at a bread bakery where we made tons of different breads, guess how many needed this over the top BS? None.
Barbara Schieving
Hi Happy camper – You do get better browning in a home oven by spritzing it with water as Julia Child recommends, but of course, if you prefer to simplify you don’t have to follow her instructions. The three rises add flavor to the bread but if you only want to do 1 or 2, do what works for you.
BreadHead83
Oh my gosh….it was so worth the time and effort. This was perfect for a relaxed winter weekend day at home. While you do have to be available every couple hours to punch down, kneed, shape, etc, you can be busy with other things in the in-between time. Again, it was so worth it. When I took my first bite, my daughter looked at me and said, Mom, what’s wrong? Don’t cry!” I told her, “I’m not crying! I’m just so very happy!” Lol
Barbara Schieving
That’s the best review ever. Thanks so much! I’m so glad you loved the bread.
Hugh Cruik
First rule of baking bread: never freak out. What’s the point? I’ve also worked in a bread bakery and I have never, ever had a loaf come out “bad.” Maybe it didn’t come out exactly as I wanted it to but every loaf is still edible and delicious. If you don’t like interacting with the dough a few times over the course of half a day then just go with no-knead breads.
Janell Brumfield
I have made this bread every day for over a week and it’s turned out really good but I can’t get big holes inside my bread , help me plaese what am I doing wrong ? 🙏🎶♥️😂!
Melissa Griffiths
Have you tried measuring out your flour? Sometimes if you are a little heavy on the flour it doesn’t make the same light holes.
Zsa Zsa Gabor
Dear Unhappy Camper
You will find that if you follow the recipe exactly you will get the desired result. But since you “worked in a bakery” you probably thought that you knew better and didn’t follow the recipe. Good luck with that!
Tim Ryan
Thanks for this, you had me at mixer. My first attempt was pretty good, looking forward to the second, I think more water in the pan and a pizza stone. I’m wondering though, for the first rise, can I let it rise overnight? TIA
Barbara Schieving
Hi Tim – I haven’t tried it with this recipe, but I often let doughs rise overnight in the refrigerator.
Tim Ryan
Barbara, thanks for the reply and just to make sure I understand since I’m new to rising breads. Do you let it rise first and then put it in the fridge? Or actually let it rise in the fridge? I only ask because I thought that the dough needed to be warm to rise. Thank you.
Barbara Schieving
You can do it either way, but if you let it rise first, you may have to punch it down a couple of times. It’s easier to refrigerate after kneading. Here’s more info https://redstaryeast.com/yeast-baking-lessons/postpone-baking/
Tim Ryan
Thanks for the answers and your patience. This is what happens when engineers bake. 🙂
Barbara Schieving
Always happy to help – have fun!
Judy Lamantia
First rise… My dough has almost doubled in size in about 1 hour! Refrigerate it
to slow it down or just proceed with it as it is?
Barbara Schieving
Hi Judy – the longer it rises, the more flavor it gets, so you can refrigerate it to slow it down, but it isn’t necessary if you prefer to just go ahead and proceed. Just keep a close eye on the final rise so it doesn’t rise too much.
Dorian
These were wonderful. Made this recipe, but used a baguette pan instead of a baking stone. Followed all the other directions including spraying the baguettes in the oven and the pan of hot water under the baguette pan. Just lightly greased the baguette pan with butter. Did not use any parchment paper. Scored the tops of the two long loaves. These turned out beautifully.
Definitely a time investment with all the proofing/rising, but did it on a slow day at home. Good taste and texture. Will do again when I have time!
Barbara Schieving
So nice to hear you loved the recipe – thanks Dorian. I’ve been thinking about buying a baguette pan.
Carole R Pratt
what about the cornmeal??
Barbara Schieving
Hi Carole – the cornmeal helps keep the risen dough from sticking to the peel. I’ve updated the directions. Enjoy!
Carol
Well that looks delicious. I don’t think I’d have the patience to make it but I love reading all the steps! That’s definitely a labor of love.
Barbara Schieving
Thanks Carol! I think you’d be surprised just how easy it is. Time-consuming yes, but definitely fun.
Judy
As an experienced pressure cooking instructor, is there any way to use the pressure cooker for this recipe? Thanks.
Barbara Schieving
Hi Judy – excellent question 🙂 Yes, you can use the pressure cooker/ Instant Pot to proof/rise the French bread dough more quickly. You can do Steps 4 and 5 like this https://jenuinehome.com/proof-dough-in-instant-pot/ and then continue with step 6 on as written. Have fun!
Sandy
My poor loaves deflated when I transferred them to my baking tray. Three hours of proofing wasted. Very sad. If anyone has tips for how not to deflate their loaves I would be more than happy to hear it.
Barbara Schieving
Hi Sandy – sorry you had trouble transferring your bread. As I noted above in the blue box – Transferring the dough to the pizza peel can be a delicate operation, so you can also rise your bread on parchment paper and put it on the pizza stone in the oven on the parchment paper. If you bake your bread on parchment paper, remember to remove the paper 10-15 minutes into baking. You can also rise and bake your bread on a baking sheet on parchment paper so you don’t have to transfer your bread at all.
Also, you can deflate and reshape dough – here’s more info https://www.kingarthurbaking.com/blog/2018/02/21/over-proofed-dough#:~:text=On%20the%20right%3A%20the%20forgotten,discernible%20difference%20between%20the%20two.