
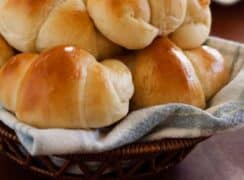

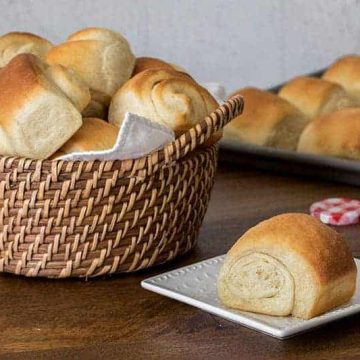
Nothing beats the smell of fresh Homemade Crescent Rolls baking in your oven, filling your kitchen with that warm, buttery aroma. Making them from scratch might seem intimidating, but this recipe proves just how simple and rewarding it can be!

WANT TO SAVE THIS RECIPE?
Enter your email below and we’ll send it straight to your inbox. Plus you’ll get great new recipes from us every week!
🥐Making crescent rolls from scratch costs significantly less than buying frozen varieties, especially when feeding a crowd!
My 2 Best Tips For Making Homemade Crescent Rolls
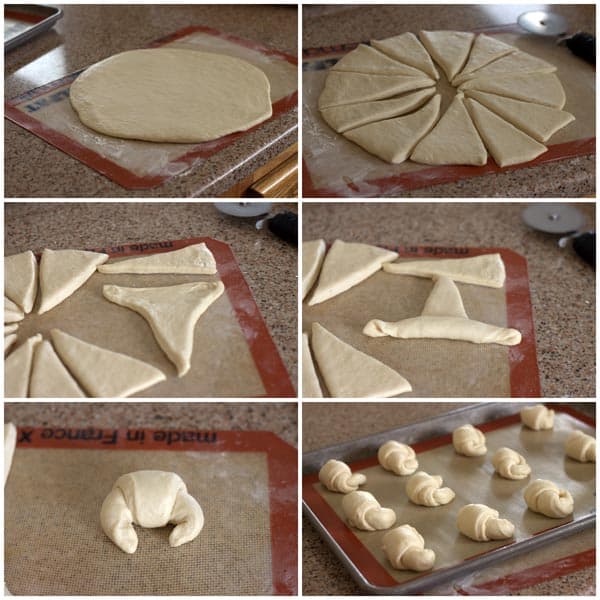
Proper Shaping: When rolling out the dough circles, work from the center outward to maintain even thickness throughout. Stretch the dough gently as you roll each triangle to create the characteristic crescent shape without tearing. Don’t skip the slight stretching step – it helps create those beautiful, elongated crescents.
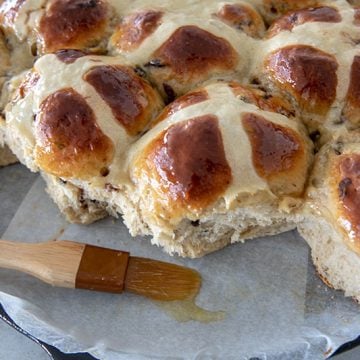
Golden Finish: Brush the rolls with melted butter immediately after baking while they’re still hot – this creates that gorgeous golden sheen and adds extra flavor. The butter will soak into the crust slightly, creating an irresistible texture contrast. Don’t skip this final step as it makes all the difference in presentation.

I use bread flour instead of all-purpose to make these crescent rolls absolutely exceptional. This creates incredibly tender, flaky layers that rival any bakery!
These buttery crescents pair beautifully with holiday dinners, Sunday roasts, or weeknight pasta dishes. They complement almost any meal, and they have become a regular feature at my dinner table because everyone always asks for them.
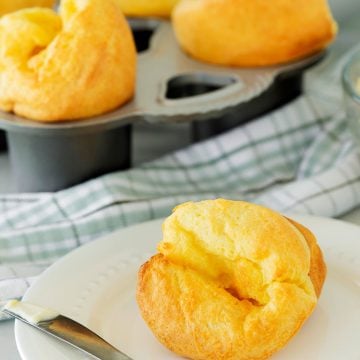
You can also enjoy them on their own for breakfast or an afternoon treat! My favorite way is split open with butter and a drizzle of honey, or even with a bit of jam for something special.
🩷 Melissa
WANT TO SAVE THIS RECIPE?
Enter your email below and we will send it straight to your inbox. Plus you will get great new recipes from us every week!

Perfect Homemade Crescent Rolls Recipe
Ingredients
- 2 cups water
- 2 eggs
- ⅓ cup shortening*
- 6 ½ cups bread flour
- 2 teaspoons salt
- ½ cup sugar
- 2 packages 4 ½ teaspoons active dry yeast**
Instructions
- Measure 2 ½ cups of the flour into a large mixer bowl. Add yeast; blend.
- Combine water, shortening, sugar, and salt in a pan or microwave safe bowl. Heat until warm (120°-130°F), stirring constantly.
- Add liquids to flour-yeast mixture. Add eggs. Beat 1 minute at low speed. Scrape down dough from sides of bowl. Beat 3 more minutes at high speed.
- Switch to the dough hook, and, on low speed, gradually add the remaining flour. Add more flour as necessary to form a soft dough. Scrape down dough from sides of bowl.
- Cover bowl first with wax paper, then with aluminum foil. Refrigerate no more than 3 days for best results. Punch down dough every 30 minutes for the first few hours until it is chilled, then once a day.
- When ready to make rolls, divide the dough in to thirds. Refrigerator remaining dough until ready to shape.
- To shape crescent rolls: Roll ⅓ of the dough into a 10-inch circle. Cut into 12 pie-shaped pieces. Roll each piece of dough from the wide side toward the point, stretching the dough slightly as it is rolled. Place on baking sheet a little apart; curve ends.
- Cover and let rise in warm place until doubled, 1 to 2 hours.
- Bake dinner rolls on baking sheet 10 to 20 minutes, depending on size, in preheated 400°F oven.
- Remove from pan and set on rack; brush with butter.
Notes
Nutrition
How To Make Homemade Crescent Rolls
Step 1: Combine 2½ cups flour with yeast in a mixer bowl. Heat water, shortening, sugar, and salt to 120-130°F, then add to flour mixture with eggs. Beat on low for 1 minute, then high for 3 minutes. Gradually add remaining flour with dough hook until soft dough forms.
Step 2: Cover bowl with wax paper and foil, then refrigerate up to 3 days. Punch down every 30 minutes for first few hours, then once daily. This develops flavor and makes dough easier to handle.
Step 3: Divide dough into thirds. Roll one portion into a 10-inch circle and cut into 12 wedges. Roll each wedge from wide end to point, stretching gently. Place on baking sheet and curve ends into crescent shape.
Step 4: Let shaped rolls rise covered in warm place until doubled, 1-2 hours. Bake at 400°F for 10-20 minutes until golden. Remove immediately and brush with melted butter while warm.
Recipe FAQs
Punching down the dough during the first few hours prevents over-fermentation and helps develop the gluten structure. Once chilled, the yeast activity slows significantly, so daily punching is sufficient to maintain the dough’s texture..
Once shaped, the rolls should be baked within 2-3 hours for best results. If you need longer storage, you can freeze the shaped unbaked rolls and bake them directly from frozen, adding 5-10 extra minutes to the baking time.
Yes, you can substitute the butter with vegan butter or additional shortening. The rolls will still be delicious, though they may have a slightly different flavor profile than the traditional version.
More Delicious Rolls Recipes to Consider

Did you try this recipe? Leave a ⭐️ rating below and share it on Instagram.
.

Linda Bennett
How to you make these rolls to put dough in refrigerator to use later or freeze dough at some point?
Melissa Griffiths
You can do that after they are shaped, no first rise. Then into the freezer or fridge and then let them rise at room temperature before baking, it can take 3-5 hours for frozen and and hour or so for cold rolls.
Karen
For the refrigerator crescent rolls– it says bread flour— can I use regular flour?
Barbara Schieving
Yes – bread flour has more gluten, but you should still get great rolls with regular flour.
Karen
Does the dough rise in the refrigerator or on the counter? Making these tonite!
Barbara Schieving
If you’re making them to serve tonight, then just make them the way you normally would make a roll – Cover, let rise until double (45 to 60 Min.). Punch down, let rest 10 min and shape. If you’re making the dough tonight to serve tomorrow, then the dough will rise some in the fridge and you’ll want to punch it down until it stops rising. Then you’ll let the shaped rolls rise on the counter as described. Enjoy!
Yolanda
Thanks, Barbara! I am baking them right now and my husband and children keep circling the kitchen asking when they will be done. They smell fantastic!
Yolanda
Can I let the dough rise on the counter instead of using the refrigerator? Your pictures are making me hungry and I feel so impatient!
Barbara Schieving
Hi Yolanda! Yes, just let the dough rise covered on the counter until it’s doubled in size, punch it down and let it rest for a few minutes, then shape. Enjoy!
Karen Petersen
These look fabulous, Barbara!!! I want to come to your Thanksgiving 🙂
Jamie
Only Thanksgiving?? I would eat these every night for dinner! They are gorgeous and I am so making these! Thanks for sharing the recipe… now if I can get mine to look as beautiful as yours!
Jenni
These look awesome! I was just looking for a good roll to make for Thanksgiving! These shall be it! 🙂
Lorraine @ Not Quite Nigella
Mum they look so delicious and soft! What a perfect addition to a Thanksgiving feast 😀 xxx
Traci
Mmm…You can’t enjoy Thanksgiving without rolls. We love ours on Thanksgiving and then as sandwiches the next day. Hope you and your family have a Happy Thanksgiving!
Foodiewife
My goodness! Aren’t these the purtiest rolls I’ve ever seen? And, they don’t come out of can. Pinning! (Happy Thanksgiving)
Kitchen Belleicious
Wait! Barbara! How is it that simple? I mean that is nothing compared to other bread recipes. I am simply giddy over this. How do you find these simple and amazing recipes
Red Star Yeast
Beautiful rolls, Barbara! Thanks for baking our recipe.
Renee - Kudos Kitchen
Thanks for the recipe, Barbara! I think I’m going to make them this year for Thanksgiving. I really like that this recipe makes so many! *print*
Kathy - Panini Happy
These look amazing, Barbara! Homemade rolls are a Thanksgiving must for me this year. 🙂