

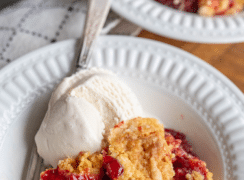
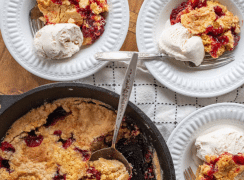
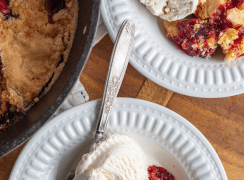
Cherry Dump Cake is a dessert that brings joy with every bite. It’s not just delicious—it’s incredibly simple to make, requiring only a handful of ingredients and minimal effort.

WANT TO SAVE THIS RECIPE?
Enter your email below and we’ll send it straight to your inbox. Plus you’ll get great new recipes from us every week!
Cherry Dump Cake is perfect for any season. In summer, its fruity sweetness pairs wonderfully with ice cream for a refreshing treat. In winter, its warm, comforting flavors make it ideal for holiday gatherings or cozy family dinners.
This cake is also great for busy weekdays. Make it on the weekend, and enjoy a ready-to-eat dessert or snack throughout the week. Whether as a mid-afternoon pick-me-up or a late-night indulgence, Cherry Dump Cake adds a sweet touch to any day.
If you are in the mood for trying more dessert featuring cherries, I suggest my Old Fashioned Cherry Cobbler, Homemade Cherry Bars or Cherry Chocolate Chip Oatmeal Cookies—yummy!
Jump to:

Why You’ll Love This Recipe
- With minimal prep and ingredients, Cherry Dump Cake is perfect for last-minute desserts. It’s a quick recipe that still impresses.
- Kids love the sweet, fruity flavor and the fun of helping to “dump” the ingredients. It’s great for involving little ones in baking.
- Ideal for potlucks and family events, this easy-to-transport dessert serves a crowd and is always a hit.
Recipe Ingredients
- Cherry pie filling— The tart and sweet foundation of our delightful dessert.
- Yellow cake mix—Adds a light, fluffy layer of golden goodness.
- Butter, melted— Rich, buttery goodness that binds it all together.
- Vanilla ice cream for serving— A cool, creamy complement to our warm cherry cake.
See the recipe card for full information on ingredients and quantities.

How To Make Cherry Dump Cake
Step #1. Pour the cherry pie filling into the dish and spread evenly.
Step #2. Sprinkle the dry cake mix over the filling, then drizzle melted butter on top.
Step #3. Swirl the butter into the cake mix with a knife. Bake for 30 minutes, or until lightly browned. Serve warm with vanilla ice cream.

Recipe FAQs
Absolutely! This recipe is versatile. Try it with apple, blueberry, peach, or any other pie filling you enjoy.
No mixing is required. The beauty of a dump cake is its simplicity. Just layer the ingredients as directed, and they’ll meld together beautifully during baking.
You can prepare the dump cake ahead of time and bake it when needed. Alternatively, you can bake it and store it in the fridge, then reheat before serving.
Expert Tips
- Ensure the cake mix is spread evenly over the cherry filling to avoid any dry spots. A little patience here goes a long way.
- Drizzle the melted butter slowly and evenly. This helps create a deliciously golden, crispy top layer.
- Gently swirling the butter into the cake mix with a knife helps blend the flavors and ensures even baking.
- Bake until the top is golden brown and bubbly. Depending on your oven, this might take a few extra minutes.
- Serve the cake warm with a scoop of vanilla ice cream. The contrast between the warm cake and cold ice cream is heavenly.
More Dessert Recipes To Consider

Did you try this recipe? Leave a ⭐️ rating below and share it on Instagram.
WANT TO SAVE THIS RECIPE?
Enter your email below and we will send it straight to your inbox. Plus you will get great new recipes from us every week!

Cherry Dump Cake
Ingredients
- 2 cans cherry pie filling
- 1 package yellow cake mix
- ½ cup butter melted
- Vanilla ice cream for serving
Instructions
- Preheat the oven to 350 degrees F.
- Add both cans of pie filling to the bottom of the 9×13-inch baking pan.
- Spread the dry cake mix evenly over the top of the pie filling.
- Drizzle the melted butter evenly over the dry cake mix.
- Use a shop stick or a butter knife to gently swirl and poke the butter into the cake mix. You can’t really mix it in — you are just working them together a bit.
- Bake for 30 minutes, or until lightly browned.
- Serve hot with vanilla ice cream.
Notes
- You can use just about any kind of pie filling you like for this recipe — it’s very flexible!

Leave a Reply