
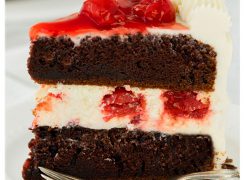
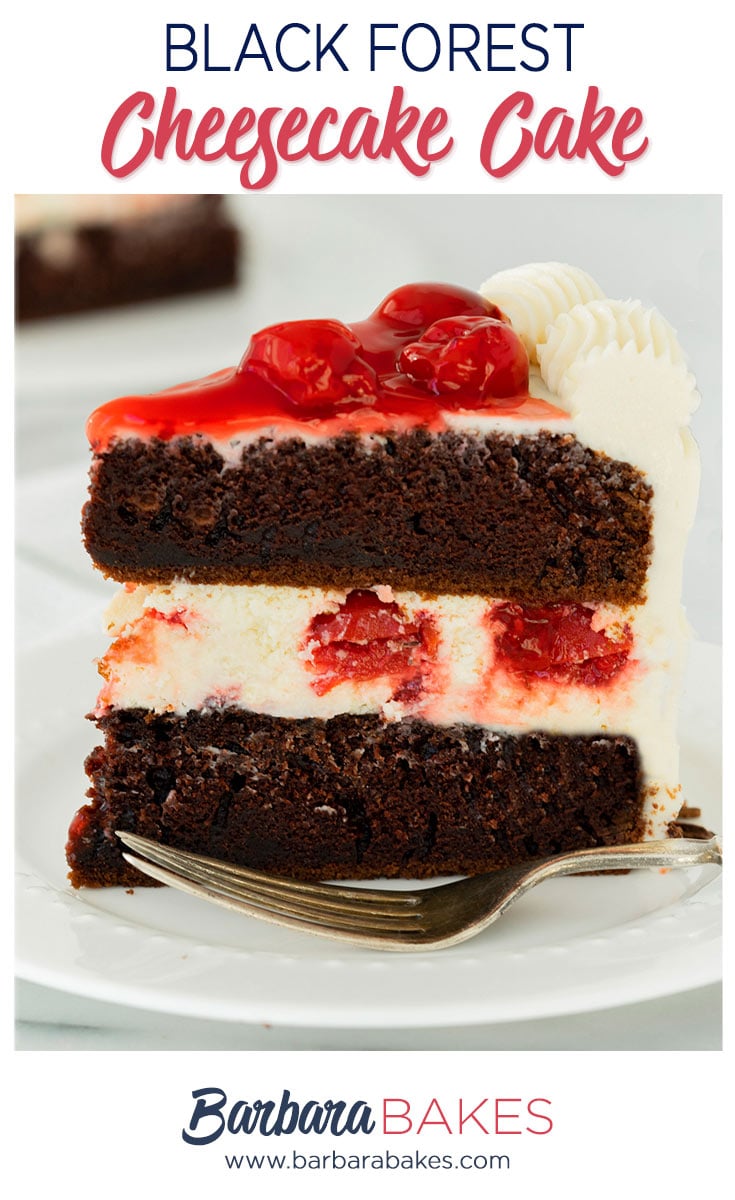
Create an unforgettable Homemade Black Forest Cake with layers of rich chocolate cake, creamy cheesecake, and luscious cherry filling – a showstopping dessert that combines classic flavors in a unique twist perfect for special occasions!
WANT TO SAVE THIS RECIPE?
Enter your email below and we’ll send it straight to your inbox. Plus you’ll get great new recipes from us every week!
This particular recipe holds a special place in my heart – it’s the dessert I turn to whenever we have something truly special to celebrate. Unlike traditional versions, this one incorporates a surprise cheesecake layer that transforms an already beloved classic into something extraordinary.
If you want to keep things simple, however, you can omit the cheesecake layer for a more traditional Black Forest Cake, but of course, I highly recommend the creamy cherry cheesecake layer!
Jump to:
- Why You’ll Love This Black Forest Cake Recipe
- Recipe Ingredients
- How to Make Black Forest Cake
- Assembling The Layers
- Recipe FAQs
- Expert Tips
- How to Serve & Store Black Forest Cake
- Why Is It Called A Black Forest Cake?
- More Decadent Cake Recipes
- More Cake Recipes to Consider
- Homemade Black Forest Cake {Cheesecake In The Middle}
Why You’ll Love This Black Forest Cake Recipe
- Make-Ahead Friendly: The cheesecake layer needs freezing anyway, making this the perfect dessert to prepare in stages when your schedule allows.
- Flavor Explosion: The tartness of cherries perfectly balances the richness of chocolate cake and creamy cheesecake for a dessert that satisfies without being overwhelmingly sweet.
- Versatile Celebration Cake: Whether it’s a birthday, anniversary, or holiday gathering, this cake creates an instant “wow” moment when brought to the table.
- Built-In Moisture: The cherry pie filling ensures this cake stays perfectly moist, eliminating the common problem of dry chocolate cake layers.
🎂 This is one of the impressive and yummy desserts I turn to whenever we have something truly special to celebrate!
Recipe Ingredients
- Cream Cheese
- Butter
- Granulated Sugar
- Powdered Sugar
- Salt
- Eggs
- Vanilla Extract
- Sour Cream
- Cherry Pie Filling
- All-Purpose Flour
- Cocoa
- Baking Powder
- Baking Soda
- Milk
- Oil — any light vegetable oil
- Chocolate — optional for garnish
See the recipe card below for full information on ingredients and quantities.
How to Make Black Forest Cake
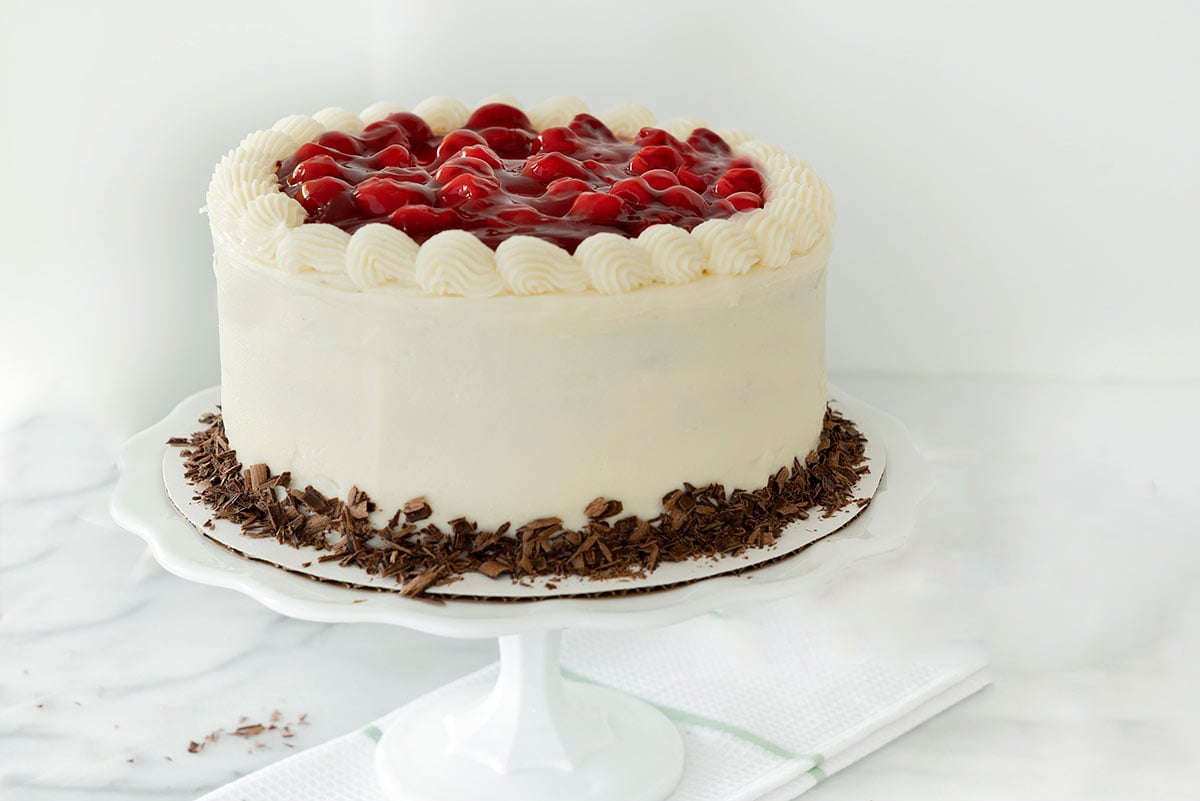
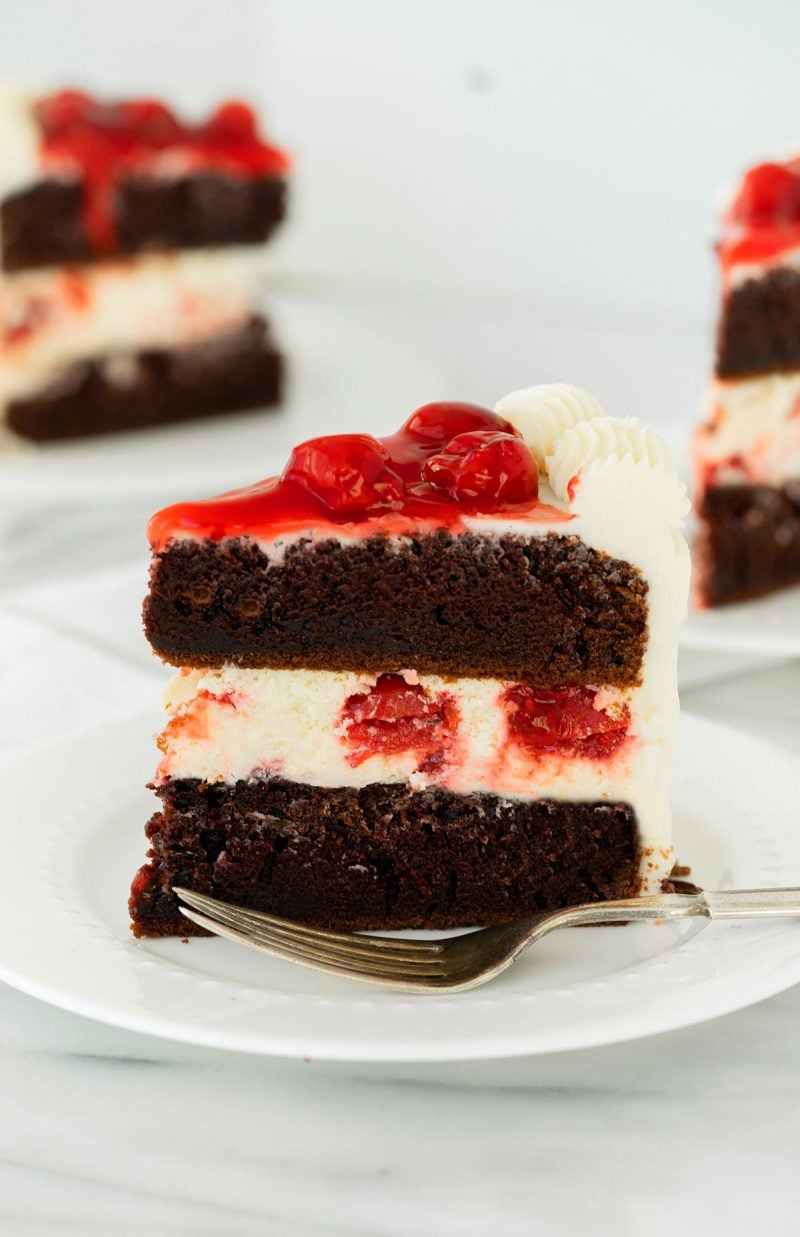
The three components to this layered dessert are a creamy cheesecake with cherries, a decadent dark chocolate cake, and a vanilla cream cheese frosting. Add a garnish of chocolate shavings and more cherries on top to complete the display.
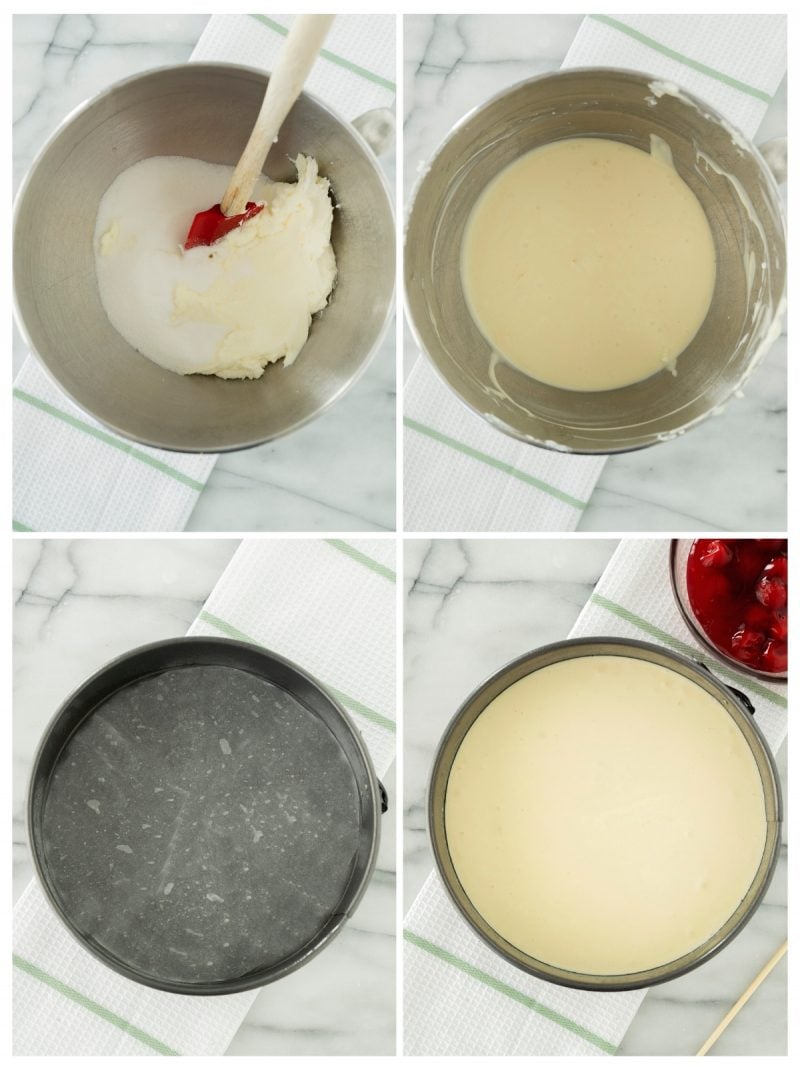
Making Cherry Cheesecake
To give the cheesecake enough time to set up, make the cheesecake layer first. Before you start, ensure all of the ingredients are at room temperature. If the dairy is too cold, it can cause your cheesecake to be lumpy.
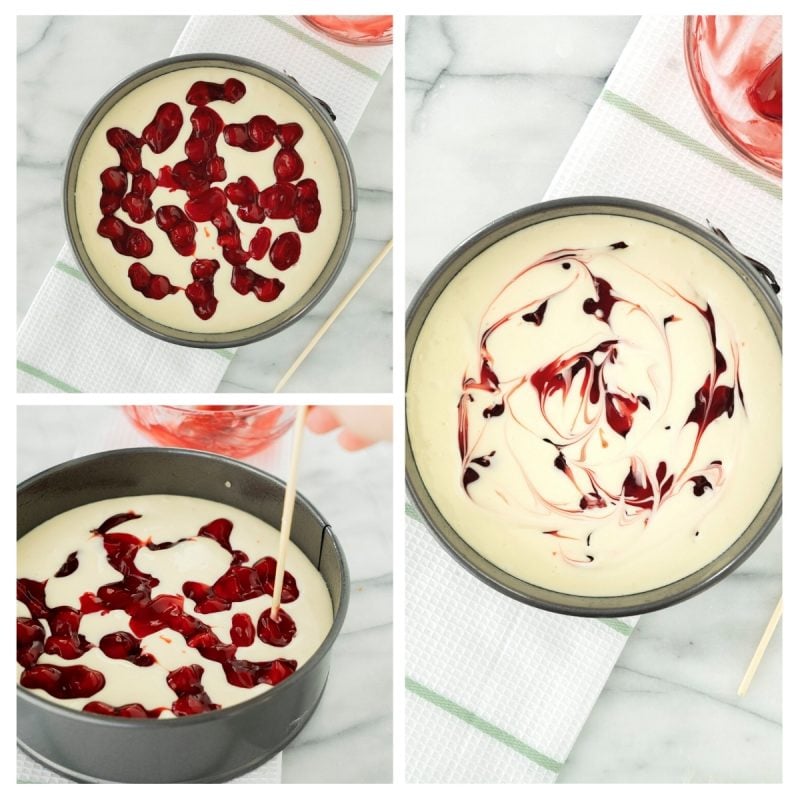
This easy cheesecake has a built-in elegance from swirls of cherry pie filling. This is an effortless trick to elevate your cheesecakes without much extra work.
To bake the cheesecake, you’ll need to fill a pan with boiling water and place it under the cake in the oven. This adds moisture to the oven to evenly and slowly cook the cheesecake for a uniform texture that doesn’t crack.
After baking, run a knife around the edge of the cake to loosen it from the edge of the pan. This prevents the cheesecake from pulling on the sides as it cools, which can cause cracks.
When the cheesecake layer is fully cooled, freeze it in the springform pan, covered, while you prepare the other components of the cake. When you want to assemble the cake, let the frozen cheesecake thaw a bit so it’s easy to remove from the pan.
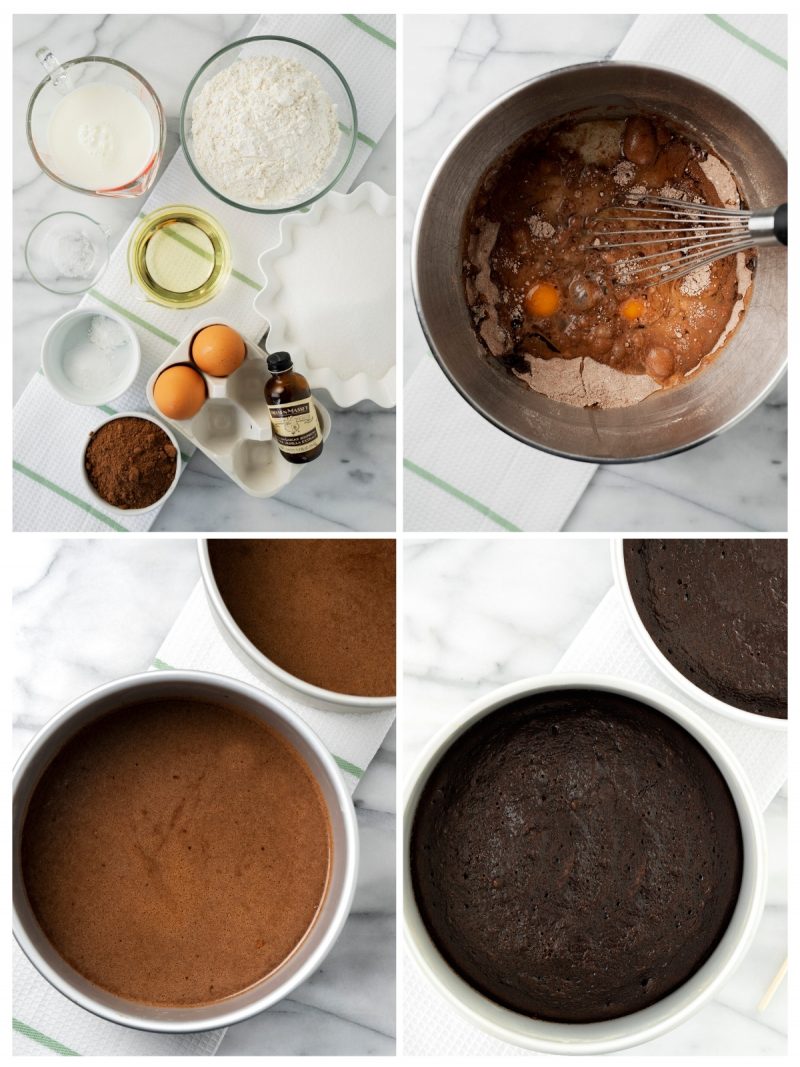
Dark Chocolate Cake Layer
While the cheesecake cools, adjust the oven temperature and prepare the chocolate cake layers. Again, you’ll want room temperature ingredients.
For this cake batter, you will combine your dry ingredients in the mixing bowl first. Then add the wet ingredients and stir together. Finally, pour in the boiling water. The resulting batter will be runny; that’s normal.
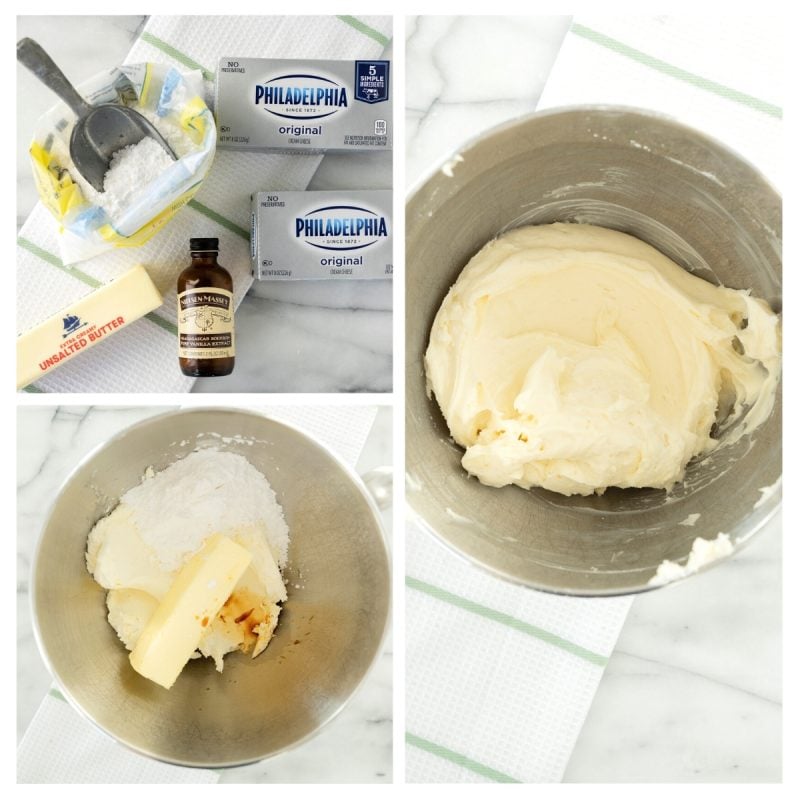
Cream Cheese Frosting
The fluffy cream cheese frosting for your black forest cake is quick and easy to make. If you’re preparing the frosting ahead of time, cover the bowl with a damp towel to prevent a crust from forming.
Assembling The Layers
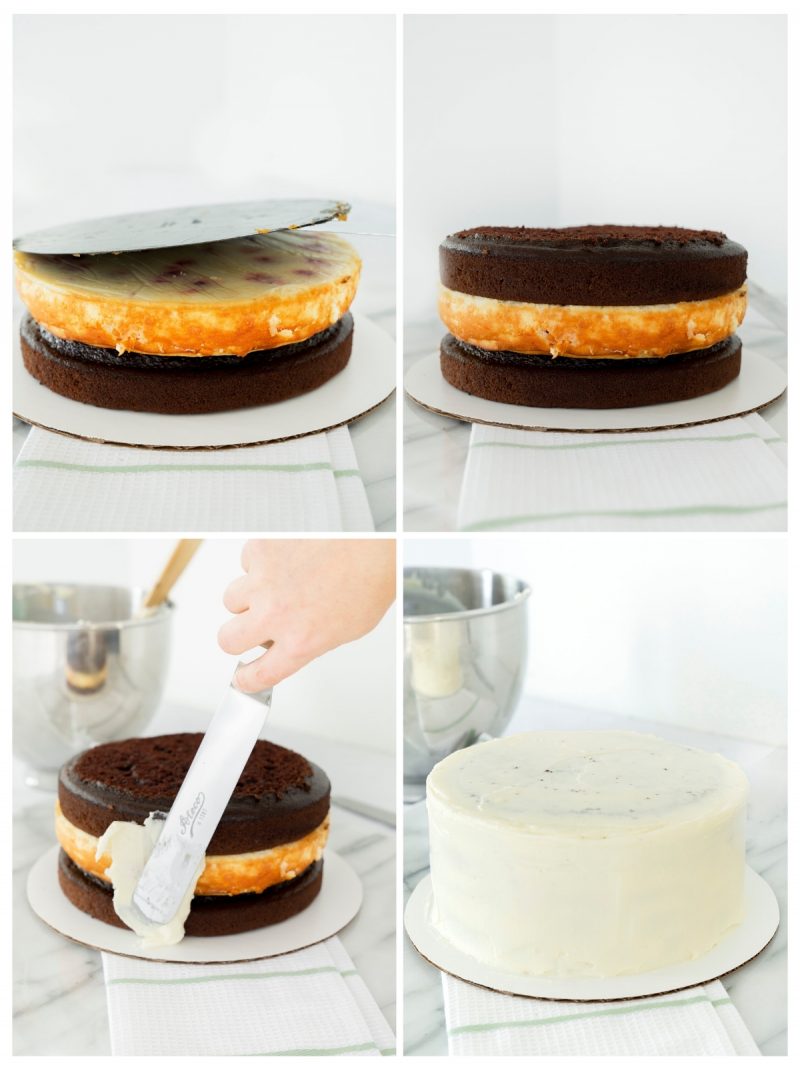
When all of the components are prepared, it’s time to assemble your three-layered cake. First, place a layer of chocolate cake on your serving plate. Invert the cheesecake on top of the first cake layer. Then remove the cake pan bottom and parchment paper.
Next, add the second chocolate cake layer. If there is a hump on top of the cake, trim it off with a sharp serrated knife.
Finally, ice your cake with the frosting. This recipe makes enough frosting to coat the cake in a thin layer and add a piped border.
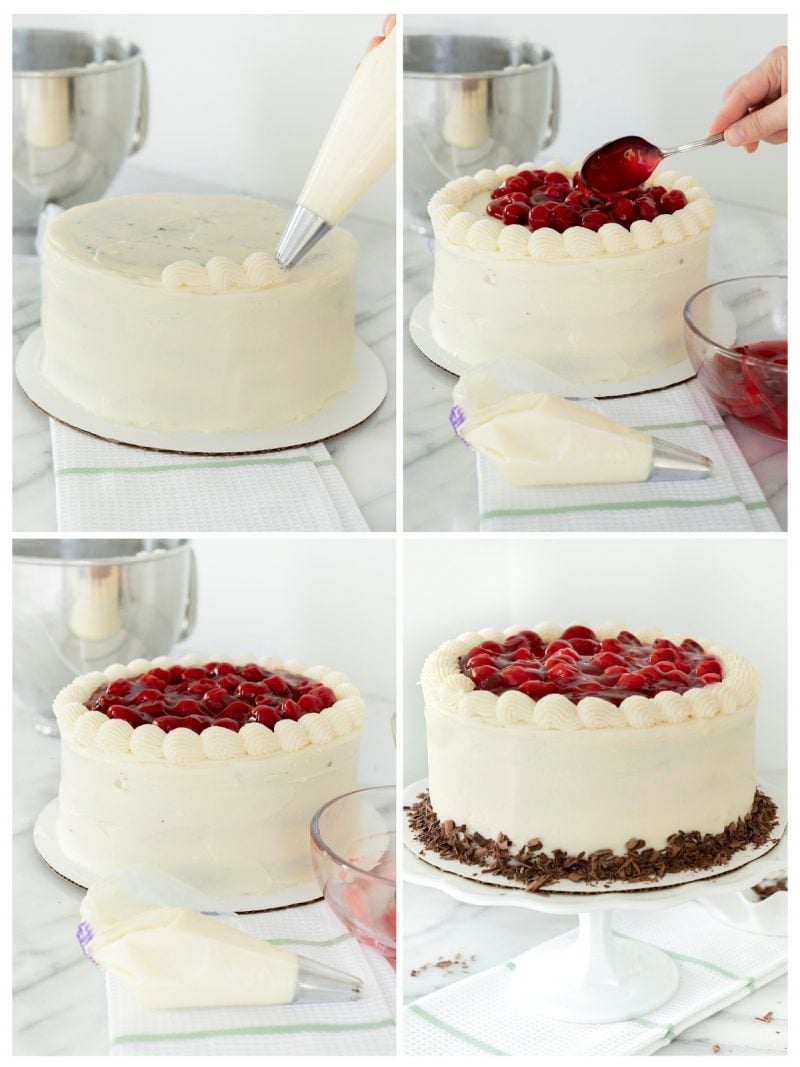
To pipe a pretty edge around your cake, fill a piping bag or a Ziplock bag with a piping tip. I used Wilton tip #4B. Pipe a decorative border around the top of the cake.
Finally, gently spoon the cherries and filling on top of the cake inside your frosting border.
To add chocolate shavings, use a vegetable peeler to shave a dark chocolate bar into elegant chips. Then use a spoon to scoop the chocolate shavings around the sides of the cake. Gently press the shavings into the sides around the base.
Recipe FAQs
This cake actually benefits from being made ahead! The complete assembled cake will keep beautifully in the refrigerator for up to 3 days. The cheesecake layer alone can be frozen for up to a month, making it easy to prep components well in advance of your special occasion.
Yep! While the cheesecake adds a luxurious dimension, you can create a more traditional Black Forest cake by omitting the cheesecake layer and simply layering the chocolate cakes with whipped cream and cherry filling.
While cherry pie filling provides convenience and consistent results, you can absolutely use fresh cherries. You’ll need to cook them down with sugar and a thickener like cornstarch to create a similar consistency. For best results, prepare about 2½ cups of homemade cherry filling and cool completely before using.

Expert Tips
- Make-Ahead Friendly: The cheesecake layer needs freezing anyway, making this the perfect dessert to prepare in stages when your schedule allows.
- Flavor Explosion: The tartness of cherries perfectly balances the richness of chocolate cake and creamy cheesecake for a dessert that satisfies without being overwhelmingly sweet.
- Versatile Celebration Cake: Whether it’s a birthday, anniversary, or holiday gathering, this cake creates an instant “wow” moment when brought to the table.
- Built-In Moisture: The cherry pie filling ensures this cake stays perfectly moist, eliminating the common problem of dry chocolate cake layers.
How to Serve & Store Black Forest Cake
Cheesecake is similar to ice cream; it cuts best with a warmed knife. Run a knife under hot water, then dry the blade, and it should cut through easily.
Before storing the cake, I recommend chilling it in the refrigerator for 1 hour to set the frosting so it is no longer tacky. Once the frosting is set, wrap the cake in plastic wrap and keep in the fridge.
Bring the cake to room temperature for serving.

Why Is It Called A Black Forest Cake?
Many people think that the black forest cake is named after the Black Forest. In fact, the cake is named after a tart-cherry alcoholic liquor called ‘Schwarzwälder Kirschwasser’, also known as Black Forest Kirsch.
I rarely cook with liquors, but you could certainly make your own cherry pie filling with kirsch.
More Decadent Cake Recipes
Looking for more gorgeous homemade cakes? You’ll love these other recipes:
- Chocolate Cake with Oreo Cheesecake Filling is another layered treat with creamy Oreo flavors and crunch.
- Chocolate Dulce De Leche Triple Layer Cake is pure decadence with dark chocolate and caramel.
- Layered Instant Pot Strawberry Cheesecake from Pressure Cooking Today is a must-try fruity cheesecake for Instant Pot lovers.
More Cake Recipes to Consider


Did you try this recipe? Leave a ⭐️ rating below and share it on Instagram.
WANT TO SAVE THIS RECIPE?
Enter your email below and we will send it straight to your inbox. Plus you will get great new recipes from us every week!
Homemade Black Forest Cake {Cheesecake In The Middle}
Equipment
Ingredients
Cheesecake
- 2 packages 8-ounces each cream cheese, at room temperature
- ½ cup granulated white sugar
- Pinch salt
- 2 large eggs room temperature
- 1 teaspoon vanilla extract
- ⅓ cup sour cream
- 1 cup cherry pie filling
Chocolate Cake Layer
- 1 ¾ cups + 2 tablespoons sugar
- 1-¾ cups all-purpose flour
- ¾ cup Hershey’s cocoa
- 1-¼ teaspoons baking powder
- 1-¼ teaspoons baking soda
- 1 teaspoon salt
- 2 large eggs
- 1 cup plus 2 tablespoons milk
- ½ cup canola oil
- 2 teaspoons vanilla extract
- 1 cup boiling water
Frosting
- 2 8-ounce packages cream cheese, room temperature
- ½ cup unsalted butter room temperature
- 1 tablespoon vanilla extract
- 2 ½ cups powdered sugar
- 1 cup cherry pie filling
- grated chocolate optional
Instructions
Cheesecake Layer
- Preheat the oven to 325ºF. Put a kettle of water on the stove to boil. Spray a 9-inch springform pan with nonstick spray and line the bottom with a round of parchment paper. Set aside.
- In a stand or electric mixer, beat the cream cheese, sugar, and salt until well combined. Add in eggs one at a time, beating at low speed until smooth. Beat in the vanilla and sour cream. Pour the batter into the prepared springform pan. Put dollops of cherry pie filling scattered across the top of the cheesecake batter. Use a butter knife to hide the cherries and swirl the pie filling into the batter.
- Set a metal broiler tray on the bottom oven rack. Carefully pour the hot water from your kettle into the broiler tray. Place the springform pan in the oven on the rack above the boiler tray.
- Bake the cheesecake for 45 – 55 minutes. It should be set to the touch and not jiggly. Remove the cheesecake and let it cool on a wire rack for about 10-15 minutes, run a butter knife or spatula around the edge to help prevent cracking.
- Cool for at least an hour, then place the pan into the freezer and let the cheesecake freeze completely for several hours, or overnight.
Cake Layers
- Preheat oven to 350°F. Grease and flour two 9-inch round cake pans.
- Stir together sugar, flour, cocoa, baking powder, baking soda, and salt in a large bowl.
- Add eggs, milk, oil, and vanilla; With a mixer, beat on medium speed for about 2 minutes. Carefully stir in boiling water. The batter will be very thin. Divide the batter between the prepared cake pans.
- Bake for 30 – 35 minutes or until a toothpick inserted in the center comes out clean. Cool 10 minutes; remove from pans to wire racks. Cool completely.
Frosting
- In a large mixing bowl, beat cream cheese, butter, and vanilla with an electric mixer until blended. Add powder sugar and beat until smooth.
Assembling The Cake
- Place one cake layer in the center of a cake plate or platter.
- Remove the cheesecake from the springform pan, layer the cheesecake layer on top of the bottom cake layer. (I had to let my springform pan warm up a bit before it would open.)
- If your cheesecake layer is not the same size as your cake layer, you may need to trim it before adding it. Peel off the parchment. Place the 2nd cake layer on top of the cheesecake.
Frosting The Cake
- Apply a thin layer of frosting to the top and sides of the cake to create a crumb coat. Put the cake in the refrigerator for 30 minutes.
- After 30 minutes, apply a second layer of frosting to the sides.
- Pipe a decorative edge on top of the cake. Add the remaining cherry pie filling to the top of the cake and carefully spread it up to the decorated edge. Sprinkle grated chocolate on the decorated edge and sides of the cake. Keep cake refrigerated until ready to serve.
Notes
- Don’t rush the freezing stage of the cheesecake layer. A fully frozen cheesecake is much easier to handle and position on the cake without breaking.
- The water bath provides gentle, humid heat that prevents the cheesecake from cracking. Don’t skip this step for best results!
- If your cake layers bake with a dome, use a serrated knife to level them before assembly. Those scraps make delicious cake pops or trifle ingredients!
- A light dusting of cocoa powder around the edge of the cake provides an elegant finish with minimal effort.
Claudia Chico
This was the most amazing Black Forest Cake ever!!! Made it for my departments Christmas lunch today and everyone was raving how amazing it was and that it was to die for, even the people who don’t really like Black Forest Cake loved it. I will never make a Black Forest Cake any other way except this way. Thank you so much for this recipe!
Barbara Schieving
Thanks so much Claudia! So nice to hear it was a big hit. Your comment really brightened my snowy day 🙂 Merry Christmas!
Priya Ranjit
Thank you Barbara for this gorgeous cake, the minute I saw this on your blog had to make it 🙂 we loved it so much and I also posted the recipe on my blog too giving you credits.
maz
Hi. I was searching for a cake for my husband’s birthday. This looks awesome. But can you suggest any other pairing of flavour with this other than raspberry. He doesn’t like berries or cherries. Thank you!
Barbara Schieving
Almost any jam would work. Does he like apricot?
Nadia
By “1-3/4 cups all-purpose flour” you mean 1 cup PLUS 3/4 cup, I’m guessing? Is that what you mean by the hyphen? I mean, logically, that’s what I’m thinking because it makes no sense “1 cup TO 3/4 cup”. But the same format should be throughout the recipe like when you wrote ” 1 3/4 cups plus 2 tablespoons sugar”
Barbara Schieving
Hi Nadia – yes, 1 cup plus 3/4 cup. I’ve updated the recipe so it’s consistent throughout. Thanks!
Nagi@RecipeTinEats
Everybody loves cheesecake! And wow Barbara, yours looks so beautiful! It’s so wonderful to look at! I would love a slice of this.
Barbara Craig
We all love cheesecake! My youngest daughter got a hugh one for her 16th birthday. Carmen & pecan. Her husband hates cheesecake. We let her marry him anyway.lol So, I’m thinking of making this for Christmas. He likes Blackforest Cake.
Thanks for posting.
Barbara Schieving
Might be a good way for him to start liking cheesecake for sure 🙂 Enjoy!
Karen Johnston
Barbara, can you suggest an alternative to your canned cherries recipe? I want to make this recipe today and haven’t any homemade.
Karen Johnston
I apologize, Barbara. I just realized after re-reading your recipe that I can used canned cherry pie filling.
Elizabeth
OMG Barbara this cake is wonderful. I made it for a good friends small Birthday party of 8 and she only got to take homes 2 small pieces. A few pictures were taken of the cake and every one wanted to know how I made it I gave you the credit you were talked about a lot ( in a good way) thank you for making me look so good.
Barbara Schieving
I’m so glad the cake was a big hit. Thanks for taking the time to let me know. It really brightened my morning! I’m sure you get a lot of the credit too for making a beautiful cake.
Tammy
Thank you for sharing this amazing recipe. I made it for my husbands birthday, he requested a black forest cake and loves cheese cake so I thought I would attempt something a bit different and boy did this fit the bill. It was a great success, even those that would only nibble at dessert ate their amazingly delicious piece. Thank you Thank you Thank you!
Michael Hankins
I made this cake last weekend and it was a huge hit. The chocolate cake part was extremely moist. Everyone loved it. Making it again today… Thank you for the recipe.
Barbara Schieving
Wow – love that you’re making it again so soon. Thanks for letting me know you loved it.
Cathy
This looks Yummy! I would like to cook the cheese cake in the pressure cooker to save time. Would I follow the cook time of the lemon cheesecake on you pressure cooker site? And would you change anything to the recipe to do so?
Barbara Schieving
Thanks Cathy – no the pressure cooker lemon cheesecake recipe is for a small cheesecake. It wouldn’t work with this recipe.
Loco Gato1419
We made our own version of this cake for my brother’s birthday and it was fantastic! It reminds me of a cake with an ice cream layer, only this is so much better 🙂
I blogged about it on my blog (http://soeasymycatcouldbakeit.blogspot.com)
Kate@Diethood
HELLO BEAUTIFUL! WOW! That cheesecake is BEYOND!
Lynne @ 365 Days of Baking & More
Oh, Barbara! This cake looks incredible and the grated chocolate all over it is perfect! Great job!
Betty
That’s one gorgeous cake! My husband would love to have a masterpiece like this one for his birthday. 🙂
leslie
OH.MY>GOODNESS! Do you ship? 🙂
Kim Beaulieu
I can’t wait to try this one. I’m a black forest fanatic. I can’t get enough of it. My family doesn’t like it yet I always make them get me one for my birthday. So we end up with two cakes and I get the black forest to myself. Evil I know. I’m totally trying this one out for the next holiday. Would make a great Valentines Day cake. Such pretty photos too.
Sam
All I can say is YIKES!!! (And I mean that in a GOOD, what-an-awfully-incrdible-looking-thing! way).
Lana @ Never Enough Thyme
What an absolutely beautiful, mouth-watering cake!
Kitchen Belleicious
it rich rich and dense just like a forest! Beautiful and I would love a bite of it. I heart cheeecakes