
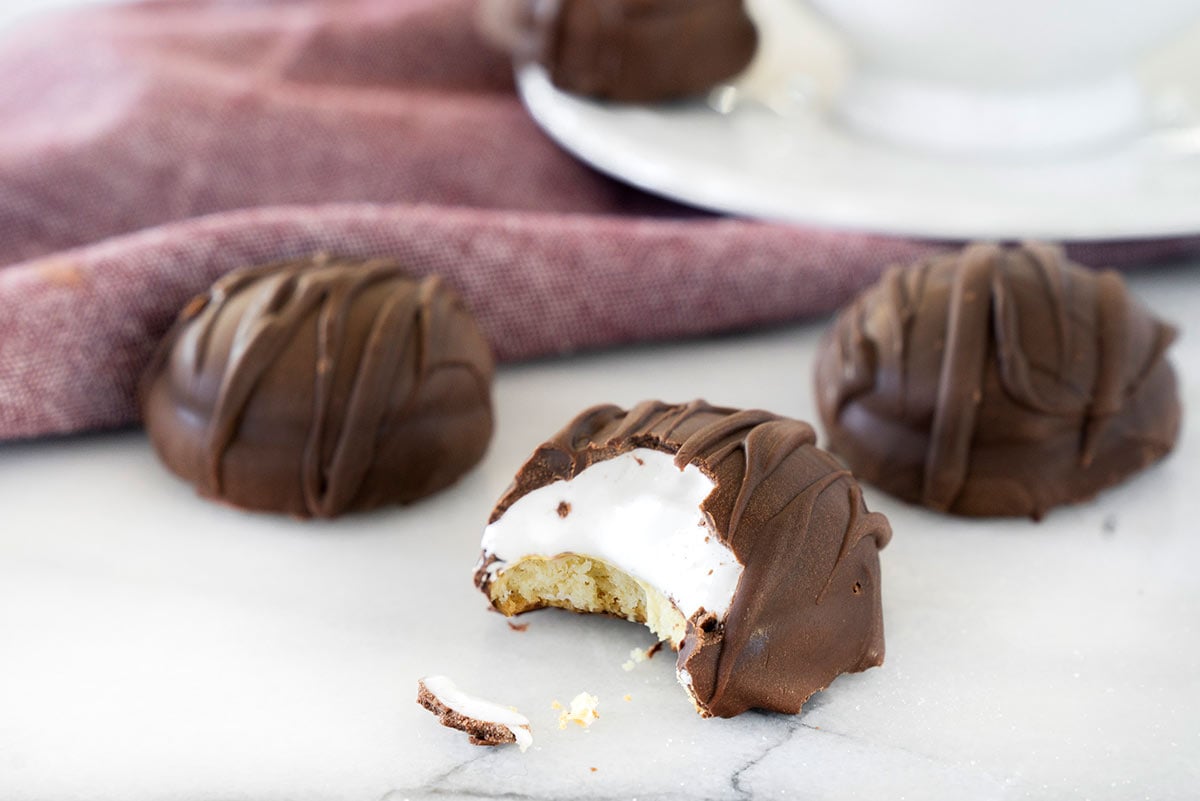
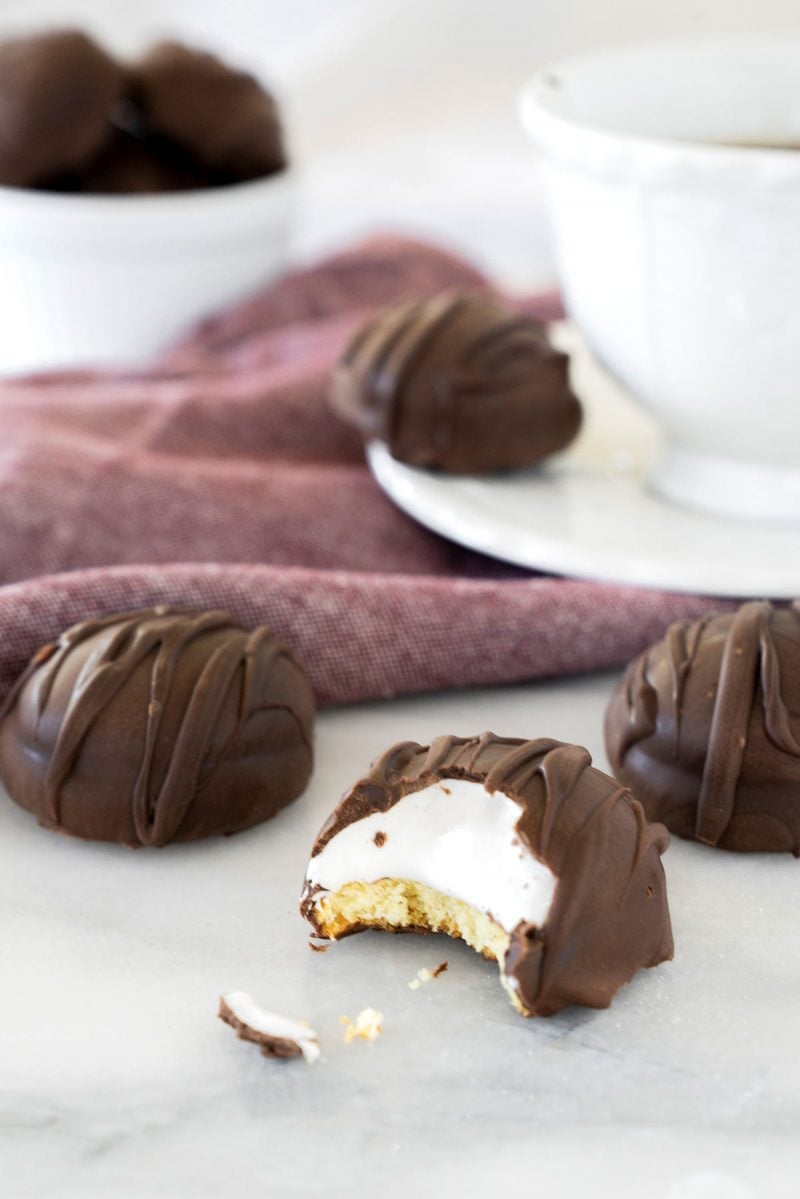
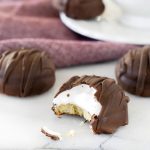
Chocolate covered marshmallow cookies with crisp, golden butter cookie base, gooey marshmallow filling and a rich chocolate glaze are fun to make, eat and share!
WANT TO SAVE THIS RECIPE?
Enter your email below and we’ll send it straight to your inbox. Plus you’ll get great new recipes from us every week!
If you’re a marshmallow lover, then these chocolate covered cookies are about to become your new favorite recipe. Homemade marshmallow is easier to make than you think. And piped on top of a crisp golden butter cookie and smothered in rich dark chocolate, it is pure bliss.
Similar to Mallomars or Pinwheel cookies, this Mallow cookie is especially fun to make around the holidays. So I hope you’ll put a twist on your traditional holiday baking menu this year with soft, chewy, and decadent marshmallow-filled delights.
Update: I’ve updated this post with helpful step-by-step instructions and new photos to help you make beautiful marshmallow and chocolate cookies.
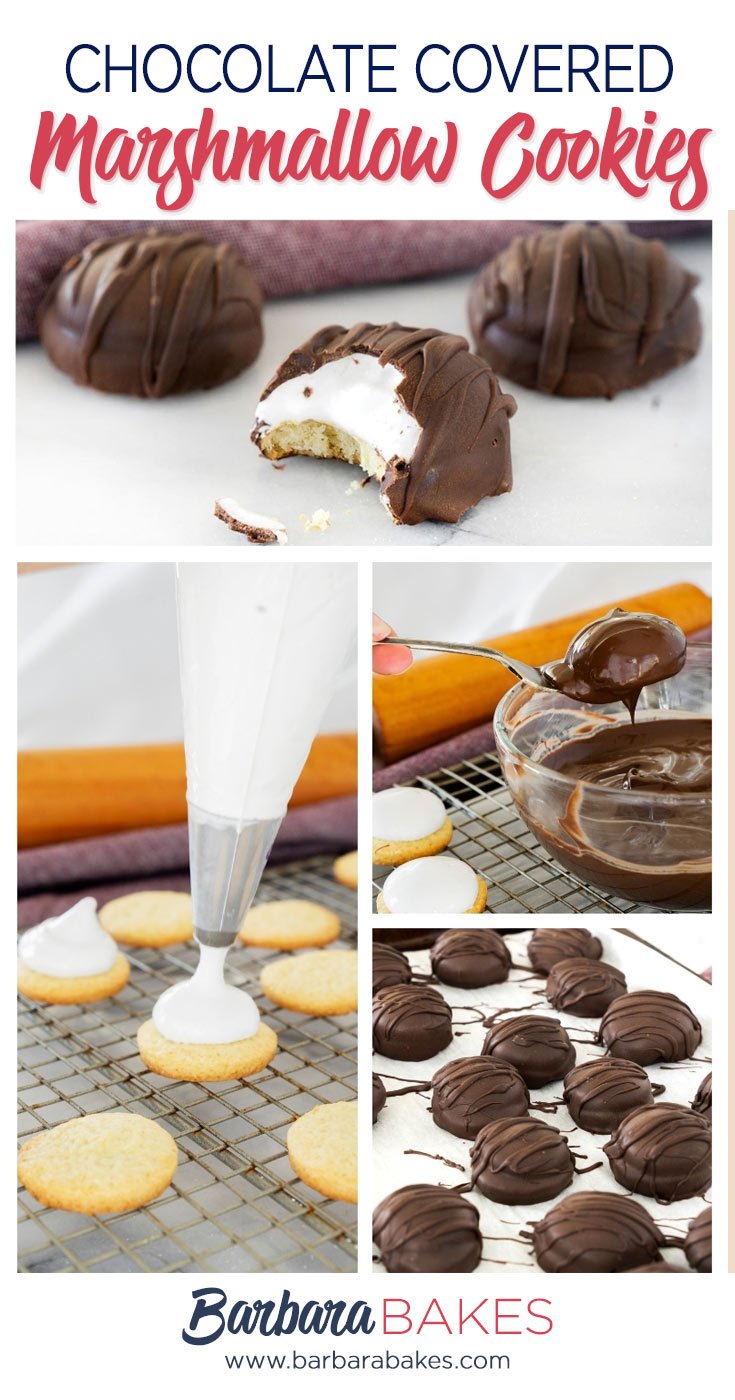
How to Make Chocolate Covered Marshmallow Cookies
There are three components to these show-stopping treats.
1. Crisp cookie base
2. Marshmallow dollop
3. Chocolate coating
You’ll make the cookies in that order, baking the cookie bases first. While the cookies are cooling making your marshmallow. Once your marshmallow is piped and has sat the required amount of time make your chocolate glaze. Be sure to have a parchment lined baking sheet ready.
Cookie Tips:
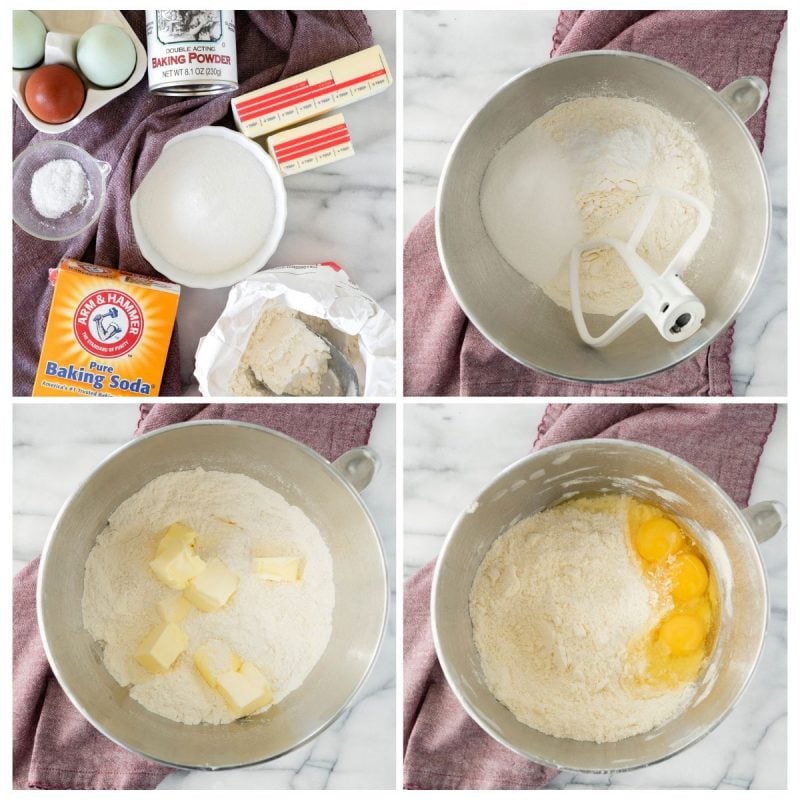
These cookies are made in a standard mixer with the paddle attachment.
When adding the butter to the dry ingredients mixer needs to be on low or flour will spill over the side when you try to mix in on a higher speed.
Once you add the eggs to the sandy buttery mixture the dough will form quickly.
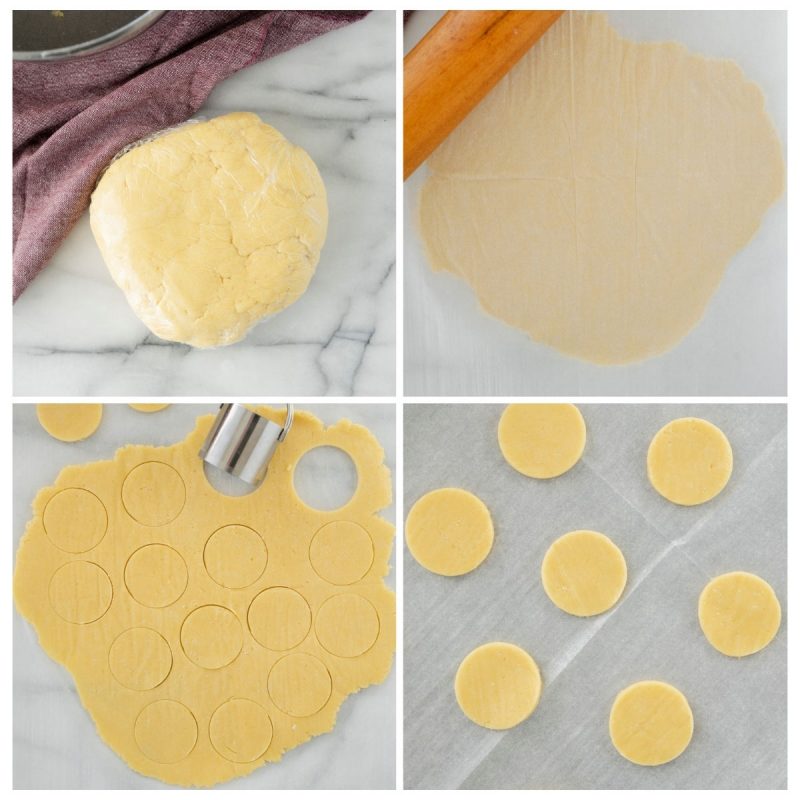
The dough will be too soft to roll and cut out so wrap in plastic wrap and refrigerate the dough as instructed.
When rolling out the dough you can do so on a floured surface or between two sheets of parchment or wax paper. If you find your dough getting soft again place it back in the refrigerator for a few minutes.
Cookies bake up fast and crispy.
While the cookies cool, you can whip up the homemade marshmallows in a stand mixer. The chocolate glaze comes together in a double boiler with just two ingredients. Then all that’s left to do is assemble and enjoy!
How to Make Homemade Marshmallows
It might sound like a daunting task, but making your own marshmallow is easier than you think. Marshmallow is essentially a meringue that’s been firmed up with gelatin. This meringue is made with whipped egg whites and sugar syrup.
Have all your ingredients measured and ready. Cook the sugar syrup first and while it’s cooking whip your egg whites to soft peaks with the beater attachment.
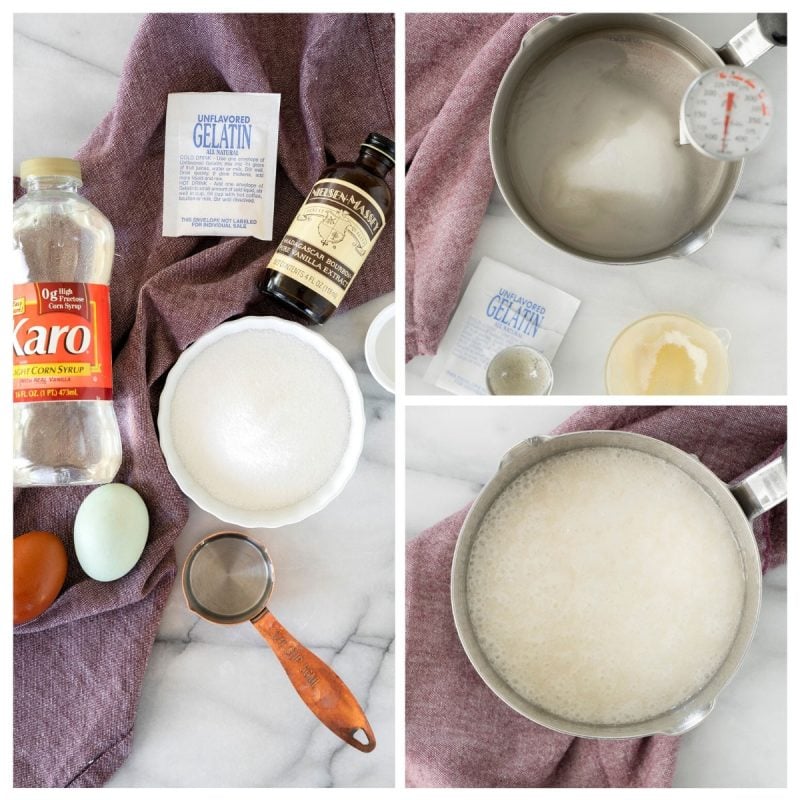
The most important thing to keep in mind when making your meringue is the temperature of your syrup. You don’t want the sugar to go past the softball stage, or 235°F on a candy thermometer. If you do not have a candy thermometer you can test this by adding a drop of the hot sugar mixture into a glass of cold water. If the sugar mixture remains in a ball but smooshes when pressed between your fingers you have reached the softball stage. (At high altitude, adjust the temperature for candy making at high altitude.)
When the sugar syrup is getting close to the correct temperature, pour your gelatin over cold water to bloom the gelatin. When adding your gelatin to the hot sugar mixture it will bubble up. Whisk the mixture to stop the bubbling.
Turn your mixer on high speed and stream the hot sugar syrup down the side of the mixing bowl and into the egg whites. Continue beating until the whites are shiny, thick, and stiffened like marshmallow. It’s important that the mixer be on high so the egg whites do not cook from the heat of the sugar mixture.

Add in your vanilla and keep mixing until marshmallow mixture becomes room temperature. If marshmallow mixture is warm when you pipe it on the cookie it will ooze over the sides of the cookies. This could take anywhere from 15 to 25 minutes. Scrape/stir with rubber spatula every so often.
Now, simply transfer the fluffy homemade marshmallows into a pastry bag or a large Ziploc for piping.
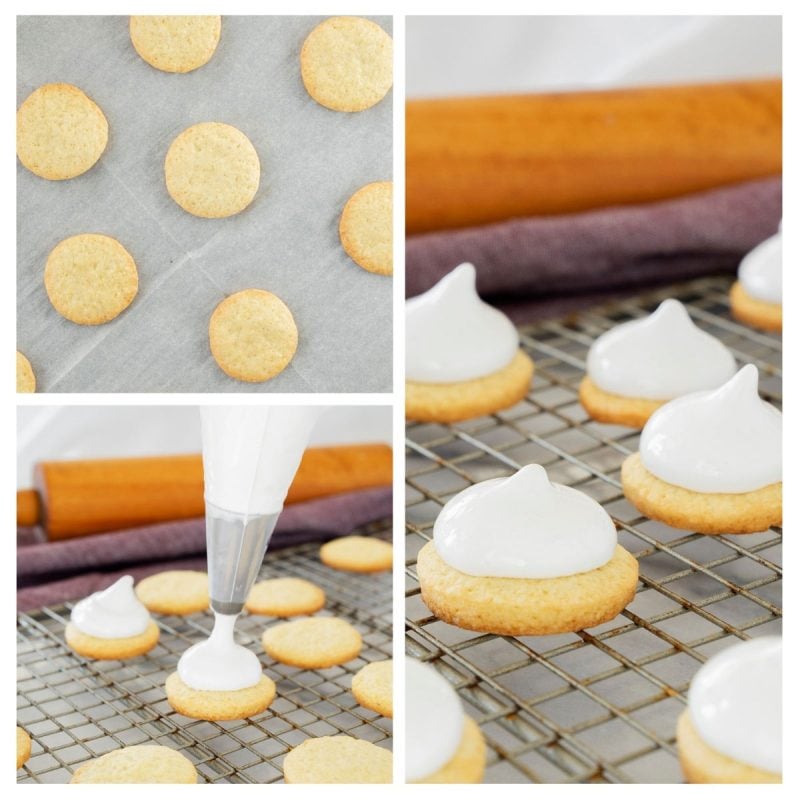
Assembling Chocolate Covered Marshmallow Cookies
Once your butter cookies are fully cooled and your homemade marshmallow is ready for piping, you can assemble the cookies. Place cookie bases on parchment lined cookie sheets.
Pipe a kiss of marshmallow onto the top of each cookie. The marshmallow will spread after it is piped, so leave a ¼ inch border around the edge of the cookie so the marshmallow has room to spread. Let this dry for one to two hours. The marshmallow should be firm before adding the chocolate glaze.
Glazing Tips:
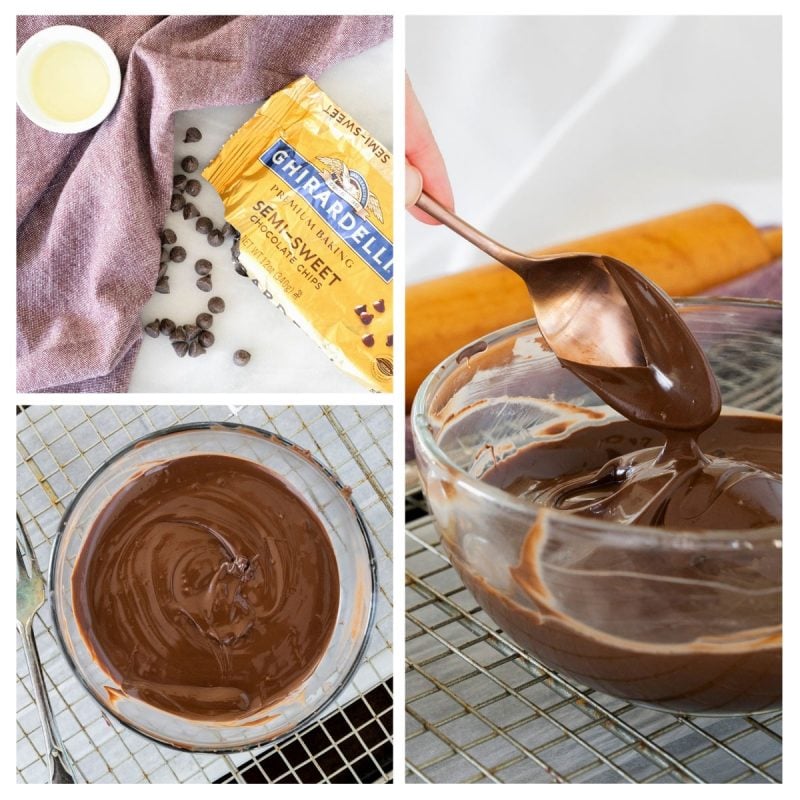
To glaze your cookies, drop them one by one into the bowl of warm melted chocolate over a double boiler. You can melt the chocolate in a glass bowl in the microwave if you prefer.
Use a fork to carefully turn the cookies to coat all sides, then lift them out and let any excess chocolate drip back into the bowl. Place the dipped cookie on the parchment-lined baking sheet. Repeat with the rest of the cookies.
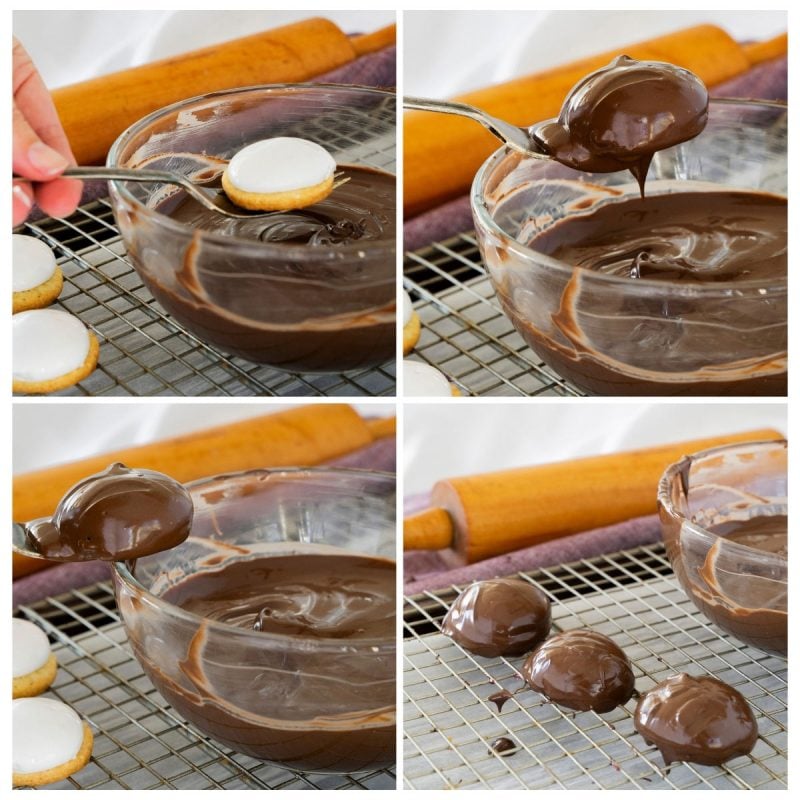
Once all cookies have been dipped and the chocolate is set, drizzle a pretty design on the tops with extra chocolate.
Let the chocolate set completely before serving. After an hour or so, you’ll have chocolate covered cookies with a soft marshmallow surprise inside!.
Do I have to Make Homemade Marshmallows?
If you’re short on time or don’t have an eclectic mixer, you can certainly make chocolate covered cookies with store-bought marshmallows. I recommend looking for the extra-large marshmallows.
Simply cut them in half and place half a marshmallow on top of each cookie. Place on a baking sheet and heat the cookies in a 350°F oven. The marshmallows will slump, expand, and brown a bit as they warm. Once they start to turn golden and soft, remove the cookies from the oven. Let them cool, then proceed with the chocolate dipping.
More Marshmallow Recipes
Once you get the hang of making your own marshmallow, try these other beloved cookie recipes:
- Peppermint Chocolate Marshmallow Cookies have a hidden surprise of marshmallow under the pepperminty chocolate ganache.
- Mini Marshmallow Surprise Brownie Bites offer a fudgy upgrade to the butter cookies in this recipe!
- Easy Marshmallow Popcorn Balls from That Skinny Chick can Bake are a fully kid-approved, colorful marshmallowy snack!
WANT TO SAVE THIS RECIPE?
Enter your email below and we will send it straight to your inbox. Plus you will get great new recipes from us every week!
Chocolate Covered Marshmallow Cookies
Equipment
Ingredients
COOKIES
- 3 cups 375grams/13.23oz all-purpose flour
- ½ cup 112.5grams/3.97oz white sugar
- ½ teaspoon salt
- ¾ teaspoon baking powder
- ⅜ teaspoon baking soda
- ½ teaspoon ground cinnamon I eliminated this
- 12 tablespoons 170grams/ 6 oz unsalted butter
- 3 eggs whisked together
- Homemade marshmallows recipe follows
- Chocolate glaze recipe follows
HOMEMADE MARSHMALLOWS:
- ¼ cup water
- ¼ cup light corn syrup
- ¾ cup 168.76 grams/5.95oz sugar
- 1 tablespoon powdered gelatin
- 2 tablespoons cold water
- 2 egg whites room temperature
- ¼ teaspoon pure vanilla extract
CHOCOLATE GLAZE:
- 12 ounces semisweet chocolate I also use dipping chocolate and eliminated the oil
- 2 ounces cocoa butter or vegetable oil
Instructions
Making the Cookies:
- In an electric mixer with the paddle attachment, blend the flour, sugar, salt, baking powder, soda, and cinnamon.
- With the mixer on low speed, add the butter and blend until the mixture is like coarse sand.
- Add the eggs and mix until combined.
- Form the dough into a disk, wrap with cling film or parchment and refrigerate for at least 1 hour and up to 3 days.
- When ready to bake, grease a baking sheet or line it with parchment paper or a silicone mat.
- Preheat the oven to 375°F.
- On a lightly floured surface, roll out the dough to ⅛-inch thickness. Use a 1 to 1 ½-inch cookie cutter to cut out small rounds of dough.
- Transfer to the prepared baking sheet and bake for 10 minutes or until light golden brown. Let cool to room temperature.
- Meanwhile, prepare the homemade marshmallows.
- When the cookies are cool, pipe a kiss of marshmallow onto each cookie. Let them set at room temperature for 2 hours.
- Meanwhile, prepare the chocolate glaze.
- Line a cookie sheet with parchment or a silicone mat.
- One at a time, gently drop the marshmallow-topped cookies into the hot chocolate glaze.
- Use a fork to remove the cookies from the glaze and let excess chocolate drip back into the bowl.
- Place the glazed cookies on the prepared pan and let set at room temperature until the coating is firm, about 1 to 2 hours.
Making Homemade Marshmallows:
- Note: if you don’t want to make your own marshmallows, you can cut a large marshmallow in half and place on the cookie base. Heat the marshmallow-topped cookies in a 350°F oven to slump the marshmallow slightly, it will expand and brown a little. Let cool, then proceed with the chocolate dipping.
- In a saucepan, combine the water, corn syrup, and sugar, bring to a boil until soft-ball stage, or 235°F on a candy thermometer.
- Place the cold water in a small bowl and sprinkle the gelatin on top. Let the gelatin “bloom” for about 5 minutes, until it reaches an applesauce-like consistency.
- Remove the syrup from the heat and stir in the gelatin mixture.
- In an electric mixer with a whisk attachment, beat the whites until soft peaks form. With the mixer running, gradually pour the syrup into the whites.
- Add the vanilla and continue whipping until stiff and shiny.
- Transfer to a pastry bag.
Making Chocolate Glaze:
- Melt the 2 ingredients together in a double boiler or a bowl set over a pot of barely simmering water.

CHARLO L ZAUSS
Hello Barbara and Melissa,
My husband was wondering if I could make a Marshmallow Pinwheel cookie, and I found your recipe for the Chocolate Marshmallow cookie!!! Well, they are a huge hit. Best cookie I have ever made, my husband said, and he is a bit of a cookie snob. So, I wanted to thank you for the delicious recipe, it was so yummy.
Fathima
wow.. these looks so delicious and perfect!
Barbara
I wish I had not found this post; I'm doomed! One of my guilty pleasures are marshmallow cookies like this; only buy them when…well, you know; desperate for something sinful! Now I can make them at home, oh no!
Was looking for a new addition to the holiday gift baskets I make for family and friends; thinking these will be perfect!
Holly
Thanks for stopping by. These all look delicious. I'm definitely going to be trying the milanos.
Micki
Question about the stencil. Do you fill the stencil oval by piping the
"one inch" batter inside and then use a spatula to spread? Not sure I quite understand using a stencil vs. your instruction to just pipe a one inch line. Thanks for any help. Can't wait to try.
subhie
they r too perfect ….n so professional….much more better than buy one!!!!!!!
pigpigscorner
Oh wow, you did a great job with those recipes!
Debbie
Those cookies look like they came out of a delicious bakery. Beautiful…please send some my way!
Talita
Mmmmm…. Delicious, Barbara! Your mallows look amazing! I'd love to have one!