
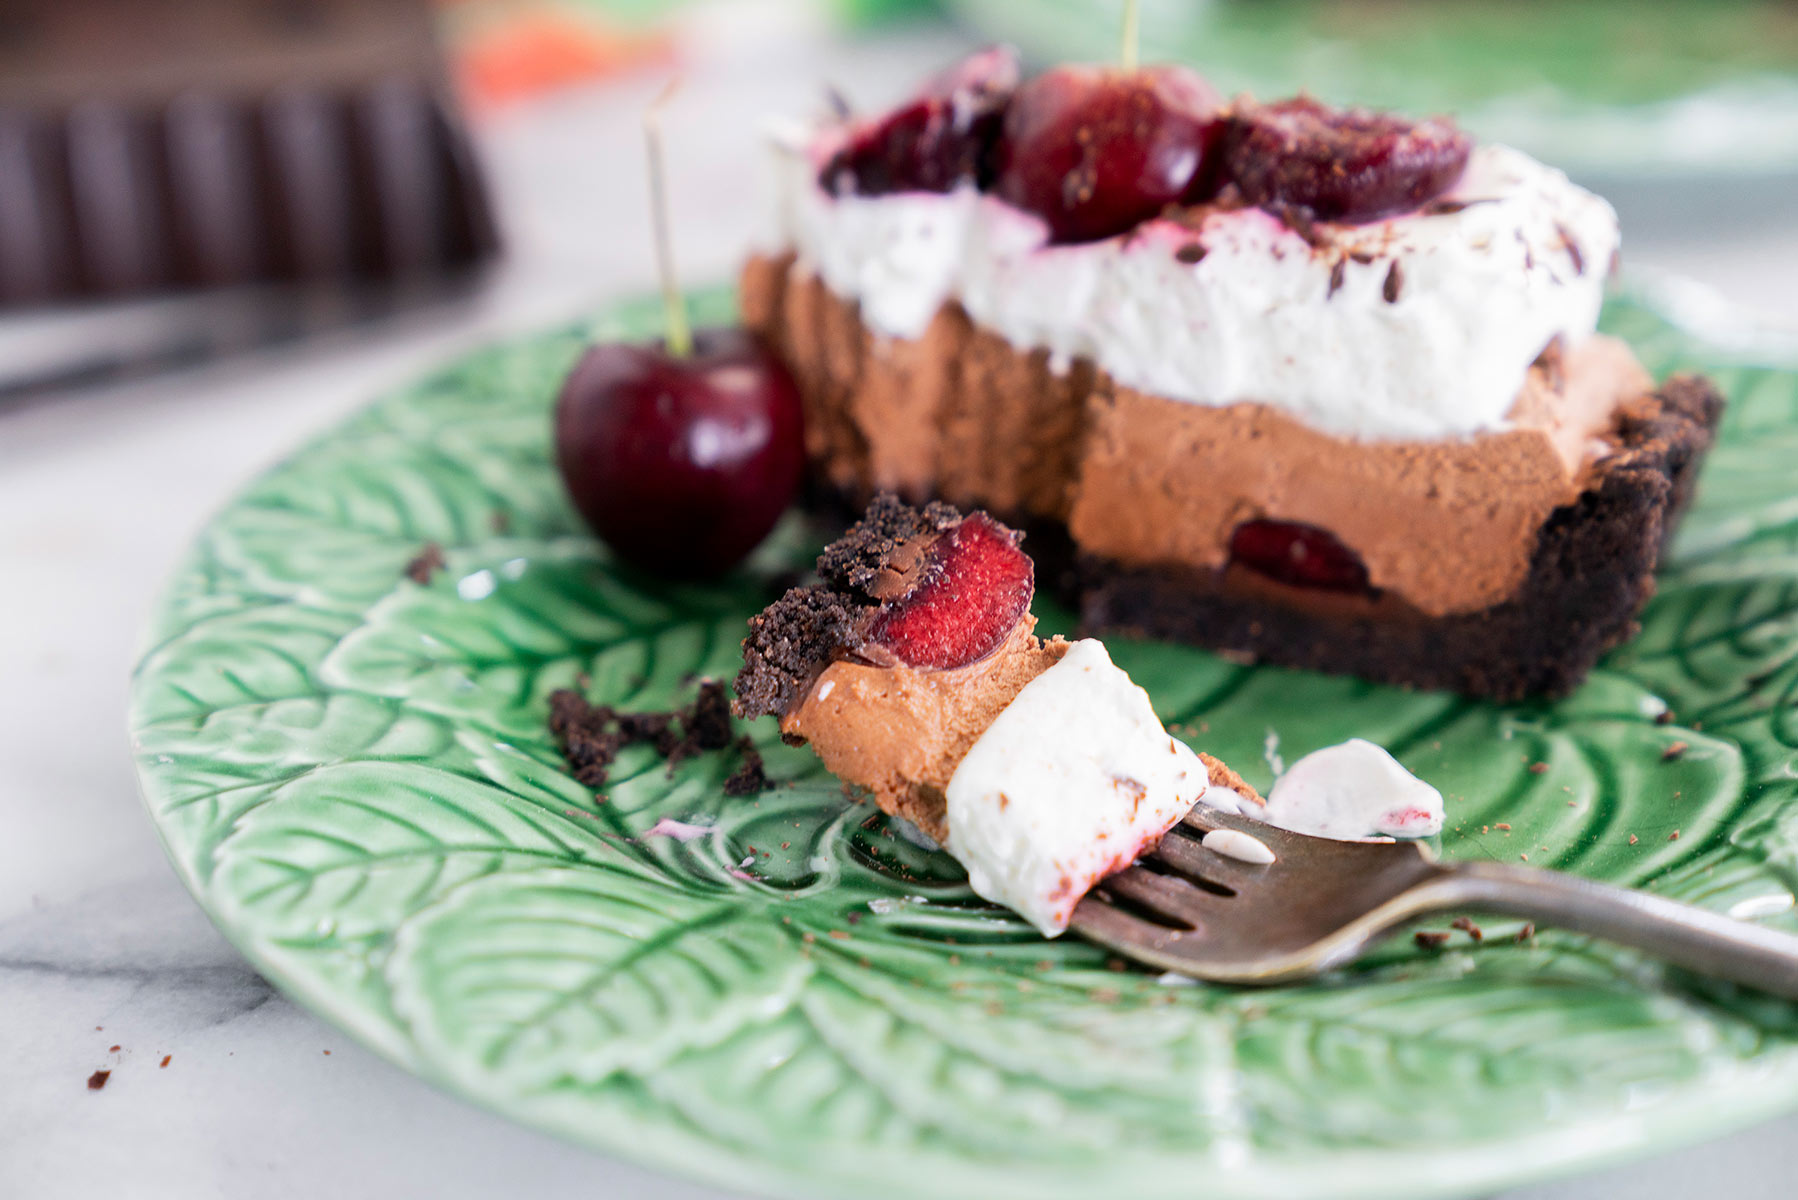
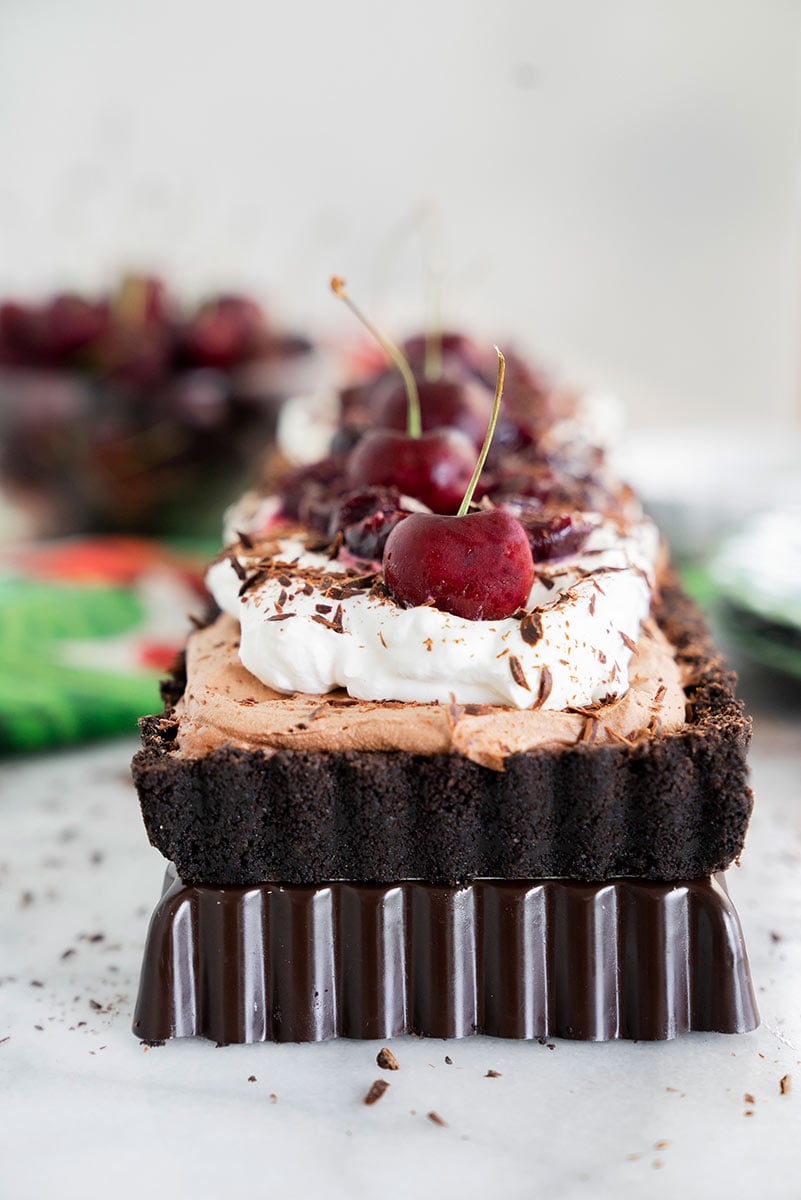
A luscious Black Forest Chocolate Tart with cherries, whipped chocolate ganache filling, and a pretty, fluted cookie crust. An easy-to-make, show-stopping tart perfect for the holidays or any occasion you want to make special.
WANT TO SAVE THIS RECIPE?
Enter your email below and we’ll send it straight to your inbox. Plus you’ll get great new recipes from us every week!
This cherry chocolate tart is a fresh take on a traditional black forest cake. It’s a light and fluffy layered dessert, with a decadent whipped chocolate ganache filling and an Oreo cookie crust.
Chocolate and cherries make a perfect pairing. And whether you make this tart with fresh or frozen cherries, it’s a sweet but sophisticated dessert that you and your guests will love.

How to Make Black Forest Chocolate Tart
This beautifully layered chocolate tart has a several steps, but they’re all easy to do. I recommend making the cherry compote first, followed by the crust.
Let these two components cool while you make the chocolate ganache layer. And finally, whip up the cream for the filling before assembling the tart and garnishing with chocolate shavings.
How to Pit Fresh Cherries
You can use fresh or frozen dark sweet cherries for the cherry compote. If you’re using fresh cherries, you’ll need to remove the pits.
To remove the pits from fresh cherries, you can use a cherry pitting tool. Or you can easily push the pit out of the cherry using a chopstick, small pastry tip, or even a paper clip. The Kitchn has a good article on removing cherry pits.
You can also remove the pits with a paring knife. To do so, start by slicing all the way around the equator of the cherry. Then gently twist the two halves in opposite directions to break the cherry in two. Use the tip of your paring knife to pop out the cherry seed.
Using Frozen Cherries
Originally this tart was made with fresh cherries, but I’ve also made it with frozen cherries and it’s just as delicious and even easier because you don’t have to pit the cherries.
There’s no need to thaw the cherries before making the compote. The cherries will thaw as they’re cooking.
I recommend using kitchen scissors to cut the cherries in half after the compote has thicken. Occasionally, frozen cherries will still have a pit in one or two of the cherries, which is easy to discover if you cut them in half.
Making Oreo Cookie Crust
To make the chocolate crust for this tart, be sure to crush the Oreo cookies into fine crumbs. This way, your crust will be easy to press into the pan and will bake evenly. (No need to remove the creme filling.)
A food processor works best for crushing the Oreos. However, if you don’t have one you can use a large plastic bag and rolling pin to crush the cookies.
I made the tart in a beautiful fluted rectangular tart pan that I absolutely love and recommend if you’re looking to elevate your desserts.
Tip: When pressing the crust up the sides of the tart pan, place your index finger along the top edge of the pan. This will keep your crust from spilling out and give you a nice level top crust.
Making Chocolate Ganache For Black Forest Tart
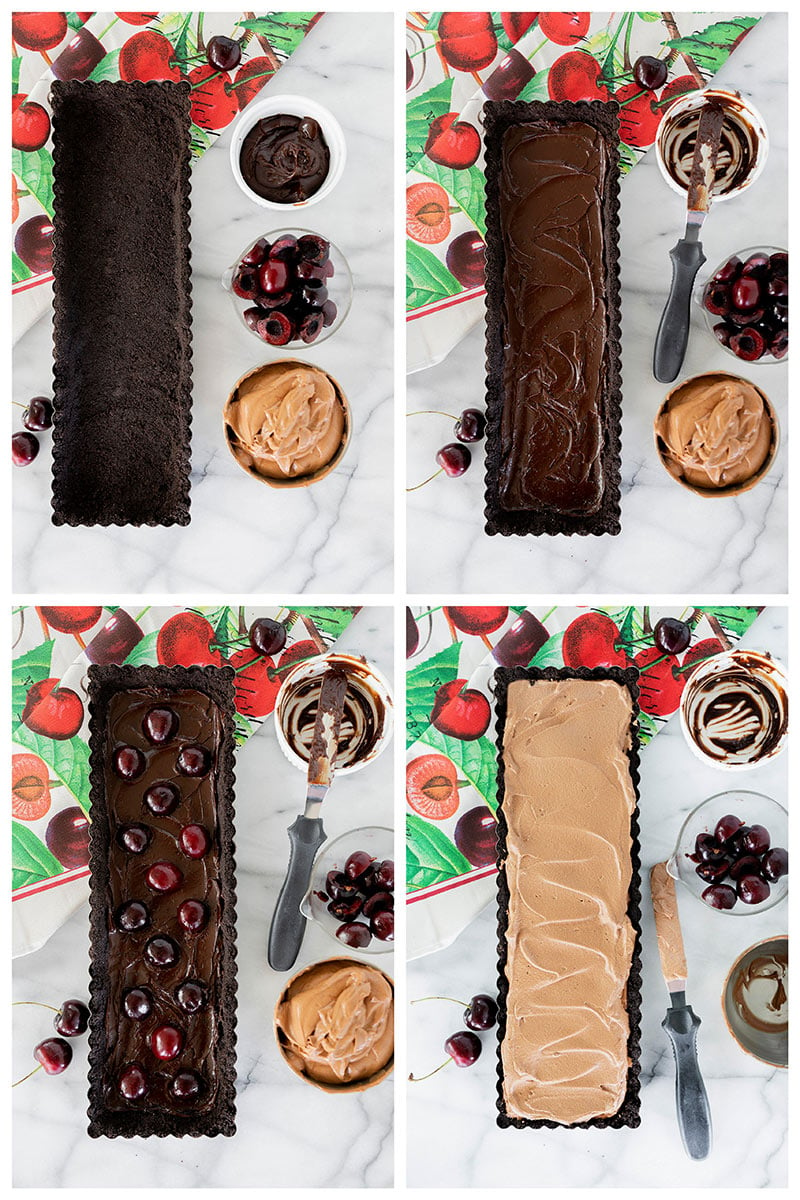
There are two decadent layers of homemade ganache in this fruit tart. The first layer goes directly over the pie crust. This adds an extra hit of chocolate and helps keep the crust crisp and the fresh cherries in place. The result is a stunning cross-section of bright red fruit when you slice and serve the tart.
Then you’ll fold the remaining ganache into whipped cream for the Chocolate Black Forest Tart filling.
While you want the ganache to cool fully before using it, avoid refrigerating the chocolate. This can cause the ganache to become too stiff to spread. If this happens, let the ganache warm up a bit at room temperature until it’s a spreadable consistency.
Whipped Ganache Tart Filling
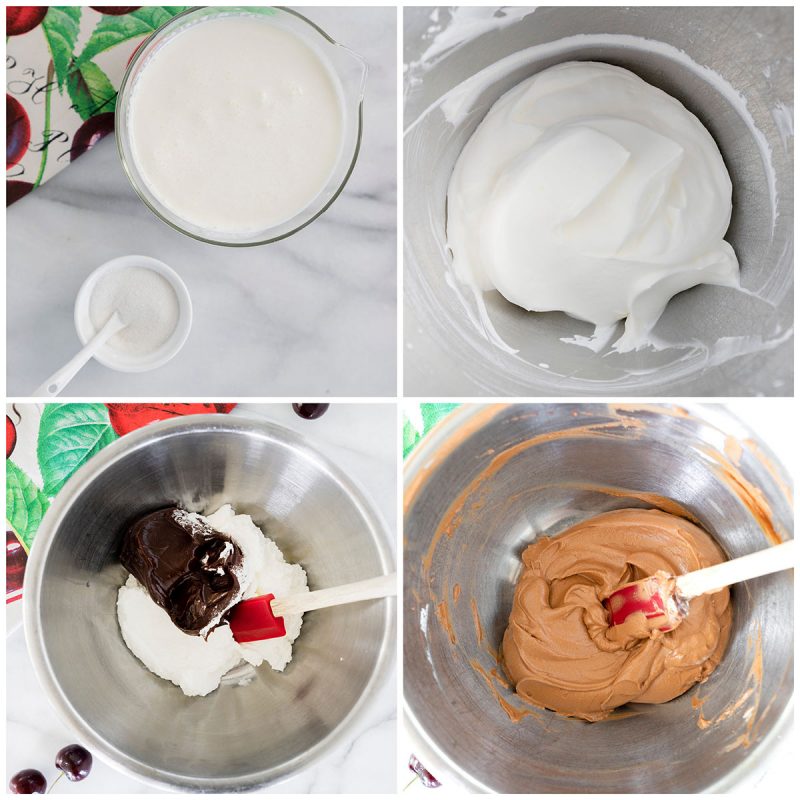
The filling for this cherry chocolate tart is a light and fluffy whipped cream base with richness from chocolate ganache. For the lightest whipped cream, chill the mixing bowl and beaters in the freezer before whipping.
When your cream reaches soft peak stage, remove some for the topping. Then add the remaining cooled chocolate ganache and mix on low speed just until the chocolate is incorporated. Scrap the bowl down and mix just until there are no visible streaks of white or dark brown in the filling.
Assembling the Tart
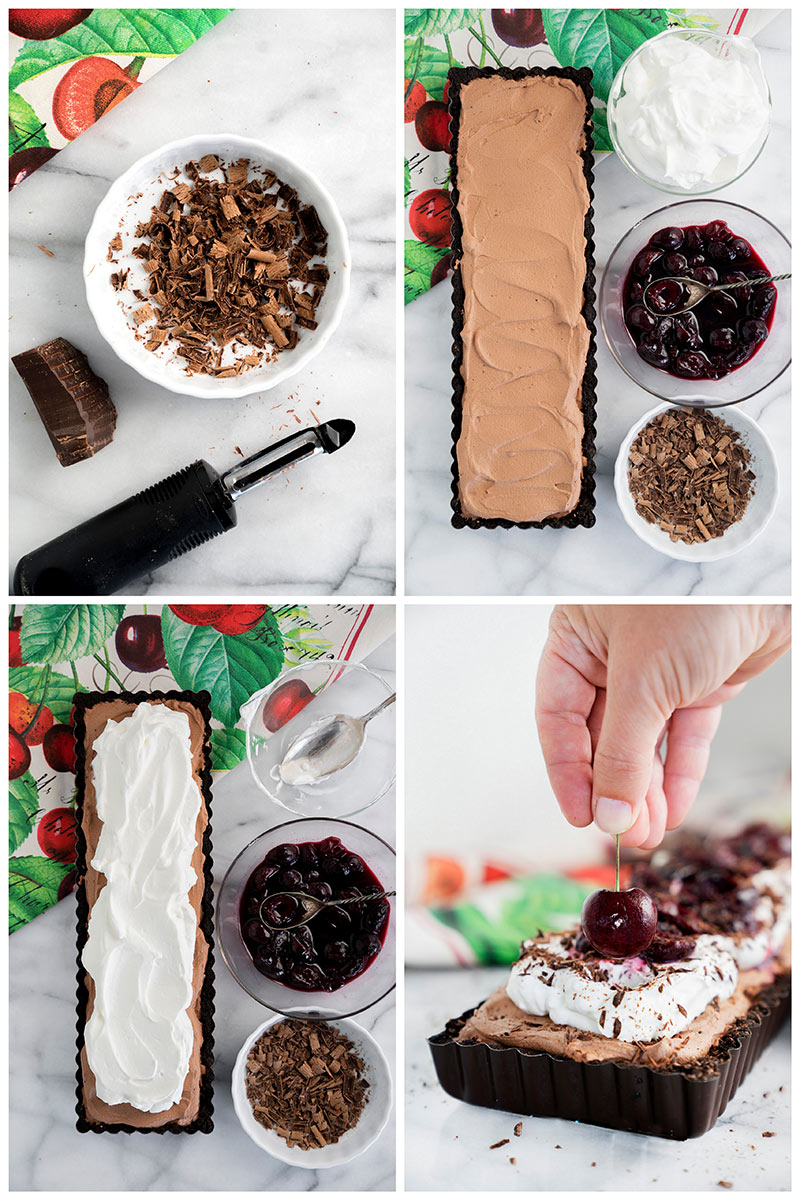
After you fill the tart crust with the whipped ganache filling and let it chill, you can assemble the garnishes. Top the cherry tart with reserved whipped cream and your cooled cherry compote.
Then garnish your masterpiece with elegant chocolate shavings. If you’re using fresh cherries, add more fresh cherries on top too for an even prettier finish.
Storing and Serving Black Forest Chocolate Tart
Chill your tart until just before serving. When you’re ready to serve, carefully remove the tart from the pan and place on a flat serving platter or cutting board. Use a sharp knife to slice the tart into rectangular pieces.
Serve extra cherry compote on the side if you haven’t put it all on top, or you may even want to make a double batch of the compote! It would be great on pancakes or waffles as well.
Refrigerate any leftover tart in an airtight container or sealed with plastic wrap.
More Popular Chocolate Desserts
If you can’t get enough dark chocolate, you’ll love these other recipes designed for chocoholics:
- Chocolate Cake with an Oreo Cheesecake Filling is another stunningly layered dessert with fluffy no-bake Oreo cheesecake sandwiched between moist chocolate cake.
- Black Forest Cheesecake Cake is a more traditional chocolate and cherry layer cake, complete with tangy cream cheese frosting.
- Pressure Cooker Triple Chocolate Layered Cheesecake from Pressure Cooking Today is for every kind of chocolate lover, from white to dark.
- Dark Chocolate Cupcakes with Raspberry Frosting from Two Peas and their Pod features another beloved dessert pairing: chocolate and raspberries
WANT TO SAVE THIS RECIPE?
Enter your email below and we will send it straight to your inbox. Plus you will get great new recipes from us every week!

Black Forest Tart
Equipment
Ingredients
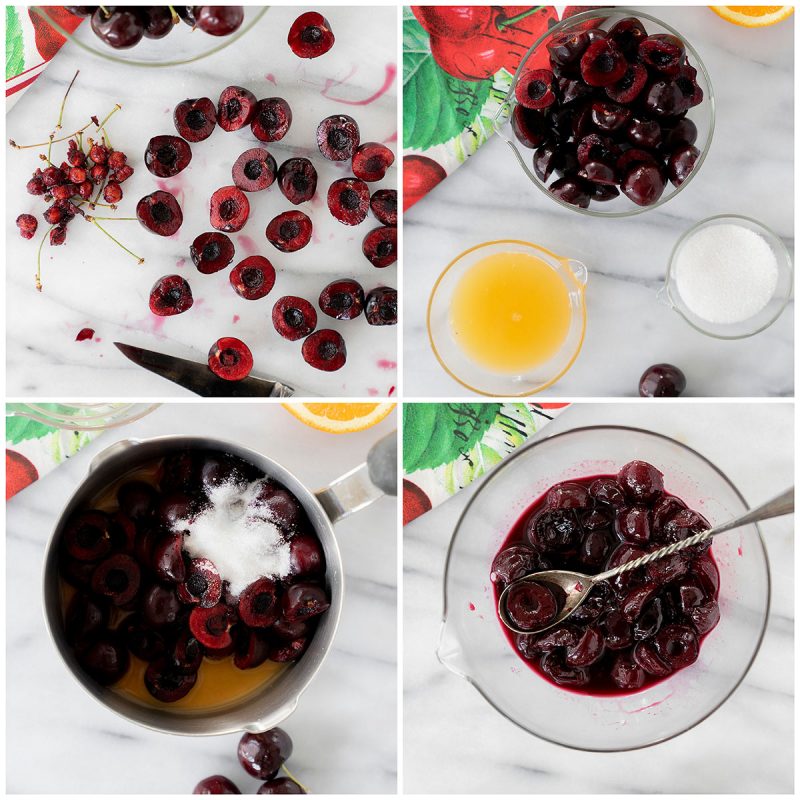
Cherry Compote
- 1 ½ cups cherries pitted and sliced in half (can substitute frozen cherries)
- 2 tablespoons sugar
- ¼ cup orange juice
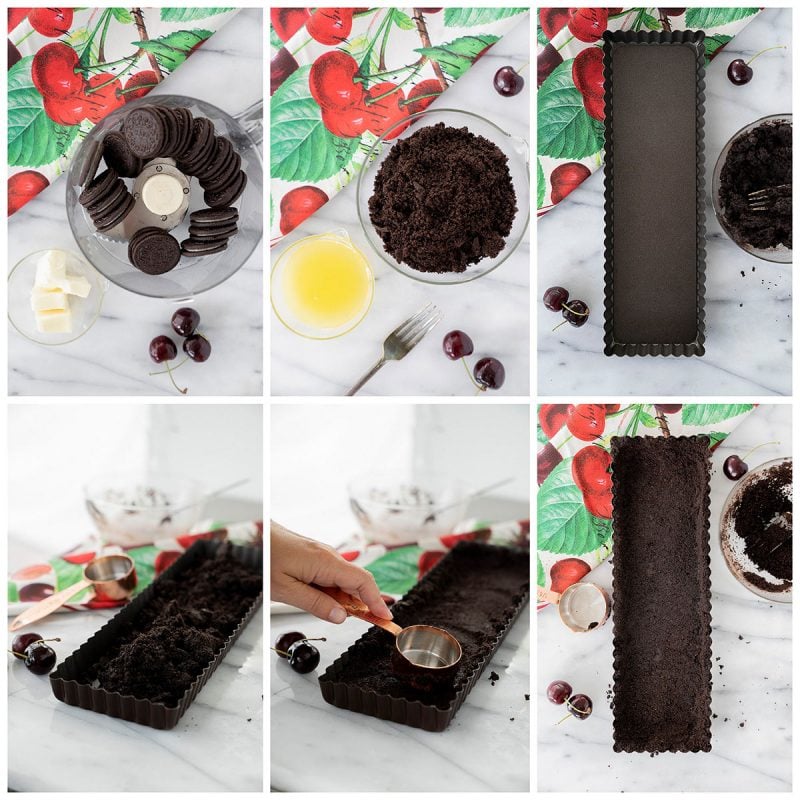
Cookie Crust
- 25 Oreo Cookies no need to remove creme filling
- 4 tablespoons salted butter melted.
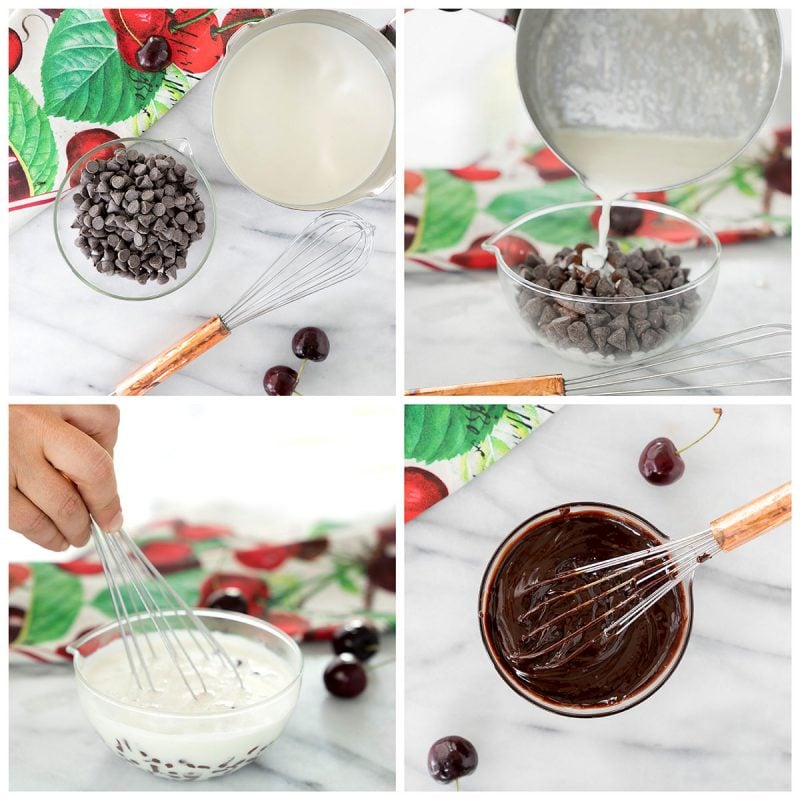
Chocolate Ganache
- 1 ¼ cup semi-sweet chocolate chips
- ⅔ cup heavy cream
Whipped Cream
- 1 ⅓ cups heavy whipping cream
- 1 tablespoon sugar
Garnish
- 12 fresh cherries for top and bottom of tart optional
- Chocolate bar for chocolate shavings
Instructions
- Cherry Compote
- Put all ingredients in a small saucepan and bring to a simmer. (If you’re using frozen cherries, there’s no need to thaw the cherries before adding to the pan.)
- Simmer for about 20 minutes, until juices are thick and syrupy, and coat the back of a spoon. Stir the mixture regularly to avoid burning
- Cool completely before using it.
- Cookie Crust
- In a food processor, pulse the Oreos into a very fine crumb. (You can also crush the Oreos in a Ziploc bag with a rolling pin.)
- Use a fork to mix the cookie crumbs and the melted butter until the mixture is evenly mixed and resembles wet sand.
- Press mixture into a 14 x 4.25-inch rectangular tart pan. Use a tamper tool, the flat bottom of a ¼ cup measuring cup, or the bottom of a small glass to firmly press into the bottom and sides of the tart pan. The crust should come up the sides of the tart pan.
- Bake in a preheated 350° oven 6 minutes. Let cool completely before adding the filling.
- Chocolate Ganache(Ganache will be divided, ½ cup for spreading on the bottom of the tart. The remainder is mixed with whipped cream for the filling.)
- Place chocolate chips in a small bowl, set aside.
- Bring heavy cream to just about a boil. Pour heavy cream over the chocolate chips. Let sit for 60 seconds.
- Gently whisk the chocolate and heavy cream until the chocolate is melted and smooth.
- Let cool completely at room temperature before using it. Avoid refrigerate the ganache, which can cause the chocolate to seize.
- Spread ½ cup of ganache on the bottom of the tart crust.
- Optional: Place an additional 8 sliced and pitted cherries evenly on the bottom of the tart. (place them face side down to keep the juices contained.)
- Whipped Cream(Whipped cream will be divided, 1 cup for the topping and the remaining for the filling.)
- Pour cold heavy whipping cream into mixing bowl. Add the sugar.
- Using the whisk attachment, mix on medium-high speed until light and fluffy and soft peaks form. Remove 1 cup of whipped topping to a small bowl and refrigerate until decorating tart.
- Whipped Ganache Filling
- Add the remaining chocolate ganache to the remaining whipped cream in a mixing bowl. Mix on low speed until completely combined.
- Pour into the tart shell and spread evenly. Refrigerate for 30 minutes minimum.
- Chocolate Shavings
- Hold a chocolate bar firmly in one hand and using a vegetable peeler peel the edge of the chocolate bar to create shavings.
- Decorating
- Once the tart is chilled spread the remaining whipped cream on top of the whipped ganache filling.
- Gently add the cherry compote on top of the whipped cream.
- Sprinkle with chocolate shavings.
- If using fresh cherries, place fresh stemmed cherries on top of the tart.
- Chill for 20 minutes minimum before serving.
- Store leftovers in an airtight container.

Mona
I made this yesterday for Thanksgiving and it was absolutely delicious. I used frozen cherries and an 11” round fluted tart pan. My kids loved it…so much, in fact, that there is none left. It didn’t even last 24 hours! Needless to say, I will definitely be making this again. Hoping to get my hands on a rectangular pan like yours! Thank you so much for this stellar recipe.
Barbara Schieving
Thanks for the rave review Mona! So nice to hear you loved it and that it worked well in an 11 inch round tart pan.
Sylvie Ficco
Hi
I want to make this but i only got a 12in circle fluted tart pan. Do you think I need to increase the recipe or do think I’ll have enough filling for that size pan?
Barbara Schieving
Hi Sylvie – I haven’t tried it, but I think there will be enough filling for a 12 inch pan with the whipped cream topping. Let me know if you give it a try.
suzan
Can I use an oreo cookie pie shell…will the quantity be too much??
Barbara Schieving
Hi Suzan – I haven’t tried it, but I think it would work well. Let me know. Enjoy!