
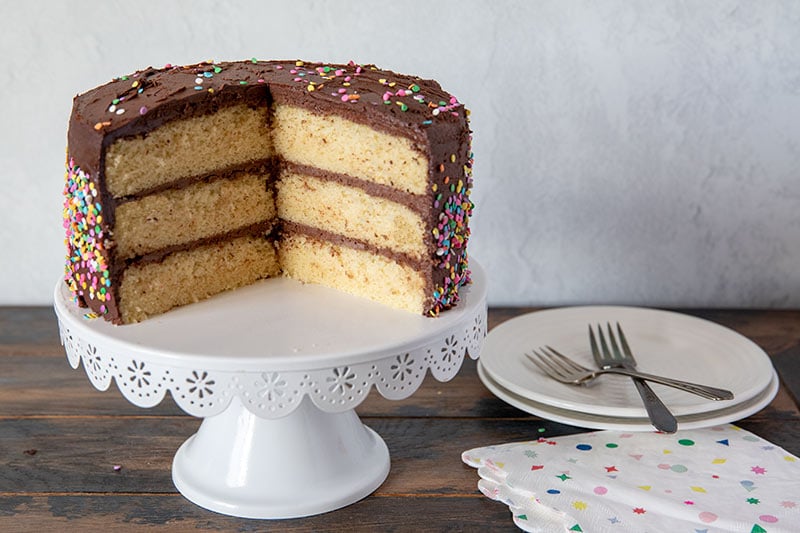
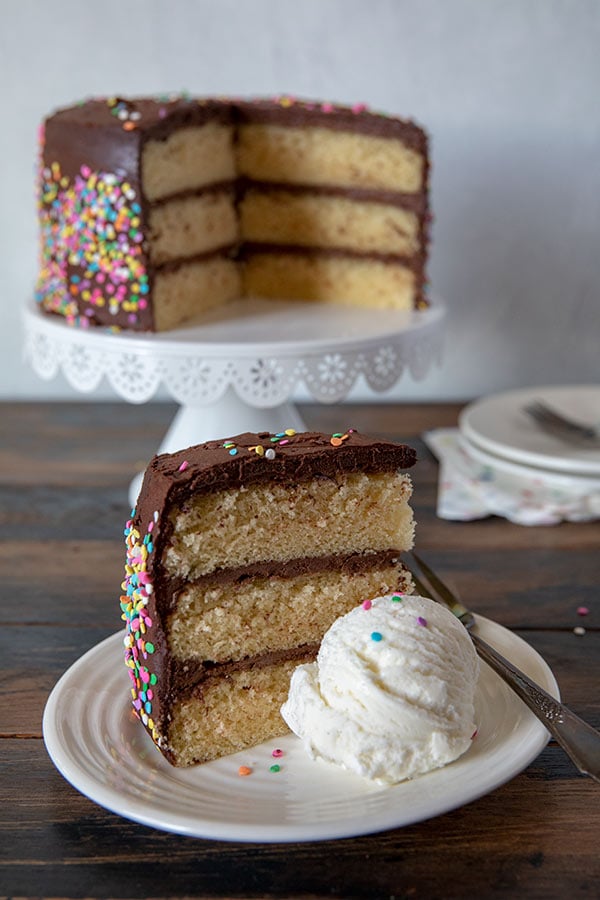
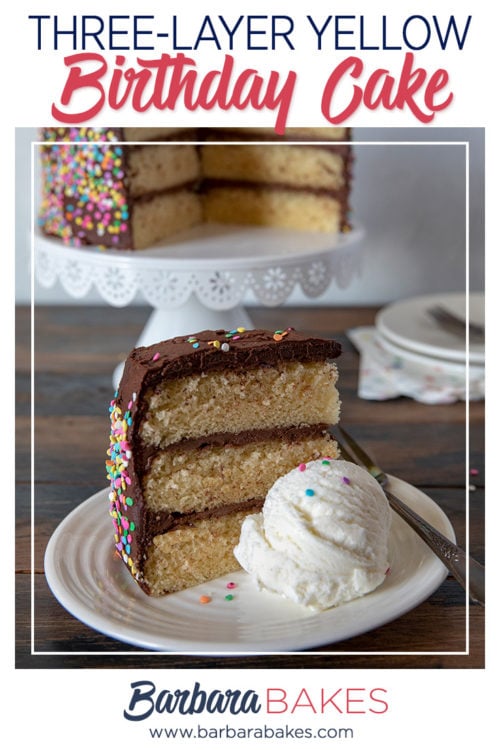
If you’re searching for a recipe for the Best Classic Yellow Birthday Cake With Chocolate Frosting stop right here. This cake is easy to make, moist and tender, and flavorful. Perfect for a celebration—or any night of the week really!
WANT TO SAVE THIS RECIPE?
Enter your email below and we’ll send it straight to your inbox. Plus you’ll get great new recipes from us every week!
King Arthur Flour’s website proclaimed
…great homemade versions of this chocolate-on-vanilla duo are somewhat elusive. But after months of testing, we think we’ve nailed it. This golden-hued, moist, tender vanilla cake with its layers of rich chocolate frosting is so good that we’ve declared it our 2019 Recipe of the Year.
After such a rave review, how could I not give it a try?
I used King Arthur Flour’s high altitude baking guide to adapt the recipe to my altitude, 5,000 feet. At high altitude, you need to bake the cake in a hotter oven, reduce the sugar a little, and increase the flour and liquids a little bit.
Making A Three Layer Yellow Cake
This yellow cake uses vanilla and a little almond extract to flavor the cake. I love using vanilla bean paste, so I substituted that for vanilla extract in the recipe.
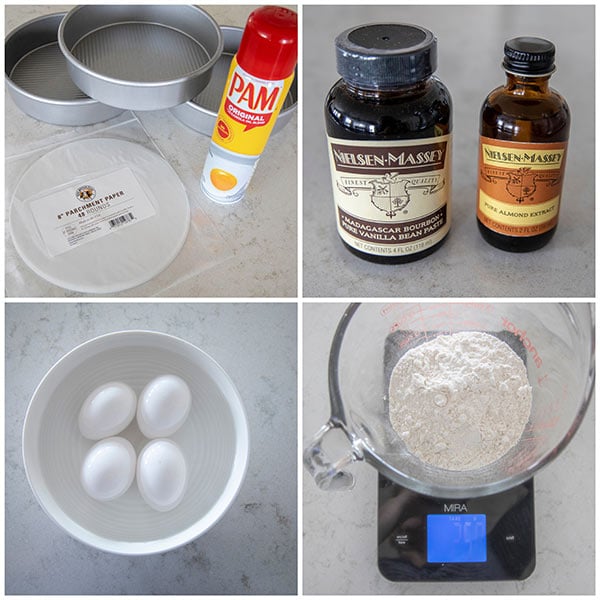
I also love these pre-cut round parchment papers from King Arthur Flour. Lining the cake pan with parchment is optional but when I use parchment paper, my cakes never stick to the bottom of the pan.
Did you know you can quickly bring eggs to room temperature by putting them in a bowl of warm water for 10 minutes? That it’s easier to make a cake when you weight the flour?
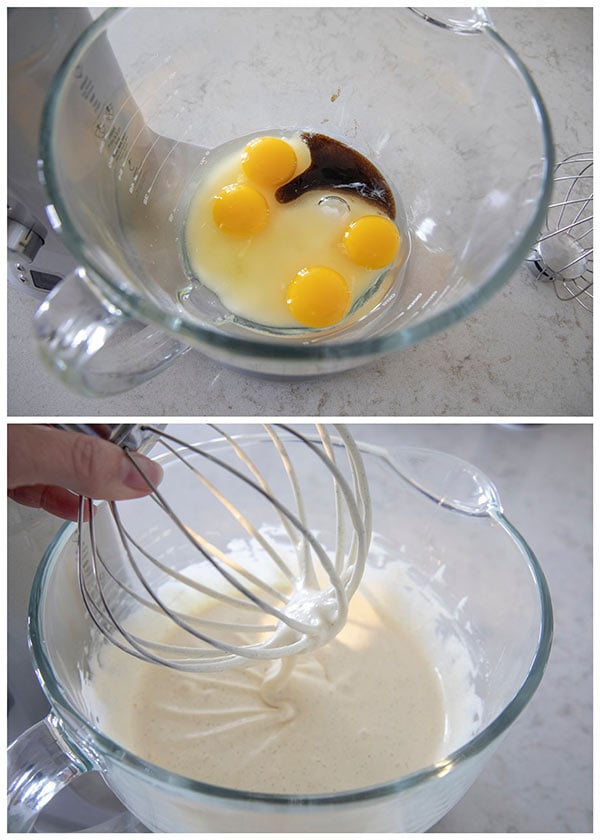
The technique they use in this cake recipe is a little different. First, you whip the eggs and sugar until they’re pale and thick. Then you mix in the dry ingredients, and finally, you mix in warm milk and melted butter.
You can make this cake in two 9-inch cake pans, but I’ve been loving my three 8-inch cake pans. It makes a taller more impressive cake and it isn’t much more work. You just divide the batter between three 8-inch pans instead of two 9-inch pans.
To evenly divide the batter between the pans, I like to use a digital scale. It’s so much easier than measuring the batter and I’m terrible at eyeballing how much batter to use. I’ve included how many grams of batter you’ll need for three 8-inch pans, as well as two 9-inch pans.
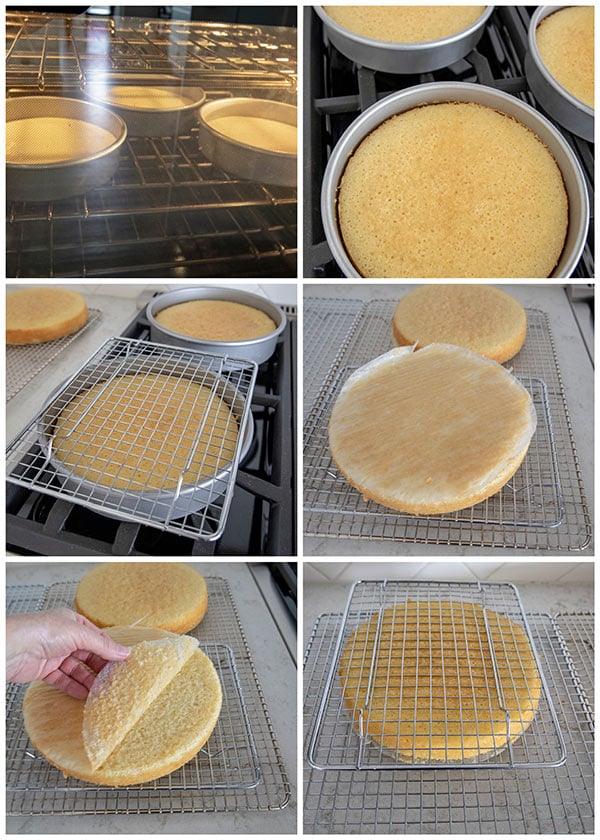
One thing you’ll like about this cake, is the cake layers bake up really flat, so you don’t need to trim the top off the cake. The edges stuck to the sides just a little bit, so be sure and run a knife around the edges before turning the cakes out.
You’ll want to peel off the parchment paper while the cake is upside down. Then place it back on the cake and turn it over. The parchment will keep the cake from sticking to the rack while it’s cooling!
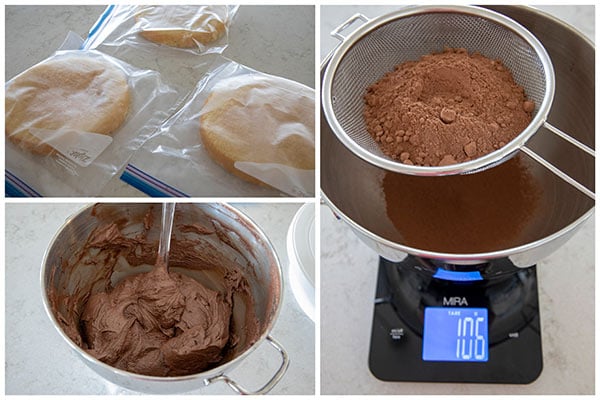
For me, it’s so much easier to make the cake over two days. I’ll bake the cake layers one day and then decorate the cake the next day. I put the 8-inch layers in Ziploc bags and freeze them overnight.
Decorating a Triple Layer Cake
The next day I’ll make the icing. It’s important to sift the cocoa before mixing it to get out all the clumps. You can measure and sift your cocoa at the same time when you’re measuring it with a scale instead of using measuring cups.
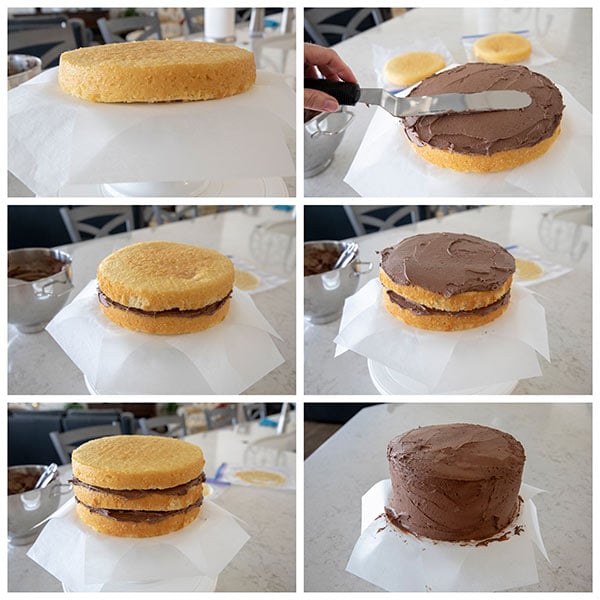
There’s no need to thaw the cakes before frosting. The cake layers are easier to move around while they’re frozen. These layers are fairly sturdy though, so even if you don’t freeze them, they’ll be easy to work with.
An offset spatula makes spreading the frosting easier. You just want a thin layer of icing between the layers. If the layers are slipping around while you’re trying to frosting them, put the cake in the fridge for a short while to set the frosting.
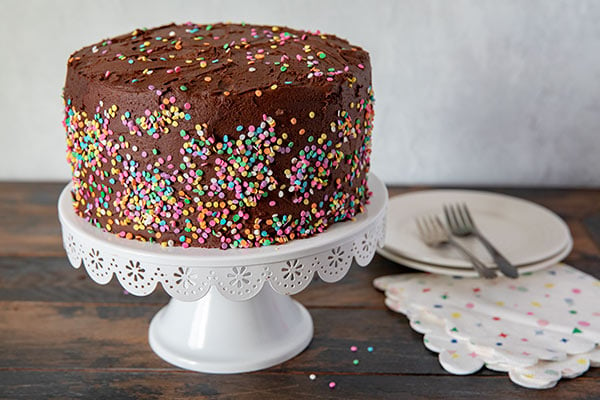
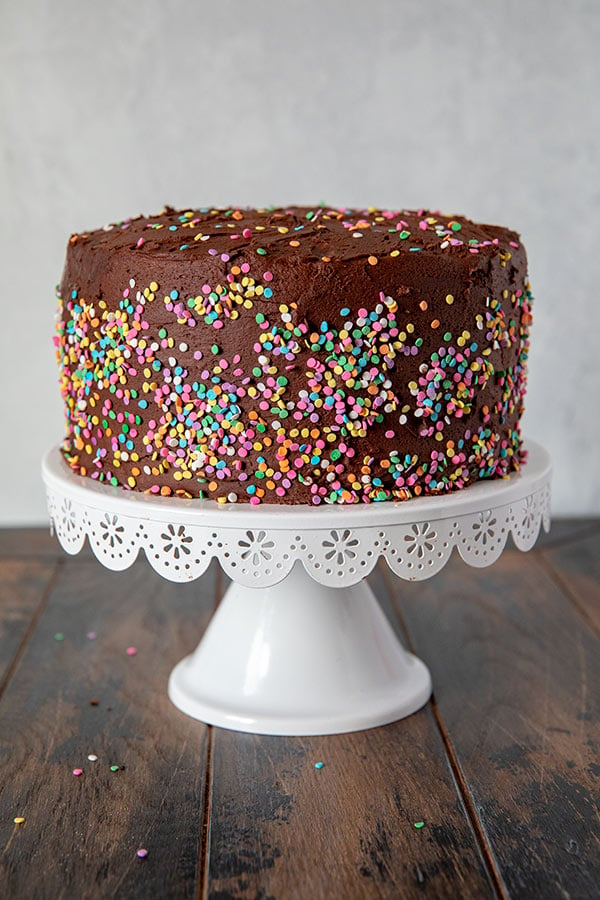
Sprinkles makes a cake more festive, so I decorated my cake with confetti sprinkles. King Arthur also had some fun video tutorials showing different ways to decorate the cake.
Remember you need to add the sprinkles while the frosting is still wet or they won’t stick to the frosting.
If you’re still unsure about baking a layer cake, check out my post baking tips for layer cakes. It has great step by step information and pictures to help you feel confident that you can bake a gorgeous layer cake for someone you love.
This really is a great classic vanilla yellow cake. It was easy to make and the frosting was fudgy and delicious. I know it’s one you’re going to want to try too.
WANT TO SAVE THIS RECIPE?
Enter your email below and we will send it straight to your inbox. Plus you will get great new recipes from us every week!
High Altitude Classic Yellow Birthday Cake With Chocolate Frosting
Equipment
Ingredients
CAKE
- 2 cups plus 2 tablespoons 258 grams Unbleached All-Purpose Flour
- 1 ¼ teaspoons salt
- 1 ½ teaspoons baking powder
- 4 large eggs at room temperature
- 2 cups minus 2 tablespoons 365 grams granulated sugar
- 1 tablespoon vanilla extract
- ⅛ teaspoon almond extract; optional for enhanced flavor
- 1 cup plus 3 tablespoons 273 grams milk (whole milk preferred)
- 4 tablespoons butter ¼ cup, cut into pats
- ⅓ cup vegetable oil
FROSTING
- 1 ¼ cups 106 grams natural cocoa powder (sifted) *
- 1 cup 113 grams + 3 cups (340 grams) confectioners’ sugar (sifted if lumpy)
- ¼ teaspoon salt
- ⅓ cup hot water
- 1 tablespoon vanilla extract
- 16 tablespoons 1 cup butter, softened
Instructions
- To make the cake: Preheat the oven to 350°F with a rack in the center. Spray three 8” x 2” or two 9” x 2” round cake pans with non-stick cooking spray; line the bottom of the pans with parchment rounds and spray the parchment, optional.
- In a small bowl, combine the flour, salt, and baking powder. Set aside.
- In a large mixing bowl, either using an electric hand mixer or a stand mixer with whisk attachment, beat the eggs, sugar, vanilla, and almond extract, if using, until thickened and light gold in color, about 2 minutes at medium-high speed. If your stand mixer doesn’t have a whisk attachment, beat for 5 minutes using the paddle attachment. The batter should fall in thick ribbons from the beaters, whisk, or paddle.
- Add the dry ingredients to the mixture in the bowl and mix — by hand or on low speed of a mixer — just enough to combine. Scrape the bottom and sides of the bowl, then mix again briefly, to fully incorporate any residual flour or sticky bits.
- In a saucepan set over medium heat or in the microwave, bring the milk just to a simmer. Remove the pan from the heat and add the butter and oil, stirring by hand until the butter has melted.
- Slowly mix the hot milk-butter-oil mixture into the batter, stirring on low speed of a mixer until everything is well combined. Scrape the bowl and mix briefly, just until smooth.
- Divide the batter evenly between the pans. You’ll use about 2 ¾ cups (about 580g) for each pan if you’re using two pans and slightly more than 1 ¾ cup (390 grams) for each pan if you’re using three pans.
- Bake the cakes until a toothpick inserted into the center comes out clean and the top feels set, 21 to 26 minutes for two 9” pans, or 18 to 22 minutes for three 8” pans; a digital thermometer inserted into the center of the cakes should read 205°F. Remove the cakes from the oven, carefully loosen the edges, and allow them to cool for 15 minutes in the pans. Then turn them out of the pans and transfer them to a rack, right-side up, to cool to room temperature.
- To make the frosting: In a large mixing bowl or the bowl of your stand mixer, stir together – by hand or mixer – the cocoa powder, 1 cup (113g) of the confectioners’ sugar, and the salt. Stir in the water and vanilla, scraping the bowl if necessary.
- Add the butter and remaining confectioners’ sugar, stirring to combine. Using an electric hand mixer or a stand mixer with paddle attachment, beat the frosting at medium-high speed for 1 to 2 minutes, until lightened in color and fluffy, stopping halfway through to scrape the bottom and sides of the bowl.
- To assemble the cake: Place one of the cake layers on a serving plate; tuck pieces of waxed or parchment paper underneath the edge of the cake to keep the plate clean. Spread the bottom layer with about 1 cup of frosting, enough to make a ¼”-thick layer. Center the second layer bottom-side up (for a flat top) over the frosted layer and press gently to set it in place. Repeat with third layer if using.
- If your schedule permits, place the cake in the refrigerator or freezer, uncovered, for at least 30 minutes (or up to 2 hours) to firm it up. This will make the layers less likely to slide around as you work, and the cake won’t shed crumbs as you frost. If you’re pressed for time, you can skip this step.
- To finish the cake: For the best-looking cake, do the frosting in two steps. First, spread a very thin layer of frosting around the sides and across the top; this is called a crumb coat. You should be able to see the cake through the frosting in spots, it’s that thin. Refrigerate the cake for 20 minutes to let this layer set. Again, skip this step if time is a factor.
- Once the cake is chilled, use the remaining frosting to coat it thoroughly and evenly.
- Store the cake, covered, at room temperature, or in the refrigerator if your kitchen is hot. Let it come to room temperature before serving.
- Storage information: The cake will keep at room temperature, covered with a cake cover, for up to three days; in the refrigerator, covered, for up to one week, or in the freezer, well wrapped, for up to one month.
Notes
Nutrition
More cake recipes you might like:
Chocolate Dulce De Leche Triple Layer Cake, Barbara Bakes
Easy German Chocolate Cake, Barbara Bakes
Triple Chocolate Layer Cake, Barbara Bakes
Berry Mascarpone Layer Cake, Life, Love and Sugar
Classic Hummingbird Cake with Coconut, That Skinny Chick Can Bake
Pin It:

Christie Artis
Should this say “4 tablespoons (¼ cup) butter”?
Melissa Griffiths
Yes
Danielle
Has any used this recipe for cupcakes? I live at about 5300 feet. Any adaptations other than baking time? Tia!
Barbara Schieving
Hi Danielle – I haven’t tried cupcakes, but I would bake the cupcakes at 325° for about 22 minutes. Let me know how it goes.
Danielle
I used them for my daughter’s high school graduation party, I did 350 for about 20 minutes, I think. They were absolutely perfect. My only mistake was I under-filled them because I was worried about high how they would rise. Next time I would aim for 24-30 cupcakes rather than 36 and fill them around 3/4 or slightly higher. They had great structure, which is usually my biggest issue with cupcakes at my elevation. Thank you again for this recipe, it’s amazing.
Barbara Schieving
Thanks for the detailed update. I’m so glad the recipe worked well for cupcakes too.
Angelena
Thank you so much for this tasty, light and perfect high altitude cake recipe!
I turned it into a marble cupcakes by taking 1 cup of batter and adding 1/4 cup dark cocoa powder, 1 T oil , 1 T sugar and used a small scoop of the chocolate on top of the medium scoop of batter in cup cake liner. Swirl with knife.
Barbara Schieving
Thanks for sharing Angelena – that sounds like a fabulous way to change up the recipe.
Jerleen Sinkes
Hi I was wondering if I could use cake flour instead of all purpose flour?
Barbara Schieving
Hi Jerleen – I haven’t tried it, but it should work out well.
Chelsea
So excited to try this! My husband’s birthday is coming up and I’d like to use this recipe, but he’s lactose intolerant. I’ve got a good vegan butter for baking, but do you have any recommendations for a milk swap? Would oat milk be thick enough, or maybe coconut milk might be better, but I’m worried the flavor might be off? Thank you!
Barbara Schieving
Hi Chelsea – I haven’t tried it with vegan butter or a different milk, but I think almond milk would work well.
Anne
Oops! Should have directions as well as ingredients! I see now why confectioners listed that way.
Danielle
Do you think this recipe would work in a 9×13 pan? I’m at around 5300 feet. Thanks!
Barbara Schieving
Hi Danielle – yes, the original recipe recommends: To make a 9″ x 13″ sheet cake: Prepare the batter as directed. Pour it into a lightly greased 9″ x 13″ pan, and bake in a preheated 325°F oven for about 45 to 48 minutes, until the cake tests done. You’ll have excess frosting if you make the entire frosting recipe; if you don’t want to end up with leftover frosting, consider making a half recipe (which will frost the cake minimally), or a three-quarter recipe (which will frost it more generously). At your altitude, you may want to bake it at 350° for a shorter time.
Danielle
Thanks so much! I ended up making 2 layers after all, but this recipe is perfect. The only change I made was to reduce the sugar a little and use substitute 1/2 the flour with King Arthur white whole wheat. I topped mine with whip cream and strawberries per the birthday girl’s request, but this will be my go to yellow cake base from now on. So nice to have a high altitude option that works!
Barbara Schieving
Thanks for the update Danielle – glad it was a hit! Sounds like a great way to serve it.
Linda Priester
My altitude is 7,500 feet. Will this recipe work and if you have a recipe for a Pound Cake using a bundt pan?
Barbara Schieving
Hi Linda – the recipe should work but will need additional adjustments. Use this chart to further adapt the recipe https://www.kingarthurbaking.com/learn/resources/high-altitude-baking This is what I try at your elevation – add 2 tablespoons additional flour, and another tablespoon milk, and only 3/4 teaspoon baking powder.
These are my favorite pound cakes https://www.barbarabakes.com/cream-cheese-bundt-pound-cakes/ and https://www.barbarabakes.com/key-lime-pound-cake/ Enjoy!
Cynthia
I made this cake last week, following the recipe exactly, and it turned out GREAT! I moved to a high altitude city (about 7,000 feet) a year ago, and have been leery of trying any baking. I did make some baguettes recently, adjusting the recipe for the altitude, and they were fine, so . . .CAAAAAKE! Seriously, for anyone at, say, 3,000 feet and above, these directions are spot on. My only regret is that I had only two 8-inch pans, so I had to use the 9-inch ones, and had only two layers. Can’t wait to try some of your other recipes.
Megan
Hi! Can I substitute coconut oil for the vegetable oil? Wanting to make this cake tonight and hoping it doesn’t come out too dry and dense. I live in Denver and this has been a struggle for me with cakes. Also, I’ve heard that wrapping the cake rounds in bake strips helps the cake cook more evenly. Would you recommend?
Barbara Schieving
Hi Megan – yes, using coconut oil should work. I didn’t think they were necessary with this cake, but you can use the bake strips. Let me know how it goes.
kendall
can i just use one pan instead of two?
Barbara Schieving
Hi Kendall – yes, to make a 9″ x 13″cake just prepare the batter as directed. Pour it into a lightly greased 9″ x 13″ pan, and bake in a preheated 325°F oven for about 45 to 48 minutes, until the cake tests done.
Bill Eimers
The cake worked beautifully at 5600 feet! I’ve been looking for THE yellow high-altitude recipe, this is it. The frosting, although delicious, was pretty stiff and grainy. I had a hard time spreading the frosting, so a scratch coat wasn’t possible. Any suggestions? I was very careful to follow the directions and ingredients. BTW the butter was at 65 degrees.
Barbara Schieving
Hi Bill – glad the cake was perfect for you. It sounds like the frosting needed less powdered sugar or a little more hot water to soften it up. I recently posted a Nutella Buttercream recipe that would be great on this cake and it’s so easy. https://www.barbarabakes.com/easy-nutella-frosting-recipe/
Tracey
Wondering whether this would work as a sheet cake?
Barbara Schieving
Hi Tracey – yes, prepare the batter as directed. Pour it into a lightly greased 9″ x 13″ pan, and bake in a preheated 325°F oven for about 45 to 48 minutes, until the cake tests done.
Adrienne
What elevation did you adjust this for? I live at 5300 feet and have been diligently looking for a recipe that is already adjusted since my efforts adjusting recipes haven’t resulted in light cakes. They’ve been dense and more like pound cake. Just wondering if this is close enough I could try it as is. I was fawning over the recipe when King Arthur posted it!
Barbara Schieving
Hi Adrienne – I live at 5,000 feet so you shouldn’t have to make any additional changes. Enjoy!
Anne
Frosting says 1cup+3cups confectioner sugar?? Why not just 4cups?
Kathi
1 1/4 cup of cocoa powder was way overpowering and I had to adjust it and use more powdered sugar and milk to make it taste normal. I think there may be a typo on the recipe. I really didn’t like the cake part either, sorry. I don’t think I will make this again.
Barbara Schieving
Hi Kathi – what type of cocoa powder did you use? If you used Dutch-process cocoa, that’s a lot more bittersweet. The cake gets rave reviews on the King Arthur site as well https://www.kingarthurflour.com/recipes/classic-birthday-cake-recipe#reviews My favorite cocoa is the triple cocoa blend. https://www.kingarthurflour.com/shop/items/triple-cocoa-blend-16-oz
Rita S
Hello,
I live in Chicago, it a high altitude area. Will I need to adjust the reco?
Thanks
Rita S
Rita S
Sorry, above was an auto correct error. . I live in Chicago, a non high altitude area. Will I need to adjust the recipe?
Barbara Schieving
Hi Rita – if you’re not at altitude, then I would use the original recipe https://www.kingarthurflour.com/recipes/classic-birthday-cake-recipe Enjoy!
Carol
That is one beautiful looking cake, Barbara. I have no doubt it was VERY tasty. Nothing better than a vanilla-chocolate classic…and EVERYTHING is better with sprinkles. What a perfect way to celebrate a birthday…or an “un-birthday”…there’s 364 of those!!! 🙂
Barbara Schieving
I like the way you think. Thanks Carol!