
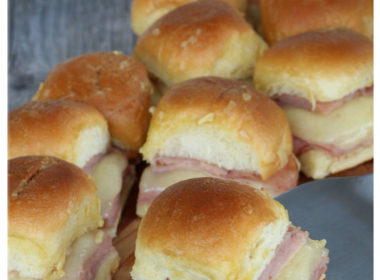
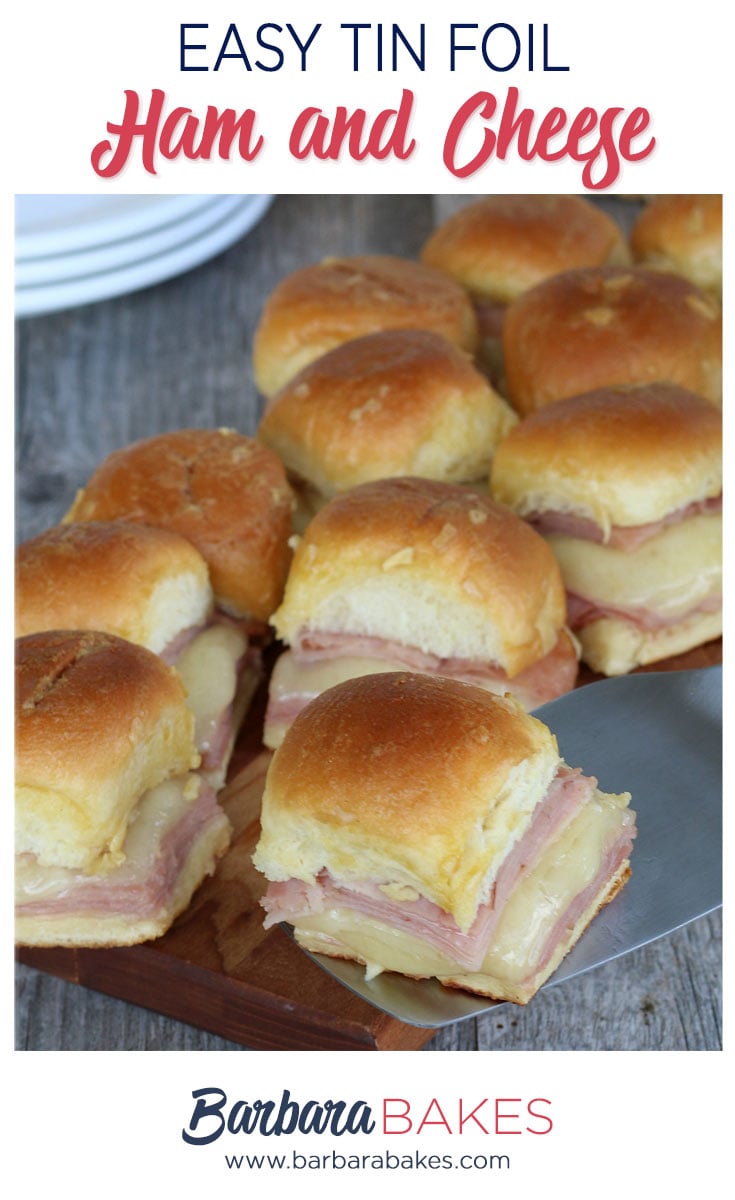
Baked ham and cheese sandwiches wrapped in tin foil are a deliciously melty twist on the classic sandwich. Quick and easy-to-make, these tin foil packets are perfect for lunch or dinner while camping, afterschool snacks, or backyard picnics!

WANT TO SAVE THIS RECIPE?
Enter your email below and we’ll send it straight to your inbox. Plus you’ll get great new recipes from us every week!
Enjoying simple sandwiches is one of life’s little pleasures. Sometimes the most memorable meals aren’t the fancy ones – they’re the simple, heartwarming dishes that bring everyone together. These baked ham and cheese sandwiches are exactly that kind of meal.
Baked ham and cheese sandwiches in foil are perfect in so many ways. Not perfect as in gourmet cuisine, but perfect in how they create opportunities for family bonding. Perfect because they require minimal kitchen time but deliver maximum satisfaction. Perfect because they’re the kind of comfort food that creates lasting memories.
Jump to:

Why You’ll Love This Baked Ham And Cheese Sandwiches
- Kid-Friendly Creation: Getting children involved in the kitchen is a breeze with these sandwiches. They can help arrange ham and cheese, wrap the foil packets, and feel proud of helping make dinner.
- Perfect for Make-Ahead: These sandwiches can be assembled hours before cooking. All you have to do is prepare the packets, store them in the refrigerator, and add the butter mixture right before heating when you’re ready to eat.
- Quick Prep: Easy to assemble in just minutes, perfect for busy days. These sandwiches require minimal ingredients and no complicated techniques, making them ideal for beginner cooks.
- Crowd-Pleaser: A hit at parties, gatherings, or casual dinners. Everyone loves the combination of warm, gooey cheese and savory ham in soft rolls. Serve them as a main dish or a hearty appetizer that disappears fast.
🥪My family goes crazy every time I whip up a chicken piccata sandwich for dinner—if you haven’t tried it yet, you’re seriously missing out!
Recipe Ingredients
- Ham slices
- Hawaiian rolls
- Cheese – Swiss or provolone are the best
- Butter
- Dijon mustard– You can also use honey mustard
- Onion– dried
- Sugar– brown
See the recipe card below for full information on ingredients and quantities.

How to Make Baked Ham and Cheese Sliders
- Prepare 6 sheets of foil 12 inches long.
- Build your sandwiches by dividing the ham between the rolls with 1 slice of cheese on each.
- Place 2 sandwiches onto each piece of foil.
- Whisk together the butter, mustard, onion and brown sugar. Pour evenly over the sandwiches.
- Fold the sides of each packet up and seal closed.
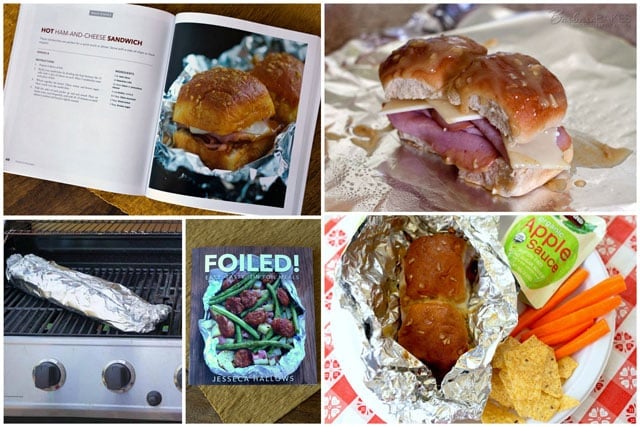
- Place on warm coals, turn frequent, and cook 10-15 minutes or until cheese is melted and bread is lightly toasted. (Cook on the grill on low heat or in the oven at 350°F for 15 – 20 minutes.)
Recipe FAQs
Yes! While you can keep them warm in a crockpot set to low, it’s best to leave them wrapped in their foil packets to prevent them from getting soggy.
Absolutely! You can add ingredients like mustard, mayonnaise, pickles, or even substitute the ham with turkey or roast beef to create a variety of flavors. Adjust the fillings to match your preferences or dietary needs.
While the recipe suggests using your preferred cheese, options like Swiss, cheddar, or provolone melt well and complement the ham nicely. Feel free to experiment with different cheeses to suit your taste.
When using a convection oven, bake the sandwiches at 350°F for 15-20 minutes. Keep an eye on them during cooking, as convection ovens can sometimes cook more quickly than conventional ovens.
Expert Tips
- Use Quality Ingredients: Opt for freshly baked rolls, premium deli ham, and flavorful cheese like Swiss or sharp cheddar to enhance the overall taste.
- Preheat the Oven: Ensure the oven or grill is preheated to the recommended temperature to cook the sandwiches evenly and avoid soggy bread.
- Butter the Rolls: Spread a thin layer of softened butter on the inside of the rolls before adding the fillings. This prevents the bread from getting too soggy and adds richness.
- Don’t Overstuff: Avoid overloading the sandwiches with fillings to ensure they cook evenly and stay compact for easy handling.
- Wrap Tightly: When wrapping the sandwiches in foil, make sure to seal the edges well to trap heat and moisture for perfectly melted cheese and warm fillings.
Should I Bake or Grill It?
This sandwich is super versatile. You can bake it, grill it, or cook it over coals. Sometimes it’s a beautiful night out and you want to use the grill. Other nights, it’s chilly and we want to stay inside and eat something toasted and delicious, so they’re perfect toasted in the oven.
What Sides Go With Baked Ham And Cheese Sandwiches In Foil?
Looking for the perfect sides to pair with baked ham and cheese sliders? Here are some delicious ideas to round out your meal.
- Garlic parmesan air fryer french fries are a crispy, flavorful addition to your sliders, offering a satisfying crunch with every bite.
- For a refreshing and healthy option, try the broccoli slaw salad, which adds a bright, crunchy contrast to the savory sliders and balances the meal with fresh veggies.
- If you’re craving a crowd-pleaser, how to make perfect pasta salad will guide you to create a zesty, colorful side dish that pairs beautifully with sliders for any gathering or casual dinner.
More Sandwich Recipes to Consider


Did you try this recipe? Leave a ⭐️ rating below and share it on Instagram.
WANT TO SAVE THIS RECIPE?
Enter your email below and we will send it straight to your inbox. Plus you will get great new recipes from us every week!

Baked Ham And Cheese Sandwiches
Ingredients
- 1 lb. ham slices
- 12 Hawaiian rolls
- 12 slices Swiss or provolone cheese
- ½ cup butter melted
- 1 ½ tablespoons Dijon mustard I used honey mustard
- 1 tablespoon dried onion
- 1 tablespoon brown sugar
Instructions
- Prepare 6 sheets of foil 12 inches long.
- Build your sandwiches by dividing the ham between the rolls with 1 slice of cheese on each.
- Place 2 sandwiches onto each piece of foil.
- Whisk together the butter, mustard, onion and brown sugar. Pour evenly over the sandwiches.
- Fold the sides of each packet up and seal closed.
- Place on warm coals, turn frequent, and cook 10-15 minutes or until cheese is melted and bread is lightly toasted. (Cook on the grill on low heat or in the oven at 350°F for 15 – 20 moinutes.)
Notes
- Store in foil in the refrigerator for up to 2 days; reheat at 350°F for 5-7 minutes.
- Hawaiian rolls are ideal, but any soft dinner rolls will work.
- Customize Fillings: Add mustard, mayonnaise, pickles, or veggies like spinach for extra flavor and variety.
- Heavy-duty foil recommended, especially for grilling or campfire cooking.

Deb
If I want to keep the sandwiches warm AFTER they come out of the oven, would a crockpot work (keeping them in the foil)? Don’t want them to get soggy!
ELIZABETH
LOOKING FOR THE ANSWER TOO – DID YOU END UP PUTTING THEM IN A CROCKPOT? AND, DID THEY GET SOGGY?
RTC
Can these sliders be made the night before and refrigerated?
Barbara Schieving
I haven’t tried it, but it should work well to put the sandwiches together and put them in a Ziploc lock bag. Then continue with step 3, put them in the tinfoil, and top them with the butter mixture right before cooking.
Joe
would it be OK to use havarti cheese with ham or turkey?
Barbara Schieving
Hi Joe – I think that would be a great substitution. Enjoy!
Mimi
If using a convection oven how long would you leave the funeral sandwiches in & at what temperature?
Barbara Schieving
Hi Mimi – bake them at 350°F for 15 to 20 minutes. Enjoy!
Sigrid Trombley
Oh, these cute little sandwiches remind me of some my mom used to make. I think the only difference is that she used rolls with poppy seeds on the top.
Norene
Wow! I couldn’t believe it when I saw this ham sandwich recipe. I have been making a version of this sandwich for more than 40 years! I got the recipe from a school cafeteria worker who would make them for staff lunches. I use a small soft type of roll too but my spread is made with butter, mustard and poppy seeds. I use ham and Swiss and wrap them individually in foil and bake at 375 degrees for about 10 minutes. They are always a big hit. My husband has taken them on camping trips and warmed them over the campfire.
Barbara Schieving
How fun! That sounds like a delicious way to change them up. Thanks for sharing Norene!
Martha Greeger
Could this be done in the oven or broiled? If so how long?
Barbara Schieving
Hi Martha – it can be done in the oven. I’d probably do it in a 9×13 pan and cook it at 400° for about 10 minutes until the cheese is melted and the rolls toasted. Just keep a close eye on it and cover with foil if the top is getting too browned before the cheese is melted.
Lorraine @Not Quite Nigella
They look seriously yummy mum! I have all the ingredients for these in the fridge too! 😀 I love seeing pics of the family too xxx
Nagi@RecipeTinEats
Such a cute little boy 🙂 You have a handsome grandson! Oh aren’t these tin foil ham and cheese sandwiches the best? They look so delicious!
Rocky Mountain Woman
ahh…what a cute little grandson you have! Aren’t they just the best? I will make these cute sandwiches for my little guy next time we go camping!
Carol
Robin is gonna LOVE these-perfect for camping and both boys love ham and cheese sandwiches. LOVE the photos of your husband and grandson…the little guy is growing up SO fast. How great is it that he enjoys being in the kitchen? My grandsons do too-especially the younger one.